Testing MySQL/MariaDB/Percona versions with Docker

Giuseppe Maxia has provided some great MySQL docker images. Percona and MariaDB also provide version via Docker Hub. In an attempt to have a consistent means of launching these different images I created the following convenience functions.

  1. Install docker for your OS. See Official Docker installation instructions.
  2. Get dockerhelper.sh
  3. Run your desired variant and version.

$ wget https://raw.githubusercontent.com/ronaldbradford/mysql-docker-minimal/master/dockerhelper.sh
$ . ./dockerhelper.sh
Docker Registered functions are:  docker_mysql, docker_percona, docker_mariadb

$ docker_mysql
ERROR: Specify a MySQL version to launch. Valid versions are 5.0 5.1 5.5 5.6 5.7 8.0
$ docker_percona
ERROR: Specify a Percona version to launch. Valid versions are 5.5 5.6 5.7
$ docker_mariadb
ERROR: Specify a MariaDB version to launch. Valid versions are 5.5 10.0 10.1

Getting a clearer picture of http response time breakdown via CLI

I came across this handy python script https://github.com/reorx/httpstat that provides a http response breakdown in text. This saves you having to open up a browser and look at a visual network response waterfall.

For example, using my website homepage and blog for comparision.

$ python httpstat.py http://ronaldbradford.com

HTTP/1.1 200 OK
Date: Fri, 23 Sep 2016 16:52:09 GMT
Server: Apache/2.4.7 (Ubuntu)
X-Powered-By: PHP/5.5.9-1ubuntu4.17
Vary: Accept-Encoding,User-Agent
Cache-Control: max-age=1
Expires: Fri, 23 Sep 2016 16:52:10 GMT
Transfer-Encoding: chunked
Content-Type: text/html

Body stored in: /var/folders/mk/0v6thtzd7mb9sb9r4fhv4bcc0000gn/T/tmpK_foIX

  DNS Lookup   TCP Connection   Server Processing   Content Transfer
[    72ms    |      27ms      |       35ms        |       39ms       ]
             |                |                   |                  |
    namelookup:72ms           |                   |                  |
                        connect:99ms              |                  |
                                      starttransfer:134ms            |
                                                                 total:173ms
$ python httpstat.py http://ronaldbradford.com/blog/

HTTP/1.1 200 OK
Date: Fri, 23 Sep 2016 16:52:39 GMT
Server: Apache/2.4.7 (Ubuntu)
X-Powered-By: PHP/5.5.9-1ubuntu4.17
X-Pingback: http://ronaldbradford.com/blog/xmlrpc.php
Vary: Accept-Encoding,User-Agent
Cache-Control: max-age=1
Expires: Fri, 23 Sep 2016 16:52:40 GMT
Transfer-Encoding: chunked
Content-Type: text/html; charset=UTF-8

Body stored in: /var/folders/mk/0v6thtzd7mb9sb9r4fhv4bcc0000gn/T/tmpn5R1f2

  DNS Lookup   TCP Connection   Server Processing   Content Transfer
[     5ms    |      34ms      |       129ms       |       790ms      ]
             |                |                   |                  |
    namelookup:5ms            |                   |                  |
                        connect:39ms              |                  |
                                      starttransfer:168ms            |
                                                                 total:958ms

Note that 301 redirects are not handled so be sure you are getting the full content you expect in a request.

$ python httpstat.py http://ronaldbradford.com/blog

HTTP/1.1 301 Moved Permanently
Date: Fri, 23 Sep 2016 16:52:22 GMT
Server: Apache/2.4.7 (Ubuntu)
Location: http://ronaldbradford.com/blog/
Cache-Control: max-age=1
Expires: Fri, 23 Sep 2016 16:52:23 GMT
Content-Length: 322
Content-Type: text/html; charset=iso-8859-1

Body stored in: /var/folders/mk/0v6thtzd7mb9sb9r4fhv4bcc0000gn/T/tmptLSJTv

  DNS Lookup   TCP Connection   Server Processing   Content Transfer
[     5ms    |      61ms      |       39ms        |        0ms       ]
             |                |                   |                  |
    namelookup:5ms            |                   |                  |
                        connect:66ms              |                  |
                                      starttransfer:105ms            |
                                                                 total:105ms

OTN appreciation day: The Performance Schema of MySQL 5.6+

To focus on just one point for OTN appreciation day on October 11 2016 and to the benefit of all users of MySQL is to consider the extremely convenient and rich value of information available in the MySQL Performance Schema to understand what SQL queries are running in a MySQL instance now. The MySQL Performance Schema in MySQL 5.6 is enabled by default, (performance_schema=on).

The following one off SQL statement will enable the instrumentation of SQL statements in the most detailed level of assessment.

The following query will show you the longest running queries in your database at this present time.

This ease of accessing what is running in a MySQL instance replaces many different and creative techniques as I describe in Improving MySQL Performance with Better Indexes in versions of MySQL before version 5.6.

If your organization does not have dedicated performance experts reviewing new functionality consistently and monitoring your production systems regularly for database optimization, the cost of having the MySQL performance schema available and with a large number of different forms of instrumentation out ways any reason not to.

One of the best presentations at Percona Live Amsterdam last week in the last time slot of the event (before beer and food) was Performance schema and sys schema by Mark Leith. I hope to provide a review of this presentation soon and my interest to explore the new MySQL 5.7 and 8.0 performance schema instruments. A few of my live tweets included:

MySQL 5.7 & 8.0 Performance Schema


Why I wrote this appreciation?

On Friday I was asked to review the MySQL performance and load of a newly developed product during simulated tested. When I was first given access to the MySQL database server I was very disappointed that for a new and unreleased product the MySQL version chosen was 5.5. This is in no way disrespectful for the great stability, functionality and features of MySQL 5.5, however for any new system under development MySQL 5.6 and MySQL 5.7 are both much more appropriate options for many reasons. If for no other reason to look at upgrading to at least MySQL 5.6 to enable you to become a better expert with this functionality is one key consideration.


OTN Appreciation Day

This post format was suggested by Tim Hall, a well known community champion among Oracle users, who maintains a rich web site of news and free technical info. According to his suggestion, this post wants to add to the OTN appreciation day, a distributed community effort to show something useful, or pleasant, or both related to the Oracle world.

For those not used to the Oracle Technology Network (OTN), it is the center of Oracle technology, the place where users can get all software (proprietary or open source) and other resources related to Oracle products. In the image below you may find several familiar names.

MySQL Group Replication OOW Tutorial

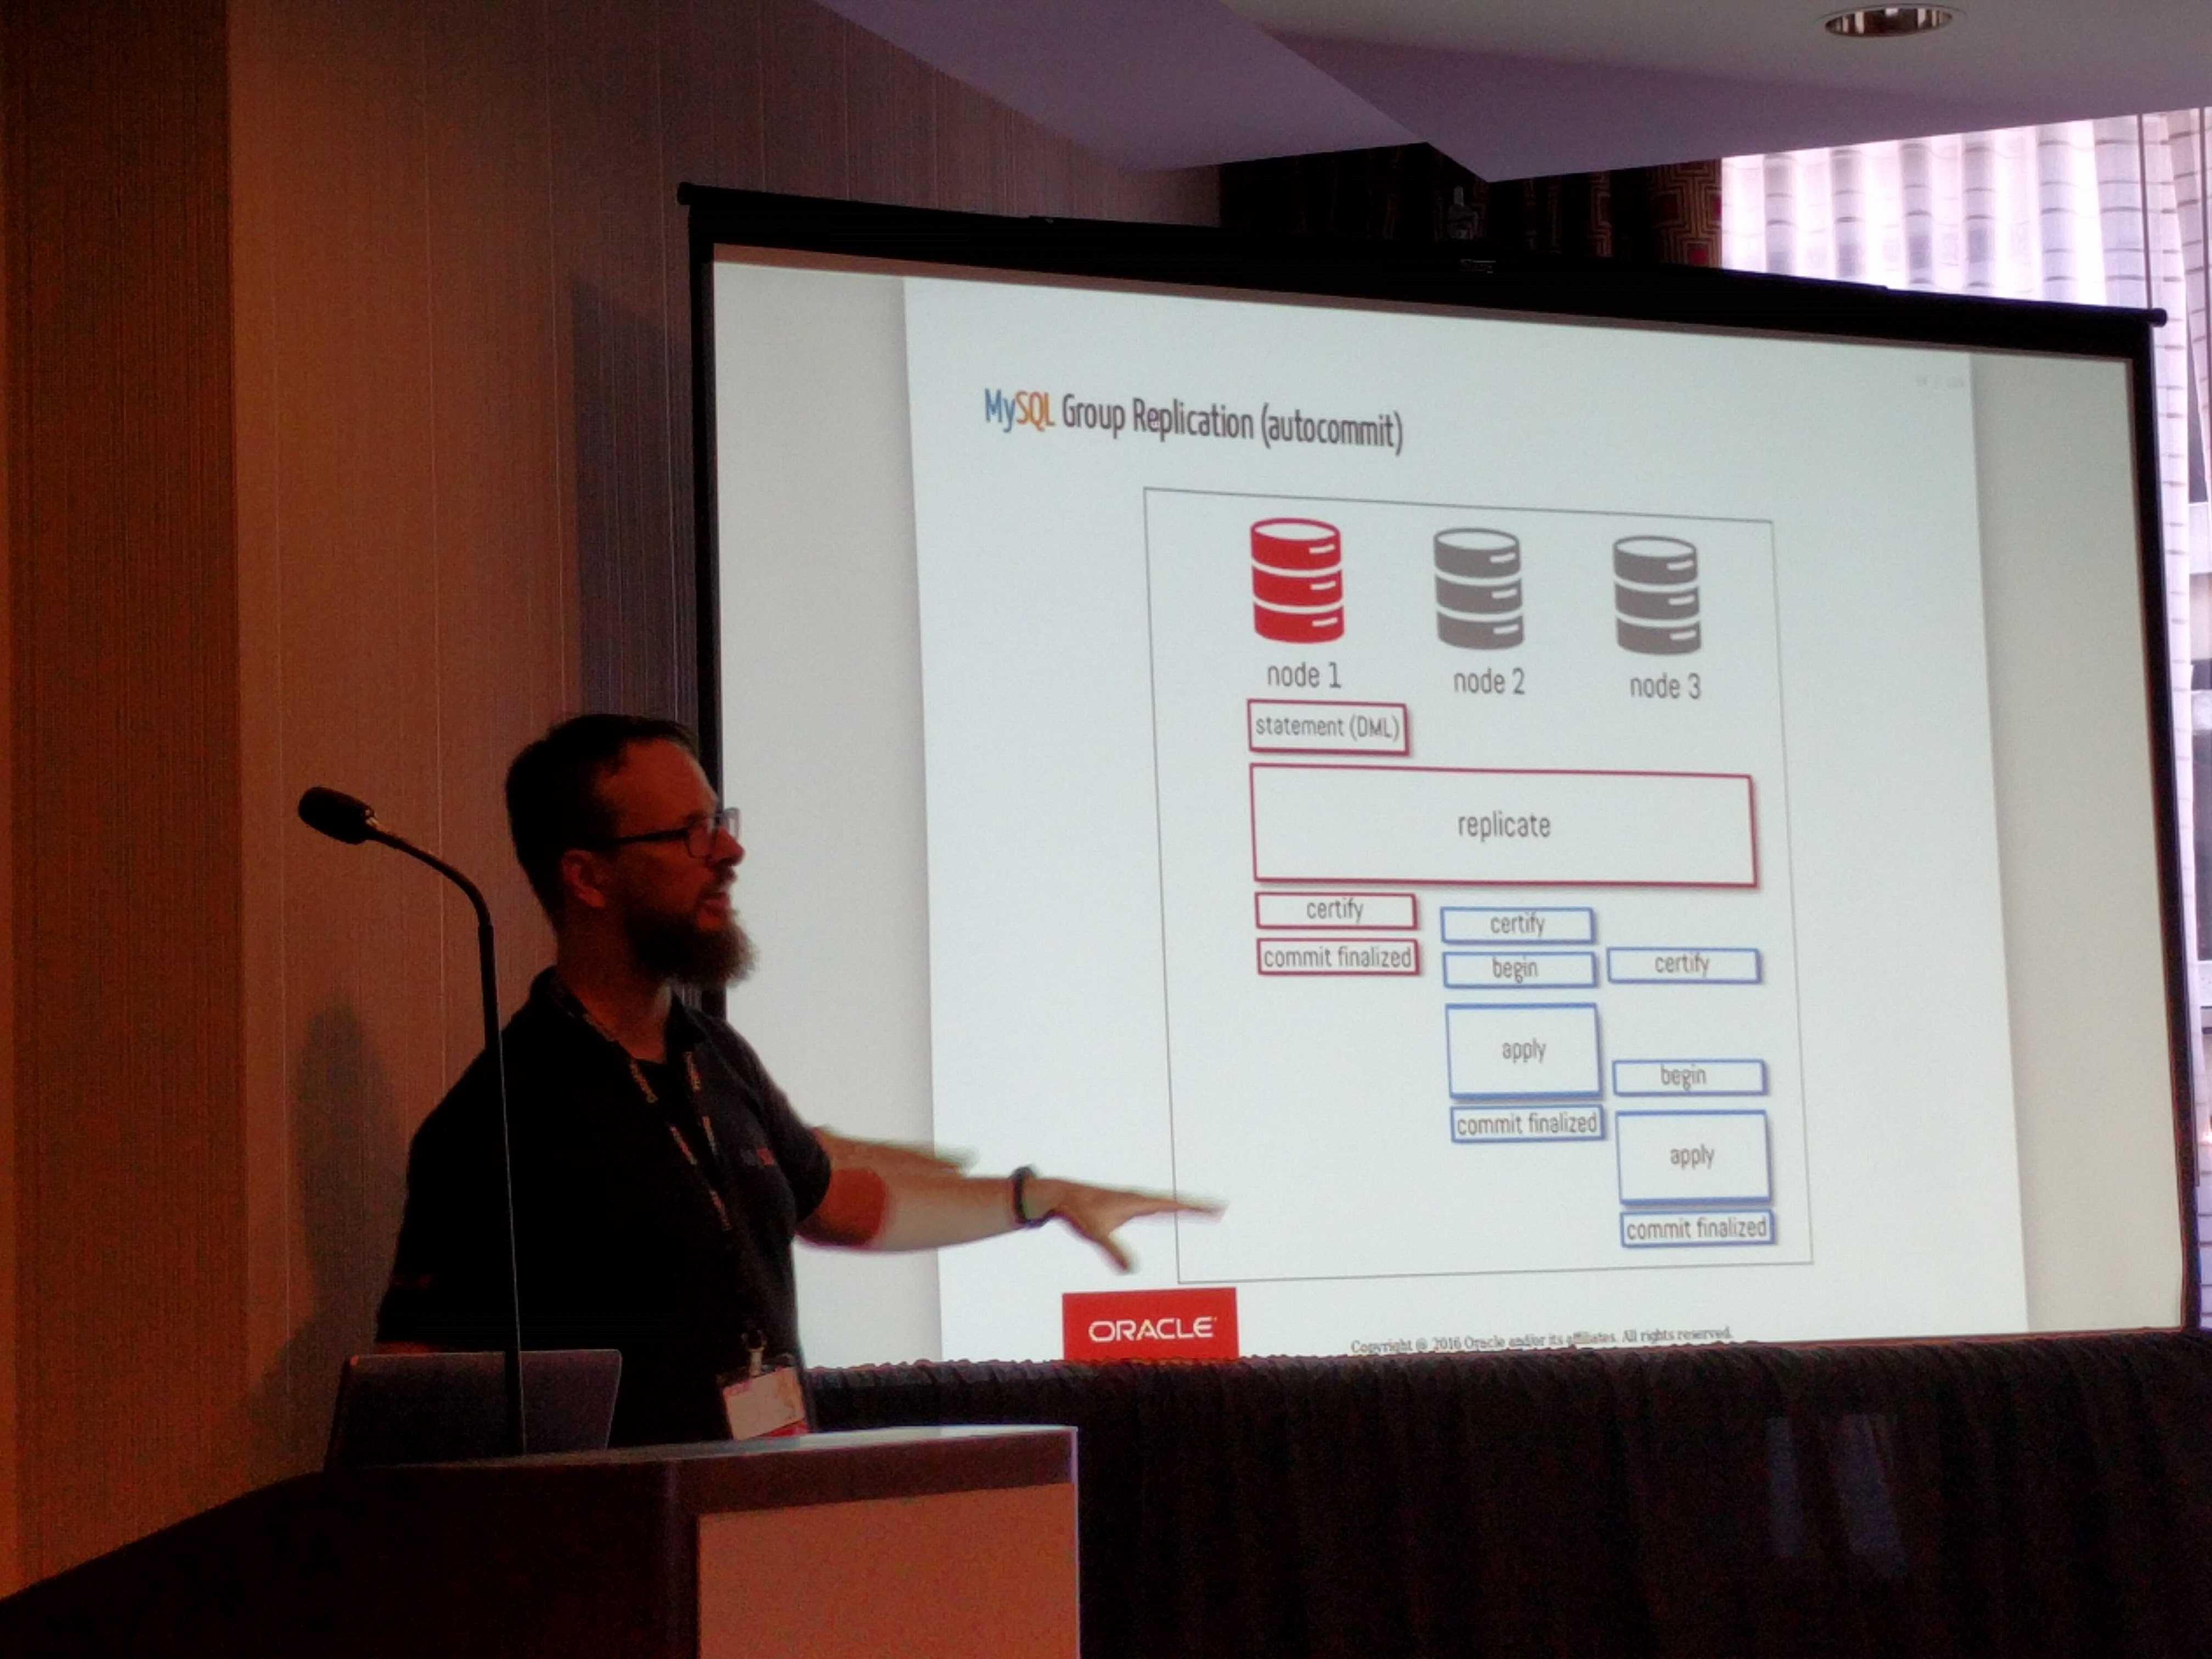
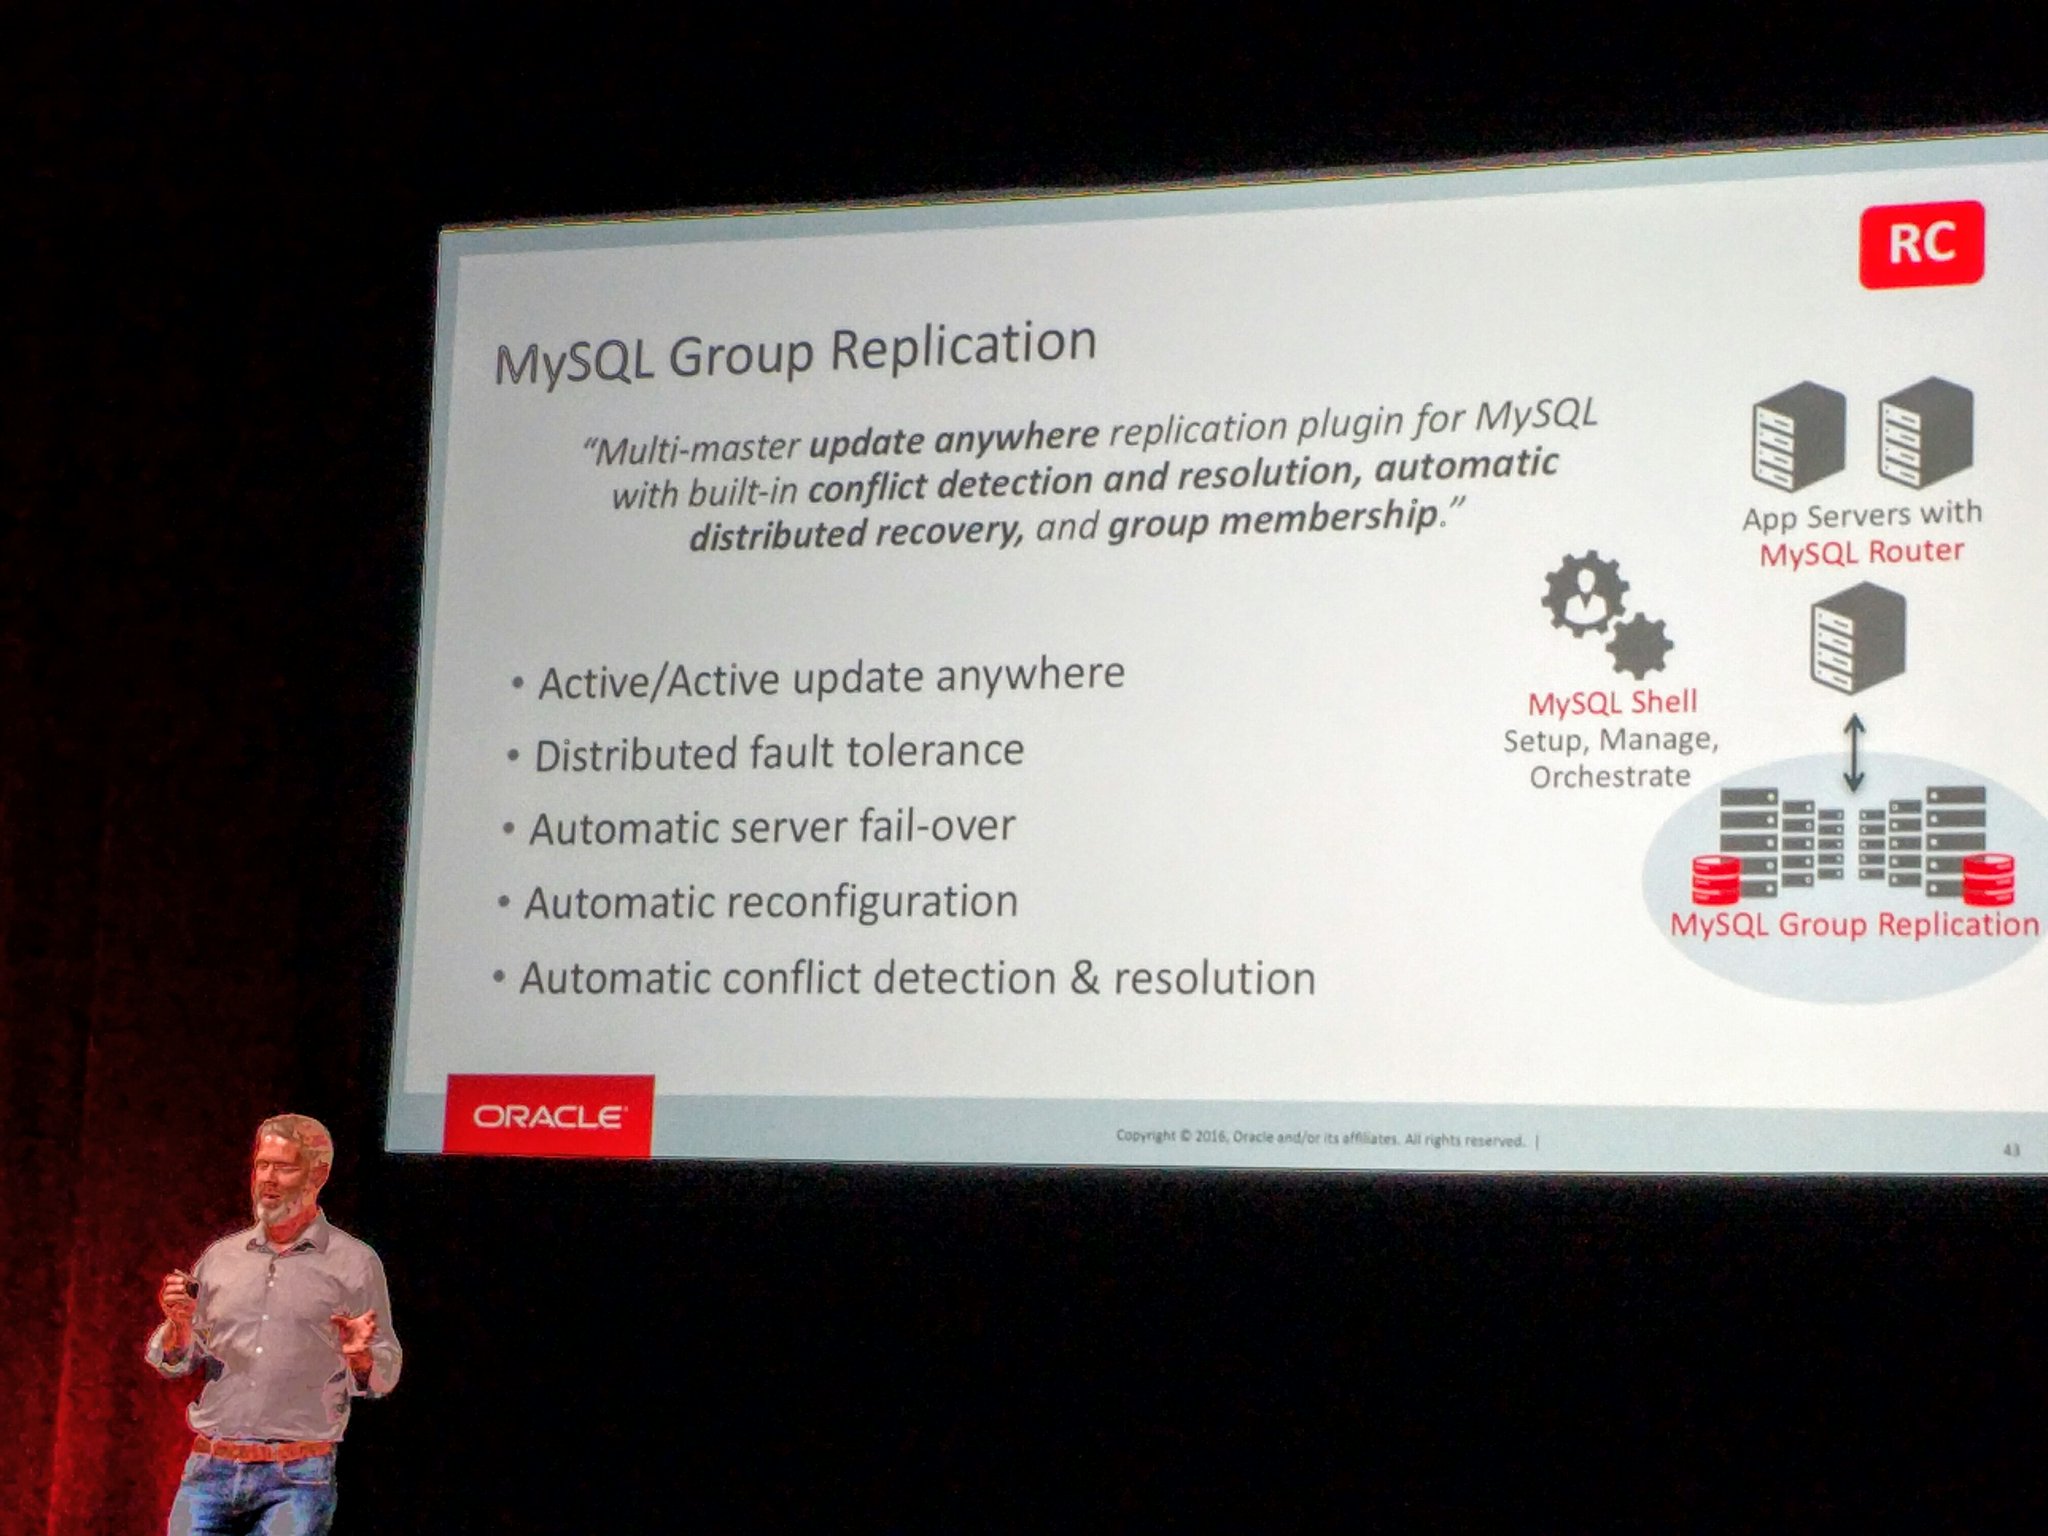
The second MySQL tutorial session at Oracle Open World was “MySQL Group Replication in a Nutshell” by MySQL Community Manager Frederic Descamps. This is succinctly described as:

“Multi-master update anywhere replication for MySQL with built-in conflict detection and resolution, automatic distributed recovery, and group membership.”

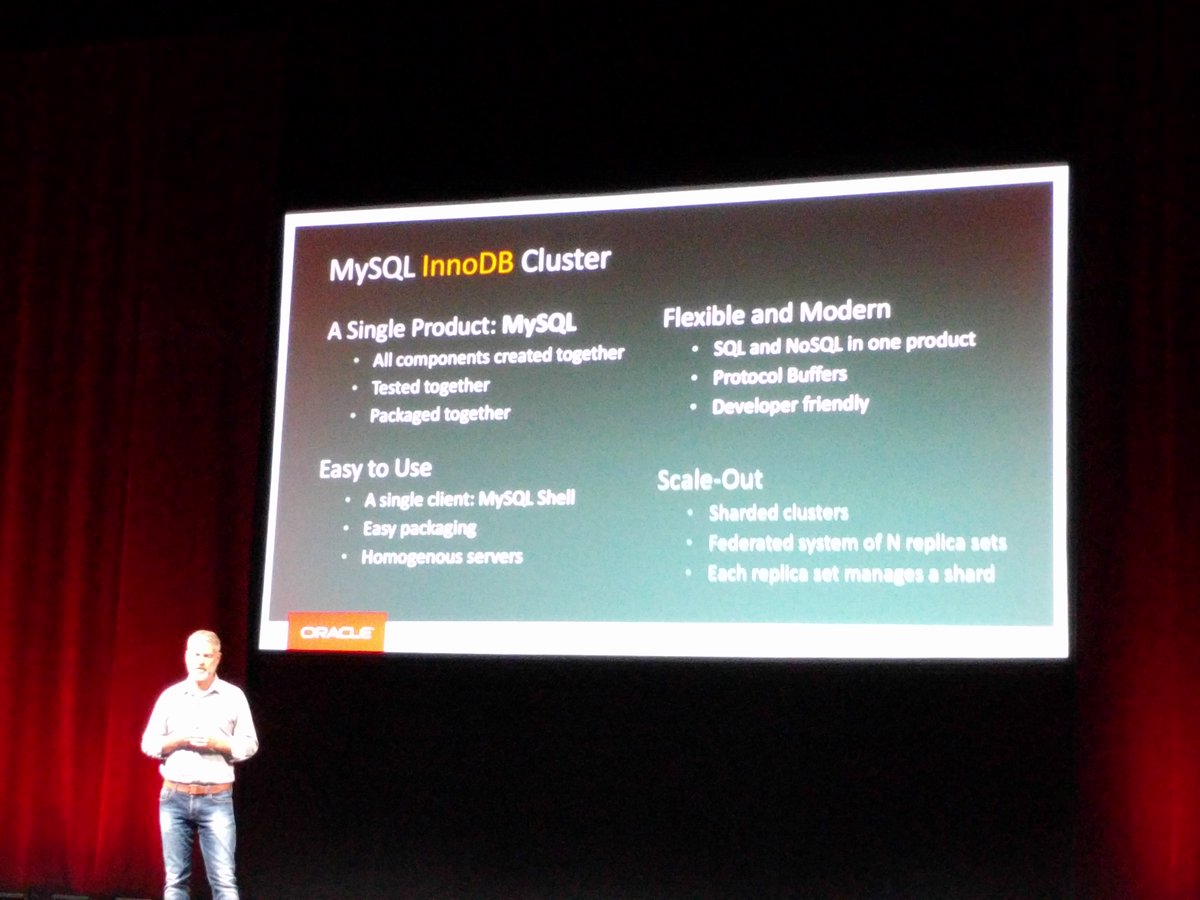
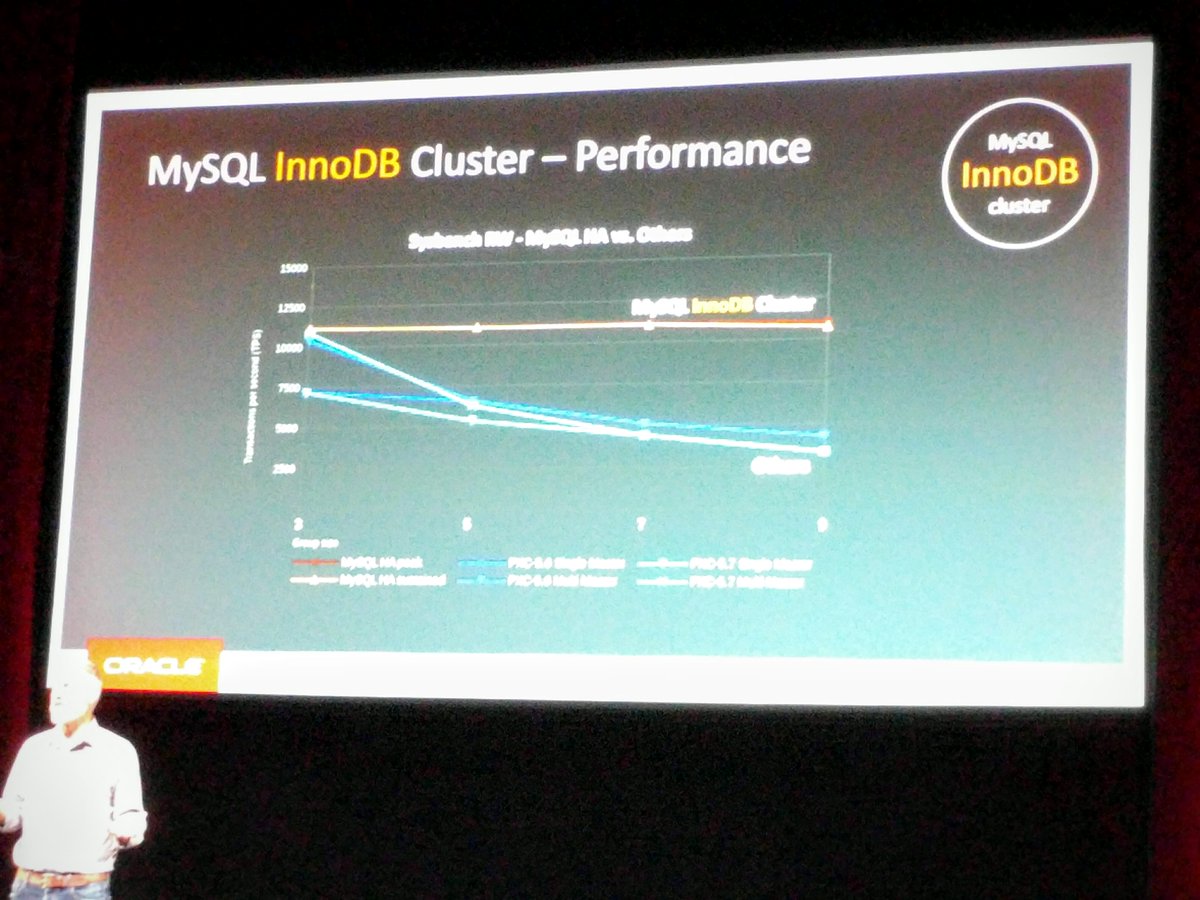
MySQL Group Replication (GR) is a virtually synchronous replication solution which is an integral component of MySQL InnoDB Cluster announced at the MySQL keynote. You can download a labs version of MySQL InnoDB cluster which includes three components.

  • MySQL Router
  • MySQL Shell
  • MySQL Group Replication

While included as part of MySQL InnoDB cluster, MySQL Group Replication can be run standalone. It is a plugin, made by and packaged by MySQL. With the plugin architecture in MySQL 5.7 the ability to release new features is greatly reduced from the more typical 2+ year general availability (GA) cycle. Plugins also allow for functionality to be not enabled by default therefore preserving the stability of an existing MySQL instance running version 5.7. This is a change in the philosophy of new functionality that I discussed in Understanding the MySQL Release Cadence which in 5.7.13 introduced the SQL interface for keyring key management. Not all in the community are happy however I consider it an important requirement for time-to-market in a fast paced open source data ecosystem.

MySQL GR is based on Replicated Database State Machine Theory and uses Paxos for evaluating consensus of available nodes in the cluster, being referred to as the Group Communication System (GCS). This is one key difference with Galera as the Paxos approach relies on accepting the certification stage within the cluster after a major of the nodes have acknowledged, rather than all nodes. MySQL GR is supported on a wide range of platforms including Linux, Windows, FreeBSD and Mac OS X, another difference with Galera.

The current Release Candidate (RC) version of MySQL Group Replication has some required configurations and some situations for applications that may not be ideal use cases for a synchronous solution. There is the complexities in the migration process of any existing infrastructure to considering MySQL Group Replication, which has at a minimum requirements of MySQL 5.7, GTID’s and row based replication. I would like to see MySQL put a lot more effort into the education and promotion of MySQL migrations from older versions to the current MySQL 5.7. Ideally I’d like to see better tools starting with MySQL 5.0 which I still see in production operation.

Some things are just the impact of current development priorities. The shell does not offer a means to promote a master in a single write configuration, i.e. the only way to simulate a failure is to produce a failure, which really means your three node cluster is no longer highly available. The use of savepoints is not currently available, a needed feature for future full compatibility for use in an OpenStack deployment. The creation of a cluster via the MySQL shell requires you to make the decision of supporting multi-master writes or a single master write. I can see the ideal need to be able to better support large batch transactions and DDL (some of those edge cases) to be able to toggle to a single write master and back. The current workaround is to utilize MySQL router to simulate this use case. The MySQL shell greatly reduces the complexity of orchestration. One of the features I like is a very convenient means to validate an Instance to see if the configuration matches minimum requirements. For example:

$ mysqlsh
> dba.validateInstance('root@mysql3:3306')

...
ERROR: Error executing the 'check' command: The operation could not
continue due to the following requirements not being met:
Some active options on server 'mysql3@3306' are incompatible with Group
Replication.
Please restart the server 'mysql3@3306' with the updated options file
and try again.
Option name                      Required Value   Current Value
Result
-------------------------------  ---------------  ---------------
-----
binlog_checksum                  NONE             CRC32            FAIL
master_info_repository           TABLE            FILE             FAIL
relay_log_info_repository        TABLE            FILE             FAIL
transaction_write_set_extraction  XXHASH64         OFF
FAIL
 at (shell):1:4
in

Something you can now do dynamically and persist in MySQL 8.0 using the SET PERSIST syntax.

The overall setup in a greenfield application is reasonable clear and will improve as the product moves towards general availability. The MySQL shell has a lot of future potential in a number of administrative functions, and the ability to switch easily between JavaScript and SQL means you can get the best of multiple languages.

In subsequent posts I will look into more of the detail of setup and monitoring of a cluster with performance_schema. I hope that existing monitoring tools will also start to support monitoring Group Replication. As the author of the New Relic MySQL Plugin in 2013 I may need to get motivated to offer a SaaS solution also.

You can find more information with official blog posts on MySQL Group Replication.

Presentations at Percona Live Amsterdam 2016

I was fortunate enough to give four presentations at the Percona Live 2016 event in Amsterdam. The slides for these are now available.

New UUID functions in MySQL 8.0.0

MySQL 8.0.0 introduces three new miscellaneous UUID functions of IS_UUID(), UUID_TO_BIN() and BIN_TO_UUID() joining the UUID() (in 5.0) and UUID_SHORT() (in 5.1) functions. See 8.0.0 Release Notes.

Thanks to the great work and hosting by Marcus Popp anybody can test out the SQL syntax of MySQL 8.0.0 using db4free without installing anything. If you want a minimal install Giuseppe Maxia provides docker minimal images of 5.0+ versions including 8.0.0.

A running docker container with MySQL 8.0 is as easy as:

The following script shows the usage and checks of these new functions.

Historically, to encode a UUID into a BINARY(16) datatype was to use UNHEX(REPLACE()) syntax. There was however no easy to unencode a BINARY(16) into the original value. BIN_TO_UUID() as shown in the output below solves this problem.

mysql> SELECT IS_UUID(1);
+------------+
| IS_UUID(1) |
+------------+
|          0 |
+------------+
1 row in set (0.01 sec)

mysql> SET @uuid='aaaaaaaa-bbbb-cccc-dddd-eeeeeeeeeeee';
Query OK, 0 rows affected (0.00 sec)

mysql> SELECT IS_UUID(@uuid) AS is_uuid;
+---------+
| is_uuid |
+---------+
|       1 |
+---------+
1 row in set (0.01 sec)

mysql> SELECT IS_UUID(REPLACE(@uuid,'-','')) AS is_uuid;
+---------+
| is_uuid |
+---------+
|       1 |
+---------+
1 row in set (0.00 sec)

mysql> SELECT @uuid_bin := UUID_TO_BIN(@uuid) AS uuid_bin, LENGTH(@uuid_bin) AS len;
+------------------+------+
| uuid_bin         | len  |
+------------------+------+
| ���������������� |   16 |
+------------------+------+
1 row in set (0.00 sec)

mysql> SELECT @old_uuid_bin := UNHEX(REPLACE(@uuid,'-','')) AS old_uuid_bin, LENGTH(@old_uuid_bin) AS len;
+------------------+------+
| old_uuid_bin     | len  |
+------------------+------+
| ���������������� |   16 |
+------------------+------+
1 row in set (0.00 sec)

mysql> SELECT @uuid_bin = @old_uuid_bin;
+---------------------------+
| @uuid_bin = @old_uuid_bin |
+---------------------------+
|                         1 |
+---------------------------+
1 row in set (0.00 sec)

mysql> SELECT BIN_TO_UUID(@uuid_bin) AS uuid, HEX(@old_uuid_bin) AS uuid_old;
+--------------------------------------+----------------------------------+
| uuid                                 | uuid_old                         |
+--------------------------------------+----------------------------------+
| aaaaaaaa-bbbb-cccc-dddd-eeeeeeeeeeee | AAAAAAAABBBBCCCCDDDDEEEEEEEEEEEE |
+--------------------------------------+----------------------------------+
1 row in set (0.01 sec)

Introducing the MySQL Cloud Service

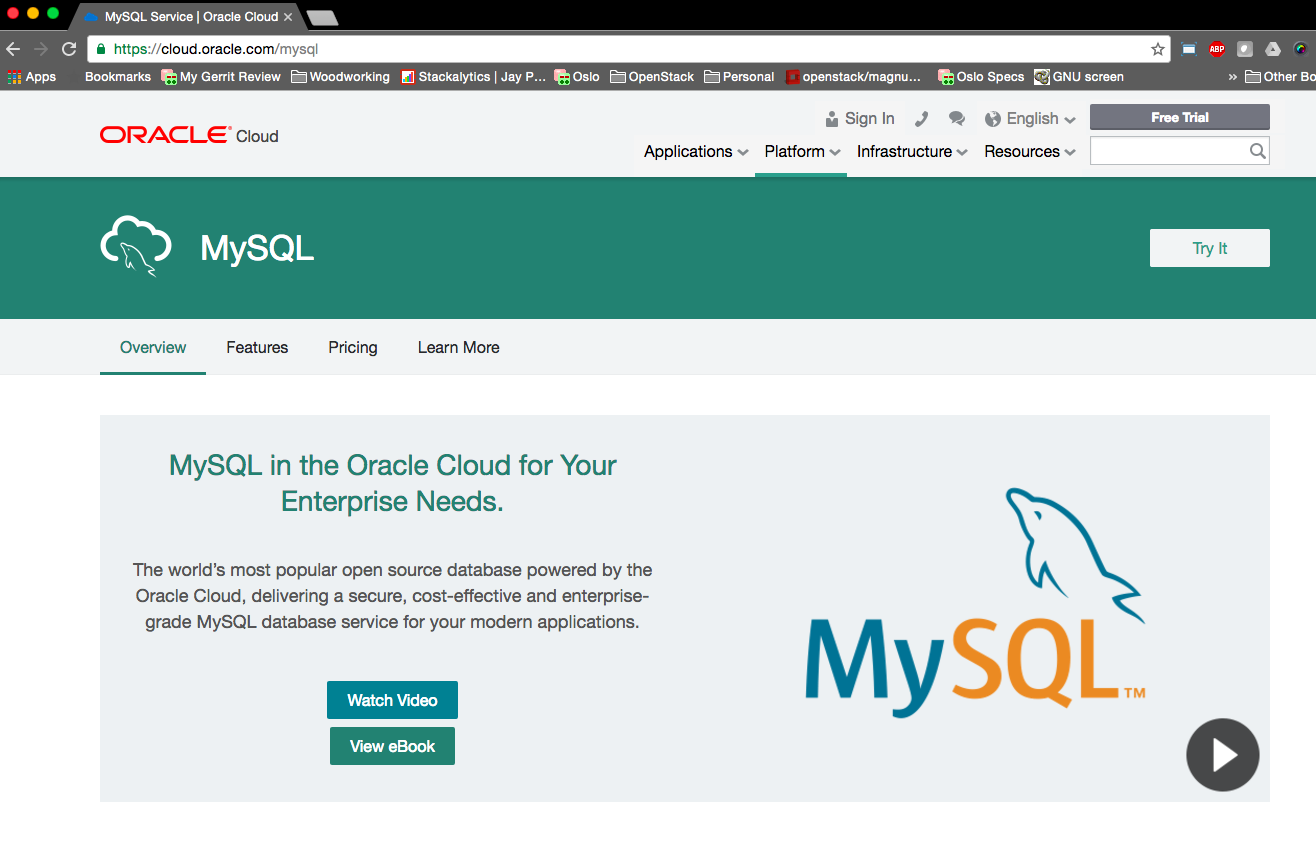
The MySQL keynote at Oracle Open World 2016 announced the immediate availability of the MySQL Cloud Service, part of the larger Oracle Cloud offering. You can evaluate this now with a trial copy at cloud.oracle.com/mysql. MySQL server product manager Morgan Tocker gave two presentations at the event including a deep dive session.

This is the first release of the MySQL cloud service. As with all first releases there are some highlights and some pipeline features. All major cloud providers have MySQL offerings. AWS RDS (traditional, MAZ and Aurora) GCP Cloud SQL and Azure MySQL App Service. Users of OpenStack have Trove for comparison. I am not going to be evaluating features between cloud offerings in this post.

Highlights

The differentiating highlights as I see them from the presentation. I will provide a followup blog on actual usage at a later time.

  • MySQL 5.7
  • MySQL Enterprise Edition (a key difference with other cloud providers)
    • MySQL Enterprise features like Firewall, Thread Pool, Auditing etc
    • MySQL Enterprise support is included in price
    • MySQL Enterprise Monitor (MEM) is available and included in price
  • SSH access to machine
    • SSH access is a non-privileged user (opc). This shows and intention on security first policy.
  • Separated partitioning in OS/MySQL disk layout
  • ZFS. (Nice, I have missed using this)
  • Optimized partition workloads different for data and sequential logging
  • Two predefined backup policies, ZFS appliance (7 day retention) and cloud storage (30 day retention)
  • The managed backup philosophy is a weekly full backup, and daily incrementals
  • Sane default MySQL configuration (my.cnf)
  • Patching notification and capability. Automated backup before patching, and rollback capability
  • The Ksplice Oracle UEK functionality for improved host uptime with security vulnerabilities or kernel improvements

Overall an A effort on paper in V1 with the willingness to be useful, sane and flexible. In a future post I will evaluate the actual MySQL cloud capabilities with the available trial.

Observations

Features and functionality I see missing from V1 during this presentation. Some are features I would like to see, some are just observations, and some are likely present features but not discussed. I will leave it up the reader to decide which is which.

  • No MySQL 5.6. There was mention of supporting two versions in future moving forward (i.e. 5.7 and 8)
  • Separated MEM configuration and management. See my later thoughts on this.
  • MySQL topologies and easy to apply templates, including the future MySQL InnoDB Cluster
  • A longer archive storage retention capability policy for backups and/or binary logs (e.g. for compliance reasons)
  • The size of the pre-defined dedicated logging partition and binary logging may be problematic for longer retention capacity
  • Provisioned IOPS capacity or performance guarantees for Disk I/O
  • An ability to define MySQL configuration templates (e.g. dev, test, prod, master, slave etc) and be able to select these for a new instance deployment. You can of course manage this after the fact manually.
  • The compute workloads are more generic at present. There appears to be no optimized disk, network or CPU variants.
  • Improved key management being able to select an already defined SSH public key (e.g. with another instance)

Only offering MySQL 5.7 is an adoption impediment. This requires any organization with applications that are not greenfield to have already migrated to MySQL 5.7. I can understand the long-term rationale view here, but I see it as a clear limitation for more rapid adoption.

The details

The MySQL Cloud Service takes the hard parts out of managing MySQL. This is deployed in the Oracle Public Cloud, leveraging the fault-tolerant regional deployments in place. This Database as a Service (PaaS) helps to remove those annoying pieces of administration including backups, patches, monitoring etc. Powered by MySQL 5.7 Enterprise edition (the only cloud provider to offer this), the cloud system version in use is identical to the downloadable on-premise version. The Cloud service offers an initially optimized MySQL configuration of my.cnf to begin with, i.e. improvements on 5.7 defaults, and has variety of compute workload sizes to choose from. Storage is a ZFS appliance, but there is no information on provisioned IOPS for intensive workloads. You can use the web interface or REST API endpoints to create, deploy and manage your cloud instances. The REST API endpoints were not demonstrated in this session.

The predefined disk layout for storage is a very sane configuration. The Operating System (Oracle Unbreakable Linux 6 ) has a dedicated partition, (not part of sizing). There is a dedicated and throughput optimized ZFS LUN for data (what you size with the setup), a dedicated and latency optimized ZFS LUN for binary and InnoDB logs (which appears not initially sizable at present) and a dedicated ZFS LUN for backups. There is also a secondary backup storage capacity by default in Cloud Storage.

The UI interface provides the capability to configure a MEM server and a MEM client. To conserve presentation time Morgan consolidated these into his initial demo instance. I feel there is room here to optimize the initial setup and to separate out the “management” server capabilities, e.g. selecting your MEM configuration, and by default offering just the MEM client authentication (if MEM server is configured). For users not familiar with MySQL Enterprise features separating the definition and management in the initial creation stage is an optimization to remove complexity. There may even be an option for a getting started quick setup step that can provision your MEM setup in a dedicated instance when there is none detected or with a new account. Here is the flip side. An inexperienced user starting out may launch a MEM server with several test instances because the initial UI setup offers these as input fields, this is not the goal when managing multiple servers. The current version of MEM shown was 3.2, with 3.3 planned. Version 3.3. includes it’s own web interface for backup management.

Some things that are not in the initial release but I’m sure are on the roadmap. One is an upsize and downsize optimization. It would appear via the demo, that when a compute size modification occurs, the existing MySQL instance is shutdown and the VM is shutdown. A new VM is provisioned using the setup and disk partitions of the prior VM. An optimization is to provision a new VM, startup MySQL, then stop MySQL on new, stop on old, unmount on old, mount on new, and start MySQL. This removes the downtime in the VM provisioning step. Ideally I’d like to see the capability to perform this on a slave, and promote a slave more seamlessly. Practically however, this has many more moving pieces than in theory and so the future use MySQL router is a solution. The upcoming MySQL InnoDB cluster will also suffer from the complexity of resizing and uptime availability, especially when nodes are of varying compute sizes. As mentioned, I would like to see pre defined MySQL configurations. I would also like the option to pre-create multiple user authentications for instances, rather than having to specific one each time. I can see for a class of servers, e.g. a load test environment of a master/slave setup, and an application with several MySQL accounts, a means of bulk user and permission management.

Under the Hood Morgan talked about the InnoDB IO configuration optimizations, the number of IO Threads, use of O_DIRECT, the redo log size and buffer pool optimized to compute shape. The thread pool is enabled by default. The same considerations are in place for the operating system, Oracle Linux 6 UEK, MySQL task priority, memlock, and ext4 filesystem.

Again, those unfamiliar with MySQL Enterprise features will need greater help and UI help understanding the features, capabilities and configuration of Firewall, Encryption, Authentication, Audit, Monitor, Backup and Thread Pool.

The SSH access is what gives this first release control to be flexible. You can modify the MySQL configuration, incorporate configuration management processes. You can utilize on system database restore capabilities. You can monitor physical resource utilizations. I am unsure of the total control of changing (or breaking the system and the kernel).

There was a lot to digest in the 45 minute practical demonstration session. I am sure as with more reading and evaluation there will be more to share. As the roadmap for MySQL InnoDB cluster develops I can see there being a good cadence on new features and functionality released for the MySQL Cloud Service.

My Live Tweets (as the presentation was happening)

Oracle MySQL Public Cloud landing page

MySQL Operations in Docker at Oracle Open World 2016

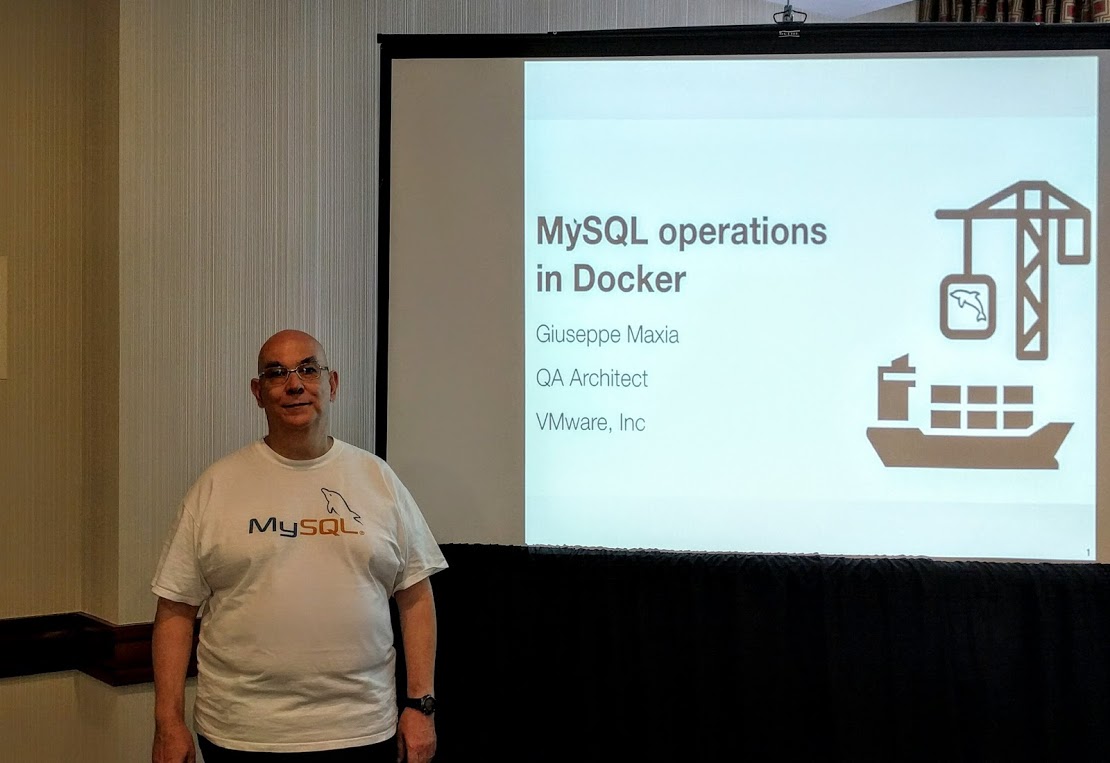
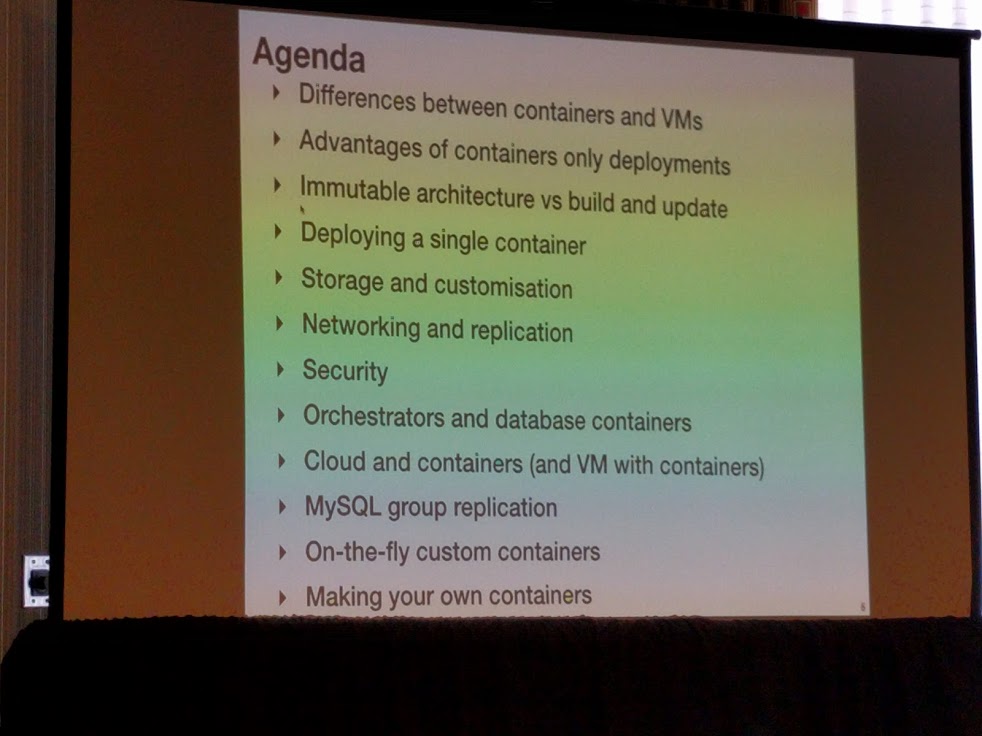
One of the Monday tutorials at Oracle Open World was MySQL Operations in Docker. A 2 hour tutorial by Giuseppe Maxia. This tutorial showed what you can do with MySQL on Docker which is specifically good for testing. Some key points from the tutorial included:

  • Differences between containers and Virtual Machines (VM)
    • VM are mutable architecture, you start then modify
    • containers are an immutable architecture
  • Containers are not micro-services
  • Understanding about the “official” MySQL docker image. (Hint: Use mysql/mysql-server, not mysql)
  • The issues of specifying a required password to install MySQL on a container
  • Understanding how to use volumes, for a file (e.g. /etc/my.cnf), or a directory (e.g. /var/lib/mysql)
  • How to produce a more secure MySQL installation using files
  • How to get MySQL 5.0,5.1,5.5,5.6,5.7 and 8.0 on #CentOS, #Ubuntu and #debian for #docker using his own minimal MySQL docker images. (NOTE: MySQL images by Oracle, Percona and MariaDB are only the current version)
  • MySQL Group replication demo (mysql/mysql-gr)

Giuseppe performed his demos on a dedicated Linux machine. My attempts to reproduce the tutorial steps on Mac failed, as mentioned because of issues with volumes. MySQL Group Replication with Docker on Mac is also unpredictable.

In summary, Giuseppe talked about how wonderful Docker is for development and testing but not advisable for production. Some of the questions regarding production concerns included the inability working with orchestrators, stability with volumes and overall container user security. In addition, a tough audience question “How do you upgrade MySQL in production using containers?” highlighted that this technology is evolving, and while becoming ideal for stateless applications, it is not ready for primetime for databases that require state to operate.

Get the Code Examples on GitHub.

Docker has become a popular technology for containers starting in 2013. It did not invent containers, A Brief History of Container Technology gives a timeline of technologies that have got us to where we are today.

MySQL Keynote at Oracle Open World 2016

Tomas Ulin made a number of key announcements at this year’s State of the Dolphin and Customer Experiences keynote. MySQL Public Cloud, MySQL 8.0 DMR, MySQL InnoDB Cluster, MySQL Group Replication (RC). Some tweets and points of the keynote:

There were also user stories by Nicolai Plum – Senior Systems Architect at Booking.com and Andrew Archibald – VP of Development at Churchill Downs.

Nicolai talked about how booking has evolved over the years starting with the traditional MySQL replication model, moving to a more complex sharded and partitioned architecture, and now a re-architecture towards a loosely coupled, write optimized and read optimized data model leveraging Redis queues. This work has enabled services to hide the complexity and need for developers to write SQL and leverage better data translation and interoperability, e.g. MySQL to Hadoop to MySQL. Booking.com is actively using MySQL 5.7, and is evaluating how to incorporate the new features of MySQL 8.0.

Andrew talked about how twinspires.com uses a multi data center master-master replication setup with MySQL 5.6 to manage critical availability needs for online wagering of horse races around the world. During peak times, load can increase 100x, similar to my own experiences handling 100x flash sales Improving performance – A full stack problem.

I have yet to discover how to deep link to this presentation at the OOW 2016 agenda to enable viewers to read the overview and speaker profiles.

A Brief History of Container Technology

The following is the text from a presentation slide at Oracle Open World 2016.

While Docker has been playing a key role in adoption of the Linux container Technology, the did not invent the concept of containers.

  • 2015 – OCI
  • 2014 – rkt
  • 2013 – Docker
  • 2013 – LMCTFY
  • 2011 – Warden
  • 2008 – LXC
  • 2007 – AIX (6.1) WPARS
  • 2007 – cgroups in Linux Kernel (2.6.24)
  • 2006 – Process Containers
  • 2005 – openvz
  • 2004 – Solaris Zones
  • 2001 – Linux vserver
  • 2000 – FreeBSD jails
  • 1979 – Unix V7 added chroot

DISCLAIMER: This post is only a repeat of the content of the slide and has not be verified for accuracy.

The Legacy Dilemma

Organizations are rapidly developing new software applications to meet the need to consume ever increasing digital content and maintain market share in a given field. These newly developed applications cover a wide range of needs from advanced data analytics, to mobile applications, to personalized recommendation engines. They utilize a new generation of languages, tools, frameworks, design approaches and software engineers to iterate rapidly. Many applications are being created without the foresight of the ongoing lifecycle management that is needed to manage this explosive growth. Organizations with existing information systems will need to support and integrate these products to maintain business viability.

The view of applications today in a typical larger organization that has started to adopt new services may look like:

The Legacy application view today

Like many pictures, this is just a snapshot. It does not represent what happens when you include the dimension of time.

The Legacy application view tomorrow

Regardless of the amount of time that passes between these two snapshots, what is important is the pace of development, i.e. the rate of change. If the goal is to replace a legacy system, the work on replacing the legacy system has to match and exceed the velocity of new development.

The legacy dilemma is a needed integration in many organizations. Established monolithic applications contain great data wealth. Organizations that are not integrating are not leveraging some of the greatest assets available.

There are a number of reasons why legacy applications are considered for replacement. The cost of licensing commercial software, the cost of running and supporting older hardware, the physical size and location of equipment, the decline and availability of skilled resources in older programming languages. What is important is to identify the strategic decisions why, and develop a roadmap that has the time, money and resources assigned to enable success. Organizations think and act in the intention of replacing legacy systems, but the plan rarely includes the detailed roadmap to completion. Solutions such as implementing a private cloud Infrastructure as a Service (Iaas) is a platform to support a system, not a plan to implement a migration or replacement.

Legacy applications fall into several broad categories. These include:

  • The purchased packaged application where customization is very limited and modification is not possible.
  • The third-party supported application where customization is very expensive and very time consuming.
  • The in-house application that while providing core features, is not actively developed. It may appear too complex or fragile to modify, or skilled resources are not available to improve functionality.

How do you tackle the adoption of your legacy application data, logic and functionality?
How do you develop a strategic roadmap for deprecation and replacement?

For a purchased or third-party application your options to replace the system are generally limited to an entirely new product and the expensive and complex transition process associated with this. The choices are more limited. For an in-house application the solution can be more flexible, incremental and planned.

No two organizational applications are the same. The process of analysis of any application is the same regardless. Systems accept data input and provide data output. The workflow to construct a data pipeline that encompasses the business logic and intellectual property of the organization for each input/output is the complex analysis set. What is visible to the end consumer, or to an administrative interface is often only a common path of data management. Only detailed documentation and code analysis enables you to identify all of the possible paths of data with specific business logic. This forensic analysis is more specific step for each particular application however the process can be repeated across applications.

With an existing legacy application that includes data, logic and functionality, the approach to incorporate and replace will vary depending on business priorities. Here are two very different approaches to a starting point depending on strategic priorities.

A business wants to personalize the products displayed to a user on their e-commerce site. What is needed is access to the data. Providing a means to migrate data (in near real time) to a different data source is needed. Providing a read-only interface to a subset of data does not require understanding of, modifying or adopting application logic.

A business wants to offer a mobile application to purchase products available on their e-commerce site. Duplicating the website functionality in a mobile application to list and order products is a recipe for an inconsistent consumer experience and the duplication of development and maintenance resources. What is needed is a common API that the website and mobile application can consume to ensure there is one path of business logic to various workflows. This requires at minimum a refactoring of existing business functionality to enable different means of consumption. This does not modify the logic or data. There is often the temptation to re-write the logic at the same time, for example in a newer language, however this introduces multiple critical path factors. Planning the creation of an API is a very strategic approach to extending an existing system. After successful implementation using existing logic there can be a planned and successful refactoring overtime using newer technologies and no critical path dependencies.

The art of dissecting an existing application is knowing how to replace the workflow while maintaining the core functionality and providing tangible benefits of undertaking the work. In general, no organizations have double the number of resources to independently maintain an existing system and a team to develop a replacement system concurrently. An example of improving an existing application by choosing a component replacement process is:

You have an e-commerce site that processes credit card payments. Moving the payment processing from a synchronous operation; i.e. you make a request to a payment processor and you wait for a response to proceed; to an asynchronous operation means this can component can scale because this new design can incorporate queueing and throttling. In the workflow of an order, an existing system is still used to place an order. A new service is created to process placed order and determine if payment is accepted or rejected. The existing application is used for fulfillment of accepted orders. This provides several additional benefits. You improve the customer experience in waiting during the ordering process. You reduce the impact of a failure point in the lifecycle of the customer experience. You provide a gated step that can be independently scaled to avoid any critical stress for system overloading. In addition, the ability to add redundancy via means of an alternative payment gateway when your primary gateway is unavailable resolves an import single point of failure (SPOF). When your business relies on a service provider to conduct important aspects of your business and the only means to know of outages is to see complains on social media, you should be proactive in your business resilience independently of a third party.

Other observed examples of replacing legacy systems functionality include:

  • The look verses book capacity of online travel, hotel reservations and events management. By utilizing different technology stacks for the look functionality that needs to scale more significantly, you can reduce loss of service, and still utilize a proven means of processing actual orders.
  • The process of consolidating email communication that is spread throughout an application and integrate with a service provider. By removing in-house and at times specific hard-coded response, you can leverage tools that enable staff to customize response for consumer, create additional communication campaigns and track usage by consumers.
  • Separating content creation from application development. When tools are used to enabled staff to manage text on a website rather than a developer needing to program a change and rely on the release management process, you enable software developers to focus on functionality rather than text changes.

These examples demonstrate the concepts to tackle reducing a large application by replacing smaller pieces of functionality with a strategic plan. As with many cliches about eating elephants and climbing mountains, there has to be a focus on the end goal, while achieving the goal with small manageable steps.

The agile software development lifecycle responsibility

The eXtreme Programming (XP) methodology places emphasis on a number of core principles for agile software development. These include (and are not limited to) the planning game, short and frequent iterations, testing, frequent refactoring, continuous integration, ownership and standards.

Identifying the problem

These core principles however are not the full lifecycle of software development. This is really only a portion of the lifecycle. What is lacking is the definition for the ongoing responsibility and ownership by the creators of software in the sustainability of said software for the lifetime of use and benefit to an organization.

An agile methodology approach (of which XP is just one) fails to expose and describe the full operational cost within development, testing and deployment. Just as a single line of code is viewed a hundred times more than the time is was written, the usage of that code in the full lifecycle of an organization is potentially a magnitude more investment of time and resources.

Software development is not just about new feature creation. It is also ensuring full product ownership and responsibility consistently. It is also ensuring that in a larger organization, compatibility and consistency can occur with other products. In other words, it is thinking of software for the whole organization, rather than the sum of individual parts.

Scheduling lifecycle management time

Development and engineering resources already apportion time between planning, development and unit testing. There needs to be a second more important consideration. An apportionment of time between product features, product stability and product maintainability.

A good assignment of time to cover the full lifecycle adequately is:

  • 60% of time to feature design, development and product support (i.e. bugs)
  • 20% of time in stability and sustainability management of the existing technology stack (i.e. refactoring and testing)
  • 20% of time in overall lifecycle management of delivered functionality (i.e. ongoing ownership)

Conveniently this Pareto allocation can be seen as 80% for development time and 20% for time generally considered operations.

Sustainability Management

Remember the core principles of XP that included frequent refactoring and standards. How much time is spent on refactoring code to provide a better, more consistent, more testable codebase for an application after code is initially deployed? What about across multiple applications in your organization. Engineering resources rarely invest any time let alone actively scheduling time for code maintenance by the entire engineering organization, yet there are immediate benefits. It can be amazing how more performant a system is when unnecessary code is simply deleted from software that has gradually evolved over time. The compounding benefits can mean less code to view by developers and thus adding incremental efficiency. Less code to deploy also means smaller installation and application footprint. Particularly when the code is unnecessarily executed in the common usage path.

Engineering teams in general are more focussed on delivering new functionality or fixing issues with newer functionality rather than reviewing existing functionality for optimization, consolidation, replacement or removal. What about applying an improvement to not just one application, but multiple applications across an organization whenever possible.

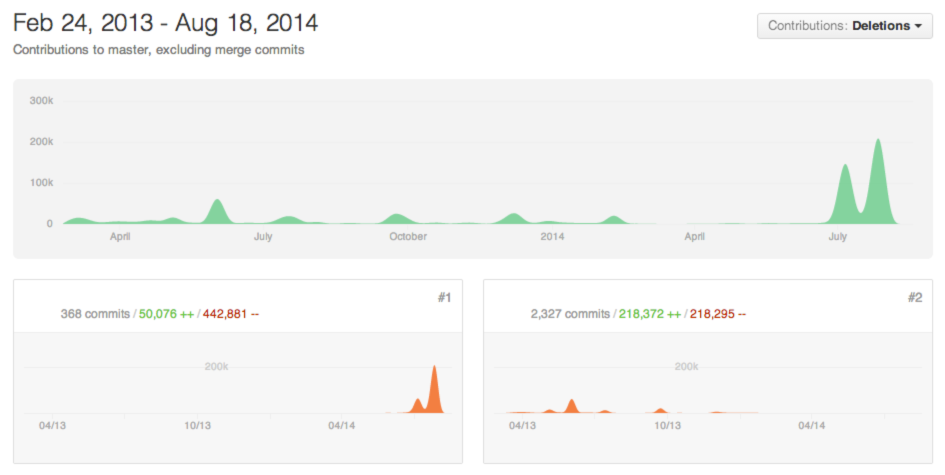
There is generally at least one individual at each organization that has the attitude of “Do I write the line of code, or is there a better way?”, and “What code can be deleted as it is no longer (or was never) used?”. If all engineers considered, evaluated and implemented these concepts as a daily process, code would be more stable, it would be more lean. Does your organization have a recognition for the developer that has deleted the most lines of code from your production system?

The following is the example of a single developers improvement to a production system via deletions.
github deletions

Are there better ways of implementing functionality with the version of the technology stack already in use? Many times a newer version of software is used for one feature, but what other new or improved features also exist. This is a proactive measure to look at the features of the technology in use. This is a different type of refactoring, but the same concept in code reduction. A great example here is the use of an iterator design pattern rather than a loop. In initial deployment of an application, memory optimization may not have been obvious, however over time and increasing datasets this simple proactive action has a larger benefit for the application.

A final step in improving sustainability of the software is testing. An agile approach introduces unit testing, but testing do not stop with the validation of a single line of code. Testing encompasses how that functions with the entire system, often known as functional testing. Systems often require load testing to know the capacity before failure, not after it occurs. If as much time was spent in these two additional areas of testing, as was spent in unit testing, more robust systems would exist and the unseen benefit is the productivity to spent more time developing.

Here are a few customer examples of refactoring. Unfortunately this is an all to common occurrence.

Module bloat

An assessment of the technology stack for a newly deployed application (i.e. just a few weeks old) showed a long list of PHP and Apache modules. Without any justification as to why these modules were used, and without a willing engineering sponsor it took quite some time to first produce automated deployment duplicating this custom environment, than applicable testing to strip out what was ultimately unnecessary. The overall outcome had multiple effects. What was needed to operate the system was actually documented. What was needed was actually automated to assist in future deployments. The resulting software was more performant as it had less baggage. The resulting deployed VM image was actually over 1GB smaller after all bloat was removed. This improved the time to deploy new application servers. As this system had a very large scale up and scale down weekly, we are talking 1000% at peak times, the impact of a more lean stack had a huge impact on the true deployment times of the application. This is an attribute that can be difficult for developers to appreciate, when comparing a development environment to a production system.

This entire process and the large investment of work would have been almost non-existent if this was part of the engineering methodology used during initial development (which took over one year for initial deployment), and if more (or all) individual developers stopped to ask why are we adding additional modules. This is part of the infrastructure planning that should have a feedback loop within each iteration. This also requires both a solid experience in engineering and architectural oversight to be able to estimate the impact over a much larger time period than the development cycle.

Framework bloat

An education based client faced a huge problem. The existing system had grown over a number of years, the engineering department had grown from one developer to over a dozen developers, yet the approach towards software development had not changed from that single developer original module based Drupal approach for a small application. With sales for the next annual education cycle already 4x more than the current user base that was having regular outages, the system could not (and would not) sustain known future sales.

Often the first question asked by clients in this situation when offering performance services is “How can I scale my system 10x?” I generally counter this question with “How did you scale from when your system was 10x smaller to now?”. Aside from the interesting conversations around these responses, I often need to explain that performance is about efficiency, and this often requires a cultural change. I also generally quote one of my popular lines — “When reviewing the performance of a piece of code (or SQL statement); the first objective should not be to make it better; the first objective should be to eliminate it.” This is also generally received with blank stares and silence. Efficiency it seems perhaps is no longer taught or practiced.

As with most simple yet profound assessments an example of the clients production system can best demonstrate what inefficiency is. An analysis of the user registration process unveiled alarming result. This analysis that can happen in a very short period, e.g. an hour. In summary, 50 SQL statements were executed to register a new user to the system. A physical desk check (again foreign when you have to ask multiple people how do I print out something as a visiting consultant) of just the database access showed that with the present inefficient Drupal ‘node’ schema design, just 11 SQL statements were actually needed to complete the required task. That is, the code could be 500% more efficient and nothing has been tuned or scaled. The client needed at least a 400% immediate improvement. However, just explaining this did not convince the organizations c-level executives to reset poor development practices to addressing immediate and ongoing scalability (i.e. success of your startup). They wanted a more abstract approach, they wanted a magically sharded solution were simply throwing H/W (and $) at the problem made it go away without changing the engineering mindset. If you go back to the answer to my response question you find this is often the solution to get to the current point, that is add more servers, add caching, add read-only data access. This is not actually the solution but is adding complexity to the problem and making it more expensive to correct. In the startup ecosystem this is also known as a successful catastrophe. You reached all of your marketing and sales pitch goals, and your software crumpled under your unplanned success.

Was this problem just in user registration, or was it throughout the entire application? If looking at one common and frequent code path a 500% improvement can be made with 0% feature impact. Would that not indicate the problem exists elsewhere in the codebase. In fact, this example product was not even the classic RAT v CAT that is often a more compounding performance issue.

Further assessment of this one code path demonstrated that when an optimal schema design was architected for the purpose of the application, the number of SQL statements would be reduced to 5 (i.e. a 900% improvement). This is a significant performance and scalability benefit when using applicable architectural design and strategic planning. Performing regular architectural reviews by skilled resources in your business strategy can help to address development productivity regression long before they occur. A great architect never sees the true benefits of their work. It is a silent reward that their given experience, knowledge and expertise has an unknown financial value to an organization.

Lifecycle Management

It can be difficult to understand the impact of code in the full lifecycle of a software product in the 21st century. Until individuals have seen the birth, growth, support, longevity and death of a system it can be impossible to understand the impact some lines of code have with one application and the interoperability requirements with other applications. When the waterfall approach for SDLC was still in active use this was possible with large scale projects over time. In the post tech boom age and with the use of agile methodologies the incremental development lifecycle hides a lot of important context for better assessment of true cost savings.

The introduction and increasing popularity of the devops and site reliability roles also attempts to hide what many large organizations and successful website have, that is a dedicated operations team. Tools have done so much to enable engineers to be more productive. Automated provisioning, PaaS and CI/CD tools seamlessly enable more (abstract) code to be written to provide that essential functionality to the end user. Automated testing has replaced design documents. Organizations developer systems without is a data model? All of these tools and techniques however do not replace the intelligence needed to operate a system over time, particularly for tasks including upgrades and integrations.

One simple concept can be implemented to assist in all contributors owning lifecycle management.

The first is the responsibility of a developer being paged when a production problem occurs due to the line of code they wrote. Being responsible accepting that in the early morning or weekend you may be needed to address a problem attributed to your individual work and a failure within an entire system may make the decision to consider the larger impact more prevalent. This is taking the XP principle of ownership and defining the time dimension to a period infinitely greater than the present iteration.

The following is a great tweet that shows this developer has heard of commenting their code, but not considering lifecycle management?

// When I wrote this, only God and I understood what I was doing
// Now, God only knows

Justifying the reallocation of time

In the 1990s the concept of adding a quality step to software development via means of code reviews and automated testing was seen as an impediment to productivity. This potential cost in lost productivity could not be justified. Why would developers write tests when there is an entire QA team to test new features each time the software is released? Today it is seen as an essential component for continuous integration and delivery and the testing is designed to test all functionality repeatedly, not just new functionality.

Assigning 40% of present development time elsewhere could be viewed as a loss of productivity because today projects do not have a start and end date and deliverables where a total cost of ownership could be more clearly calculated. Today, projects are a continual ongoing evolution, even the concept of cost projection simply does not exist and therefore could be stated as impossible to validate against. After more than a decade of working with startups at many stages of evolution, the cost of not undertaking stability and lifecycle management is a far greater longer term cost to an organization by an outside observer. Look no further than the much larger turnover of technology staff in today’s organizations. These resources have institutional knowledge that is lost to the organization. This information is rarely documented as a historical artifact and the reason why steps were taken cannot be inferred from what is presently the state of the current code (or even reviewing the code revision history). This cost is rarely calculated within the software development lifecycle.

Adopting ownership

Many organizations suffer from the clash of traditional infrastructure principles with the pace of accelerated innovation. This approach helps to better balance the responsibility particularly between engineering and operations departments and improves the workflow to producing better products to the business in the longer term and ultimately to those who matter, the customer.

When developers value the total impact of a line of code in the full lifecycle of the product or service, a different mindset leads to actually writing better code. This code results in being more efficient and the carryover effect is the developer is actually more effective at writing more subsequent code.

Q: Does MySQL support ACID? A: Yes

I was recently asked this question by an experienced academic at the NY Oracle Users Group event I presented at.

Does MySQL support ACID? (ACID is a set of properties essential for a relational database to perform transactions, i.e. a discrete unit of work.)

Yes, MySQL fully supports ACID, that is Atomicity, Consistency, Isolation and Duration. (*)

This is contrary to the first Google response found searching this question which for reference states “The standard table handler for MySQL is not ACID compliant because it doesn’t support consistency, isolation, or durability”.

The question is however not a simple Yes/No because it depends on timing within the MySQL product’s lifecycle and the version/configuration used in deployment. What is also *painfully* necessary is to understand why this question would even be asked of the most popular open source relational database.

MySQL has a unique characteristic of supporting multiple storage engines. These engines enabling varying ways of storing and retrieving data via the SQL interface in MySQL and have varying features for supporting transactions, locking, index strategies, compression etc. The problem is that the default storage engine from version 3.23 (1999) to 5.1 (2010) was MyISAM, a non-transactional engine, and hence the first point of confusion.

The InnoDB storage engine has been included and supported from MySQL 3.23. This is a transactional engine supporting ACID properties. However, not all of the default settings in the various MySQL versions have fully meet all ACID needs, specifically the durability of data. This is the second point of confusion. Overtime other transactional storage engines in MySQL have come and gone. InnoDB has been there since the start so there is no excuse to not write applications to fully support transactions. The custodianship of Oracle Corporation starting in 2010 quickly corrected this *flaw* by ensuring the default storage engine in MySQL 5.5 is InnoDB. But the damage to the ecosystem that uses MySQL, that is many thousands of open source projects, and the resources that work with MySQL has been done. Recently working on a MySQL 5.5 production system in 2016, the default engine was specifically defined in the configuration defined as MyISAM, and some (but not all tables) were defined using MyISAM. This is a further conversation as to why, is this a upgrade problem? Are there legacy dependencies with applications? Are the decision makers and developers simply not aware of the configuration? Or, are developers simply not comfortable with transactions?

Like other anti-reasonable MySQL defaults the unaware administrator or developer could consider MySQL as supporting ACID properties, however until detailed testing with concurrency and error conditions not realize the impact of poor configuration settings.

The damage of having a non-transactional storage engine as the default for over a decade has created a generation of professionals and applications that abuses one of the primary usages of a relational database, that is a transaction, i.e. to product a unit for work that is all or nothing. Popular open source projects such as WordPress, Drupal and hundreds more have for a long time not supported transactions or used InnoDB. Mediawiki was at least one popular open source project that was proactive towards InnoDB and transaction usage. The millions of plugins, products and startups that build on these technologies have the same flaws.

Further confusion arises when an application uses InnoDB tables but does not use transactions, or the application abuses transactions, for example 3 different transactions that should really be 1.

While newer versions of MySQL 5.6 and 5.7 improve default configurations, until these versions a more commonly implemented non-transactional use in a relational database will remain. A recent Effective MySQL NYC Meetup survey showed that installations of version 5.0 still exist, and that few have a policy for a regular upgrade cadence.

Do you control your database outages?

Working with a client last week I noted in my analysis, “The mysql server was restarted on Thursday and so the [updated] my.cnf settings seems current”. This occurred between starting my analysis on Wednesday and delivering my findings on Friday.

# more /var/lib/mysql/ip-104-238-102-213.secureserver.net.err
160609 17:04:43 [Note] /usr/sbin/mysqld: Normal shutdown

The client however stated they did not restart MySQL and would not do that at 5pm which is still a high usage time of the production system. This is unfortunately not an uncommon finding, that a production system had an outage and that the client did not know about it and did not instigate this.

There are several common causes and the “DevOps” mindset for current production systems has made this worse.

  • You have managed hosting and they perform software updates with/without your knowledge. I have for example worked with several Rackspace customers and there would be an outage because Rackspace engineers decided to apply an upgrade at a time that suited them, not their customers.
  • You have chosen automate updates for your Operating System.
  • Your developers update the software when they like.
  • You are using a 3rd party product that is making an arbitrary decision.

In this case the breadcrumbs lead to the last option, that cPanel is performing this operation as hinted by the cPanel specific installed MySQL binaries.

$ rpm -qa | grep -i mysql
cpanel-perl-522-MySQL-Diff-0.43-1.cp1156.x86_64
MySQL55-devel-5.5.50-1.cp1156.x86_64
MySQL55-client-5.5.50-1.cp1156.x86_64
cpanel-perl-522-DBD-mysql-4.033-1.cp1156.x86_64
compat-MySQL50-shared-5.0.96-4.cp1136.x86_64
MySQL55-server-5.5.50-1.cp1156.x86_64
cpanel-mysql-libs-5.1.73-1.cp1156.x86_64
MySQL55-shared-5.5.50-1.cp1156.x86_64
MySQL55-test-5.5.50-1.cp1156.x86_64
compat-MySQL51-shared-5.1.73-1.cp1150.x86_64
cpanel-mysql-5.1.73-1.cp1156.x86_64

Also note that cPanel still uses MySQL 5.1 shared libraries.

So why did cPanel perform not one shutdown, but two in immediate succession? The first was 17 seconds, the second was 2 seconds. Not being experienced with cPanel I cannot offer an answer for this shutdown occurance. I can for others which I will detail later.

160609 17:04:24 [Note] /usr/sbin/mysqld: Normal shutdown
...
160609 17:04:28 [Note] /usr/sbin/mysqld: Shutdown complete
...
160609 17:04:41 [Note] /usr/sbin/mysqld: ready for connections.
...
160609 17:04:43 [Note] /usr/sbin/mysqld: Normal shutdown
...
160609 17:04:45 [Note] /usr/sbin/mysqld: ready for connections.
...

And why did the customer not know about the outage? If you use popular SaaS monitoring solutions such as New Relic and Pingdom you would not have been informed because these products have a sampling time of 60 seconds. I use these products along with Nagios on my personal blog site as they provide adequate instrumentation based on the frequency of usage. I would not recommend these tools as the only tools used in a high volume production system simply because of this one reason. In high volume system you need sampling are much finer granularity.

So just when you were going to justify that 17 seconds while unexpected is tolerable, I want to point out that this subsequently occurred and the outage was over 4 minutes.

160619 11:58:07 [Note] /usr/sbin/mysqld: Normal shutdown
...
160619 12:02:26 mysqld_safe Starting mysqld daemon with databases from /var/lib/mysql
...

An analysis of the MySQL error log which is correctly not rolled as I always recommend showed a pattern of regular MySQL updates, from 5.5.37 thru 5.5.50. This is the most likely reason a 3rd party product has performed a database outage, to perform a software update at their choosing, not yours.

150316  3:54:11 [Note] /usr/sbin/mysqld: ready for connections.
Version: '5.5.37-cll'  socket: '/var/lib/mysql/mysql.sock'  port: 3306  MySQL Community Server (GPL)

150316  3:54:22 [Note] /usr/sbin/mysqld: ready for connections.
Version: '5.5.37-cll'  socket: '/var/lib/mysql/mysql.sock'  port: 3306  MySQL Community Server (GPL)

150316 19:07:31 [Note] /usr/sbin/mysqld: ready for connections.
Version: '5.5.37-cll'  socket: '/var/lib/mysql/mysql.sock'  port: 3306  MySQL Community Server (GPL)

150317  2:05:45 [Note] /usr/sbin/mysqld: ready for connections.
Version: '5.5.40-cll'  socket: '/var/lib/mysql/mysql.sock'  port: 3306  MySQL Community Server (GPL)

150317  2:05:54 [Note] /usr/sbin/mysqld: ready for connections.
Version: '5.5.40-cll'  socket: '/var/lib/mysql/mysql.sock'  port: 3306  MySQL Community Server (GPL)

150319  1:17:26 [Note] /usr/sbin/mysqld: ready for connections.
Version: '5.5.42-cll'  socket: '/var/lib/mysql/mysql.sock'  port: 3306  MySQL Community Server (GPL)

150319  1:17:34 [Note] /usr/sbin/mysqld: ready for connections.
Version: '5.5.42-cll'  socket: '/var/lib/mysql/mysql.sock'  port: 3306  MySQL Community Server (GPL)

150616  1:39:44 [Note] /usr/sbin/mysqld: ready for connections.
Version: '5.5.42-cll'  socket: '/var/lib/mysql/mysql.sock'  port: 3306  MySQL Community Server (GPL)

150616  1:39:52 [Note] /usr/sbin/mysqld: ready for connections.
Version: '5.5.42-cll'  socket: '/var/lib/mysql/mysql.sock'  port: 3306  MySQL Community Server (GPL)

151006  1:01:45 [Note] /usr/sbin/mysqld: ready for connections.
Version: '5.5.45-cll'  socket: '/var/lib/mysql/mysql.sock'  port: 3306  MySQL Community Server (GPL)

151006  1:01:54 [Note] /usr/sbin/mysqld: ready for connections.
Version: '5.5.45-cll'  socket: '/var/lib/mysql/mysql.sock'  port: 3306  MySQL Community Server (GPL)

151027  1:21:12 [Note] /usr/sbin/mysqld: ready for connections.
Version: '5.5.46-cll'  socket: '/var/lib/mysql/mysql.sock'  port: 3306  MySQL Community Server (GPL)

160105  1:31:35 [Note] /usr/sbin/mysqld: ready for connections.
Version: '5.5.47-cll'  socket: '/var/lib/mysql/mysql.sock'  port: 3306  MySQL Community Server (GPL)

160211  1:52:47 [Note] /usr/sbin/mysqld: ready for connections.
Version: '5.5.48-cll'  socket: '/var/lib/mysql/mysql.sock'  port: 3306  MySQL Community Server (GPL)

160211  1:52:55 [Note] /usr/sbin/mysqld: ready for connections.
Version: '5.5.48-cll'  socket: '/var/lib/mysql/mysql.sock'  port: 3306  MySQL Community Server (GPL)

160503  1:14:59 [Note] /usr/sbin/mysqld: ready for connections.
Version: '5.5.49-cll'  socket: '/var/lib/mysql/mysql.sock'  port: 3306  MySQL Community Server (GPL)

160503  1:15:03 [Note] /usr/sbin/mysqld: ready for connections.
Version: '5.5.49-cll'  socket: '/var/lib/mysql/mysql.sock'  port: 3306  MySQL Community Server (GPL)

160521 18:46:24 [Note] /usr/sbin/mysqld: ready for connections.
Version: '5.5.49-cll'  socket: '/var/lib/mysql/mysql.sock'  port: 3306  MySQL Community Server (GPL)

160522 11:51:45 [Note] /usr/sbin/mysqld: ready for connections.
Version: '5.5.49-cll'  socket: '/var/lib/mysql/mysql.sock'  port: 3306  MySQL Community Server (GPL)

160529 15:26:41 [Note] /usr/sbin/mysqld: ready for connections.
Version: '5.5.49-cll'  socket: '/var/lib/mysql/mysql.sock'  port: 3306  MySQL Community Server (GPL)

160529 15:30:12 [Note] /usr/sbin/mysqld: ready for connections.
Version: '5.5.49-cll'  socket: '/var/lib/mysql/mysql.sock'  port: 3306  MySQL Community Server (GPL)

160604 23:29:15 [Note] /usr/sbin/mysqld: ready for connections.
Version: '5.5.49-cll'  socket: '/var/lib/mysql/mysql.sock'  port: 3306  MySQL Community Server (GPL)

160609 17:04:41 [Note] /usr/sbin/mysqld: ready for connections.
Version: '5.5.50-cll'  socket: '/var/lib/mysql/mysql.sock'  port: 3306  MySQL Community Server (GPL)

160609 17:04:45 [Note] /usr/sbin/mysqld: ready for connections.
Version: '5.5.50-cll'  socket: '/var/lib/mysql/mysql.sock'  port: 3306  MySQL Community Server (GPL)

160619 12:21:58 [Note] /usr/sbin/mysqld: ready for connections.
Version: '5.5.50-cll'  socket: '/var/lib/mysql/mysql.sock'  port: 0  MySQL Community Server (GPL)

What is intriguing from this analysis is that several versions were skipped including .38, .39, .41, .43, .44. One may ask the question why?

For Clients

This leads to several questions of the strategy used in your organization for controlling outages of your MySQL infrastructure for upgrades or for other reasons.

  • What is an acceptable outage time?
  • What is the acceptable maintenance window to perform outages?
  • What is your release cadence for MySQL upgrades?
  • Who or what performs updates?
  • Can your monitoring detect small outages?

You should also consider in your business strategy having a highly available (HA) MySQL infrastructure to avoid any outage, or application intelligence to support varying levels of data access as I describe in Successful MySQL Scalability Principles.

Understanding the MySQL Release Cadence

At the recent New York Oracle Users Group summer general meeting I gave a presentation to the Oracle community on the MySQL product release cycle. Details included:

  • Identifying the server product options covering community, enterprise and ecosystem.
  • Describe MySQL enterprise products, features and support options.
  • Describing the DMR, RC, GA, EOL and labs product lifecycle.
  • Discussing the GA release frequency.
  • Talking about the MySQL Upgrade path.

Utilizing OpenStack Trove DBaaS for deployment management

Trove is used for self service provisioning and lifecycle management for relational and non-relational databases in an OpenStack cloud. Trove provides a RESTful API interface that is same regardless of the type of database. CLI tools and a web UI via Horizon are also provided wrapping Trove API requests.

In simple terms. You are a MySQL shop. You run a replication environment with daily backups and failover capabilities which you test and verify regularly. You have defined DBA and user credentials ACL’s across dev, test and prod environments. Now there is a request for using MongoDB or Cassandra, the engineering department has not decided but they want to evaluate the capabilities. How long as a operator does it take to acquire the software, install, configure, setup replication, backups, ACLs and enable the engineering department to evaluate the products?

With Trove DBaaS this complexity is eliminated due to a consistent interface to perform the provisioning, configuration, HA, B&R, ACL across other products the exact same way you perform these tasks for MySQL. This enables operations to be very proactive to changing technology requests supporting digital transformation strategies.

Enabling this capability is not an automatic approval of a new technology stack. It is important that strategic planning, support and management is included in the business strategy to understanding the DBaaS capability for your organization. Examples of operations due diligence would include how to integrate these products into your monitoring, logging and alerting systems. Determine what additional disk storage requirements may be needed. Test, verify and time recovery strategies.

Trove specifically leverages several other OpenStack services for source image and instance management. Each trove guest image includes a base operating system, the applicable database software and a database technology specific trove guest agent. This agent is the intelligence that knows the specific syntax and version needs to perform the tasks. The agent is also the communication mechanism between Trove and the running nova instance.

Trove is a total solution manager for the instance running your chosen database. Instances have no ssh, telnet or other general access. The only access is via the SQL communication via the defined ports, e.g. 3306 for MySQL.

The Trove lifecycle management covers the provisioning, management, security, configuration and tuning of your database. Amrith Kumar in a recent presentation at the NYC Postgres meetup provides a good description of the specifics.

Trove is capable of describing and supporting clustering and replication topologies for the various data stores. It can support backup and restore, failover and resizing of clusters without the operator needing to know the specific syntax of complexities of a database product they are unfamiliar with.

A great example is the subtle difference in MySQL replication management using GTID’s between MySQL and MariaDb. To the developer, the interaction between MySQL and MariaDB via SQL is the same, the management of a replication topology is not identical, but is managed by the Trove guest agent. To the operator, the management is the same.

Also in his presentation, Kumar described Tesora, an enterprise class Trove service provided with a number of important additional features. Tesora supports additional database products including Oracle and DB2Express as well as commercial versions for Oracle MySQL, EnterpriseDB, Couchbase, Datastax, and mongoDB. Using the Horizon UI customizations with pre-defined trove instances greatly reduces the work needed for operators and deployers to build there own.

Are you a responsible developer?

What is a good example of individual developer responsibility? Here is just one example.

A developer downloads a copy of the core production database to their own development laptop. Why? Because it’s easy to work with real data, and it’s hard to consider building applicable test data that all engineers can utilize.

What could be wrong with this approach? Here are a few additional points.

  • Security. Should the developer accidentally leave their laptop on that 90 minute train commute each way daily, could that data end up with a result of negative publicity for the organization. For employees that work at more sensitive organization is theft a possibility? Or, does that employee become disgruntled by lack of management and with poor ethical values take the names, emails, addresses and purchase history of your customers so it can be used for other means.
  • Data Clensing. This includes removing pay rate information of employees of the company that developers should never have access to. It is about obfuscating email address of millions of customers so that test code to improve receipt generate doesn’t accidentally email 1,000 existing customers with a repeat receipt that now contains invalid data. It is about providing a subset of information that is applicable and relevant.
  • Testing philosophy. Testing is all about trying to break your software, not testing that one small feature works in the likely path of use. It is easy to unit test the developer change for editing a customer profile to add a emergency contact field. It is right to consider the lifecycle of customer data. Is it knowing you need to consider the full workflow and the multiple paths to creating and editing a customer profile that causes the responsibility of the organization’s need to be consistent for the entire experience, not just one singular perspective . In simple terms it is about functionality testing at the time of development, not the narrow view of unit testing and that other detailed testing is somebody else’s responsibility.
  • Time. How long did it take to download the 10G dataset and import it? How much of that data is really needed. Does five years of historical products and orders ensure adequate unit and functional testing. Sure it is easy to have the available disk space however what efficiency improvements could exist for a data set 20x smaller. If it took five minutes to reset the test data for development instead of one hour would a developer refresh more often?

Before considering the means to meet an immediate problem such as this one example, stop, think, and act about improving the process for benefit of all technical resources. This is what sets apart an engineer that is just a coder and a software developer.

It is unfortunate that engineering managers are not constantly focussed on process and productivity improvements for sustaining software for the entire lifecycle of a product. The reality is many have worked as developers without applicable mentoring and management and an entire generation of software developers are now influencing the next generation. Historically, the rigidness of the traditional waterfall approach to the software development lifecycle instills a number of key principles that agile only environments have not fostered or understood.

Understanding the DBaaS capability for your organization

As your organization transforms to embrace the wealth of digital information that is becoming available, the capability to store, manage and consume this data in any given format or product becomes an increasing burden for operations.

How does your organization handle the request, “I need to use product Z to store data for my new project?” There are several responses I have experienced first-hand with clients.

  1. Enforce the company policy that Products O and S are all that can be used.
  2. Ignore the request.
  3. Consider the request, but antagonize your own internal organization with long wait times (e.g. months or years) and with repeated delays to evaluate a product you simply do not want to support.
  4. Do whatever the developers say, they know best.

Unfortunately I have seen too many organizations use the first three options as the answer. The last option you make consider as a non valid answer however I have also seen this prevalent when there is no operations team or strategic technical oversight.

Ignorance of the question only leads to a greater pressure point at a later time. This may be when your executive team now enforces the requirement with their timetable. I have seen this happen and with painful ramifications. With the ability to consume public cloud resources with only access to a credit card, development resources can now proceed unchecked more easily if ignored or delayed. When a successful proof of concept is produced this way and now a more urgent need is required to deploy, support and manage, the opportunity to have a positive impact on the design decision of a new data product has passed.

Using DBaaS is one enabling tool within a strategic business model for your organization to satisfy this question with greater control. This however is not the solution but rather one tool combined with applicable processes. In order to scope the requirements for the original question, your model also needs to consider the following:

  • Provisioning capabilities
  • Strategic planning and insight
  • Support and management
  • Release criteria

Provisioning

This is the strength of DBaaS. Operations can enable development to independently provision resources and technology with little additional impeding dependency. There is input from operations to enable varying products to be available by self servicing, however there is also some control. DBaaS can be viewed as a controlled and flexible enabler. A specific example is an organization that uses the MySQL relational database, and now a developer wishes to use the MongoDB NoSQL unstructured store. An operator may cringe at the notion of a lack of data consistency, structure data query access or performance capabilities. These are all valid points, however those are discussions at a strategic level discussion your workflow pipeline and should not be an impediment to iterate quickly. Without oversight, to iterate quickly can lead to unmanageable outcomes.

Strategic Planning

There always needs to be oversight combined with applicable strategy. A single developer stating they want to use the new product Z for a distribution key/value store needs to be vetted first within the engineering organization and its own developer peers. If another project is already using Product Y that has the same core data access and features, this burden of an additional product support should be a self contained discussion validating the need first.

This is one strength of a good engineering manager that balances the requirements of the business needs and objectives with the capabilities of the resources available, including staff, tools and technology. Applicable principles put in place should also ensure that some aspect of planning is instilled into the development culture.

Support and Management

The development and engineering resources rarely consider the administration and support required for the suite of products and services used in an organization. The emphasis is on feature development and customer requirements, not the sustainability, longevity and security of any system. Operational support is a long list of needs, just a few include:

  • Information security.
  • Information availability.
  • Service level agreements (SLAs) between partners, service providers and the internal organization
  • The backup ecosystem, time taken, consistency, point-in-time recovery, testing and verification, cost of H/W, S/W, licenses.
  • Internet connectivity.
  • Capacity planning and cost analysis of storing and archiving ever increasing sources of data.
  • Hardware and software upgrades.

Two way communication which is often overlooked is the start of better understanding. That is, operations being included and involved in strategic development planning, and engineering resources included in operations needs and requirements for ensuring those new product features operate for the benefit of customers. In summary, “bridging the communication chasm”.

DevOps is an abused term, this implies that developers now perform a subset of responsibilities of Operations. As an individual that has worked in both development teams and lead operations teams, your resources skills, personality, rational thinking and decision making needs are vastly different between an engineering task and a production operations task.

Developers need to live a 24 hour day (with the unnecessary 3am emergency call) in the shoes of an operator. The reverse is also true, however the ramifications to business continuity are not the same. Just one factor, the cost, or more specifically the loss to the business due to a production failure alters the decision making process. Failure can be anything from a hardware or connectivity problem, bad code that was released to a data breach.

Release Criteria

If an organization has a strong (and flexible) policy on release criteria, all parties from the stack-holder, executive, engineering, operations and marketing should be able to contribute to the discussion and decision for a new product, and applicable in-house or third-party support. This discussion is not a pre-requisite for any department or developer to iterate quickly, however it is pre-requisite to migrate from a proof-of-concept prototype to a supported feature. Another often overlooked criteria in the pursuit for rapid deployment of new features which are significantly more difficult to remove after publication.

Expired MySQL passwords

I was surprised to find on one of my websites the message “Connect failed: Your password has expired. To log in you must change it using a client that supports expired passwords.

Not knowing that I was using a MySQL password expiry policy I reviewed the 5.7 documentation quickly which *clearly* states “The default default_password_lifetime value is 0, which disables automatic password expiration.”.

I then proceeded to investigate further, my steps are below the following comment.

However, it is always important with MySQL documentation and a new feature (in this case a 5.7 feature) to review release notes when installing versions or to least read ALL the documentation, because you may miss important information, such as.

Note:
From MySQL 5.7.4 to 5.7.10, the default default_password_lifetime value is 360 (passwords must be changed approximately once per year). For those versions, be aware that, if you make no changes to the default_password_lifetime variable or to individual user accounts, all user passwords will expire after 360 days, and all user accounts will start running in restricted mode when this happens. Clients…

I would encourage you to view the MySQL password expiry policy to see the full note. I have only include the intro here are a teaser, because you need to read the entire note.

Analysis

Back to impatient analysis steps.

$ mysql -u admin -p 
*********

SELECT VERSION();
+-----------+
| VERSION() |
+-----------+
| 5.7.9-log |
+-----------+

SHOW GLOBAL VARIABLES LIKE 'default_p%';
+---------------------------+-------+
| Variable_name             | Value |
+---------------------------+-------+
| default_password_lifetime | 360   |
+---------------------------+-------+


SELECT host,user,password_last_changed 
FROM mysql.user
WHERE password_last_changed + INTERVAL @@default_password_lifetime DAY < CURDATE();
+-----------+--------------+-----------------------+
| host      | user         | password_last_changed |
+-----------+--------------+-----------------------+
| localhost | XXX          | 2014-12-01 12:53:36   |
| localhost | XXXXX        | 2014-12-01 12:54:04   |
| localhost | XX_XXXX      | 2015-06-04 11:01:11   |
+-----------+--------------+-----------------------+

Indeed there are some passwords that have expired.

After finding the applicable application credentials I looked at verifying the problem.

$ mysql -uXX_XXXX -p
*******************
Enter password: 
Welcome to the MySQL monitor.  Commands end with ; or \g.
Server version: 5.7.9-log

mysql>

Interesting, there was no error to make a client connection, however.

mysql> use XXXX;
ERROR 1820 (HY000): You must reset your password using ALTER USER statement before executing this statement.

I then proceeded to change the password with the applicable hint shown.

ALTER USER XX_XXXX@localhost IDENTIFIED BY '*************************';

I chose to reuse the same password because changing the password would require a subsequent code change. MySQL accepted the same password. (A topic for a separate discussion on this point).

A manual verification showed the application and users operating as it should be, so immediate loss of data was averted. Monitoring of the sites home page however did not detect this problem of a partial page error, so should a password expiry policy be used, an applicable check in a regularly scheduled operational task is a good feature request.

All of this could have been avoided if my analysis started with reading the documentation and the note (partly shown above) which has an alternative and potentially more practical immediate solution.

In a firefighting operational mode it can be a priority to correct the problem, however more detailed analysis is prudent to maintain a "Being proactive rather than reactive" mindset. Being a Friday, I feel the old saying "There is more than one way to skin a cat" is applicable.

I am also more familiar with the SET PASSWORD syntax, so reviewing this 5.7 manual page is also a good read to determine what specific syntax is now deprecated and what "ALTER USER is now the preferred statement for assigning passwords" also.

Digital transformation strategies

“The cosmos is complex, the cloud does not have to be”.

This quote by Ben Amaba, Worldwide Executive at IBM Cloud, early in his presentation at the Performance without Limits 3.0 on IBM Cloud event was his introduction to what I interpreted as stepping back from “what do I do with the cloud?” to consider “what makes my business successful?”. Indeed “the cloud”, i.e., Infrastructure as a Service (IaaS), should not be the complicated component in your business strategy.

The realization is that today, digital information exists and its growth is accelerating exponentially. Any strategy to embrace this need is essential to maintaining business success. This implies that to achieve transformation, your business has to include using available and potentially un-thought-of digital information to innovate and personalize. The present traditional approach towards provisioning resources and services simply cannot meet this need. Hence the adoption of “utilizing the cloud” is becoming the ubiquitous answer.

The business model that one develops for maximizing this infrastructure-on-demand needs to be a provable, reproducible, resilient and a flexible reference architecture. It needs to have set principles to embrace the potential of the cloud. It needs to minimize the potential of failure.

Amaba talked about having three guiding principles in his presentation. These are:

  1. Hybrid
  2. Discipline
  3. Analytical

As we consider digital transformation strategies, just understanding the potential capability of a hybrid structure is required. This will vary from organization and industry and will rely on a balance of private and public cloud services. Locking your organization into an all public cloud solution (e.g. AWS), or an all private cloud solution (e.g. all VMWare) limits your capacity to adapt.

Implementing an on-premise cloud infrastructure that leverages OpenStack to replace existing propriety off-premise cloud providers such as AWS, Azure and Google Cloud is not the ROI you should hope for. Indeed a hybrid private/public strategy with the capacity to enable greater access to applicable and real-time data and tools, providing the ability for your employees, associated researchers, strategic partners and even individuals via a foldit gamification type approach all increase the innovative transformation that can ensure your company is the disruptor, not the disrupted.

Let’s consider a theoretical example when a hybrid cloud strategy enables the capacity for innovation to occur in record time. CERN announces the release of 300TB of LDR data. If this was released into one specific cloud infrastructure, could your organization support that? For example, if this was the SoftLayer cloud infrastructure, leveraging the compute resources of this cloud provider would be beneficial to your internal organization because one feature of this cloud is that it includes free data transfer across the entire worldwide network. This one feature on a specific cloud has an immediate cost-benefit.

Not being capable of expanding your organizations authentication, intellectual property analysis engines, and tools to quickly and seamlessly cater for the data could also be a competitive disadvantage. Amaba noted that 1/3 of top companies will face disruption in the next few years. Disruption is not limited to a competitor, a customer or a supplier. It can include the lack of ability to adapt timely to opportunity. Is being able to utilize any public cloud rather than one specific public cloud included in your business process? Could your internal global infrastructure and network support an additional 300TB of data immediately? While this is a specific use case, the availability of data and the ability for your organization’s employees to consume, digest and analyze is a digital strategy you need to be prepared for to compete in speed and innovation within your industry. Is the source of new data for your organization an opportunity or a problem?

The discussion of whata hybrid cloud is and how does my organization cater for and uses a hybrid cloud is the reason that thought leadership is needed. To understand the enterprise architecture of legacy systems, the capacity of new cloud-native applications and the huge divide in transition between these to enable utilization of existing data-wealth must also be part of your transformation strategy.

Amaba’s presentation also included discussing the discipline of needing to ensure and provide consistency. This ranges from the varying views of information to your consumers to the choices for workload assignment and access. Analytics was the third principle that encompassed the capability to determine insights, from using big data analysis to cognitive computing.

These thoughts are a reflection on the few notes taken at the time. I am really looking forward to seeing the slides and video presentation to fully reflect and comment in more detail.

Understanding the Oslo Libraries

Underpinning all of the OpenStack projects including Nova, Cinder, Keystone, Glance, Horizon, Heat, Trove, Murano and others is a set of core common libraries that provide a consistent, highly tested and compatible feature set. The Oslo project is a collection of over 30 libraries that are designed to reduce the technical debt of code duplication across projects and provide for a greater quality code path due to the frequency of use in OpenStack projects.

These libraries provide a variety of different features from the more commonly used functionality found in projects including configuration, logging, caching, messaging and database management to more specific features like deprecation management, handling plugins as well as frameworks for command line programs and state machines. The Oslo Python libraries are designed to be Python 2.7 and Python 3.4 compatible, leading the way in migration towards Python 3.

The first stable Oslo library oslo.config was included in the Grizzly release. Now over 30 libraries comprise the Oslo project. These libraries fall into a number of broad categories.

1. Stable OpenStack specific libraries

These libraries, using the olso. prefix are generally well described the library name.

  • oslo.cache
  • oslo.concurrency
  • oslo.context
  • oslo.config
  • oslo.db
  • oslo.i18n
  • oslo.log
  • oslo.messaging
  • oslo.middleware
  • oslo.policy
  • oslo.privsep
  • oslo.reports
  • oslo.serialization
  • oslo.service
  • oslo.utils
  • oslo.versionedobjects
  • oslo.vmware

2. Python libraries that can easily operate with other projects

In addition to the oslo namespace libraries, Oslo has a number of generically named libraries that are not OpenStack specific. The goal is that these libraries can be utilized outside of OpenStack by any Python project. These include:

  • automaton – a framework for building state machines.
  • cliff – a framework for building command line programs.
  • debtcollector – a collection of python patterns that help you collect your technical debt in a non-destructive manner (following deprecation patterns and strategies and so-on).
  • futurist – a collection of async functionality and additions from the future.
  • osprofiler – an OpenStack cross-project profiling library.
  • hacking – a library that provides a set of tools for enforcing coding style guidelines.
  • pbr – (or Python Build Reasonableness) is a add-on library that helps provide (and enforce) a set of sensible default setuptools behaviours.
  • pyCADF – a python implementation of the DMTF Cloud Audit (CADF) data model.
  • stevedore – a library for managing plugins for Python applications.
  • taskflow – a library that helps create applications that handle state/failures… in a reasonable manner.
  • tooz – a library that aims at centralizing the most common distributed primitives like group membership protocol, lock service and leader election

3. Convenience libraries

There are also several libraries that are used during the creation of, or support of OpenStack libraries.

The first was oslo-incubator where as the name suggests, initial libraries were incubated. As this code matured it was refactored into standard libraries. Projects have either graduated, been incorporated elsewhere or been deprecated. While the Oslo Incubator has been removed of libraries in Mitaka, one of the goals of the Newton cycle is to see the adoption of Oslo libraries in all projects. We will be providing a series of blogs to detail the walkthrough and reviews of existing projects for reference.

Other libraries include:

  • oslosphinx is a sphinx add-on library that provides theme and extension support for generating documentation with Sphinx. The Developer Documentation, Release Notes, a number of the OpenStack manuals including the Configuration Reference and now the Nova API Reference rely on this library.

  • oslotest is a helper library that provides base classes and fixtures for creating unit and functional tests.
  • oslo-cookiecutter is a project that creates a skeleton Oslo library from a set of templates.

4. Proposed or deprecated libraries

Some libraries fall outside of these categories, such as oslo.rootwrap. This was a mature library for handling fine filtering of shell commands to run as root. This is now deprecated in favor of oslo.privsep which is a mechanism for running selected python code with elevated privileges.

pylockfile is a legacy (and adopted) inter-process lock management library that was never used within OpenStack.

The oslo.version is an example of a proposed library at present to help in using python metadata to determine versioning.

The Oslo team is also evaluating what other common code may be suitable for an Oslo library.

The meaning behind the Oslo Name

Each OpenStack project has some reason behind the name. Oslo is in reference to the Oslo Peace Accords and “bringing peace” to the OpenStack project.

Oslo is also the capital of Norway, and in Norway you can find Moose. The moose is our project mascot.

are you running KVM or QEMU launched instances?

A recent operators mailing list thread asked this question regarding the OpenStack user survey results of April 2016 (See page 39).

As I verified my own local multi-node devstack dedicated H/W environment with varying commands, I initially came across the following error (which later was found to be misleading).

$ virt-host-validate
  QEMU: Checking for hardware virtualization                                 : PASS
  QEMU: Checking for device /dev/kvm                                         : FAIL (Check that the 'kvm-intel' or 'kvm-amd' modules are loaded & the BIOS has enabled virtualization)
  QEMU: Checking for device /dev/vhost-net                                   : WARN (Load the 'vhost_net' module to improve performance of virtio networking)
  QEMU: Checking for device /dev/net/tun                                     : PASS
   LXC: Checking for Linux >= 2.6.26                                         : PASS

This is an attempt to collate a list of varying commands collected from various sources, and the output of these in my Ubuntu 14.04 LTS environment.

# Are you running 64-bit architecture (0=bad; >0 is good)
$ egrep -c ' lm ' /proc/cpuinfo
8

# Does your processor support hardware virtualization (0=bad; >0 is good)
$ egrep -c '^flags.*(vmx|svm)' /proc/cpuinfo
8

# Are you running a 64-bit OS
$ uname -m
x86_64

# Have I installed the right Ubuntu packages
$ dpkg -l | egrep '(libvirt-bin|kvm|ubuntu-vm-builder|bridge-utils)'
ii  bridge-utils                        1.5-6ubuntu2                          amd64        Utilities for configuring the Linux Ethernet bridge
ii  libvirt-bin                         1.2.2-0ubuntu13.1.17                  amd64        programs for the libvirt library
ii  qemu-kvm                            2.0.0+dfsg-2ubuntu1.24                amd64        QEMU Full virtualization

# Have packages configured user privileges
$ grep libvirt /etc/passwd /etc/group
/etc/passwd:libvirt-qemu:x:108:115:Libvirt Qemu,,,:/var/lib/libvirt:/bin/false
/etc/passwd:libvirt-dnsmasq:x:109:116:Libvirt Dnsmasq,,,:/var/lib/libvirt/dnsmasq:/bin/false
/etc/group:libvirtd:x:116:rbradfor,stack

# Have I configured QEMU to use KVM
$ cat /etc/modprobe.d/qemu-system-x86.conf
options kvm_intel nested=1

# Have I loaded the KVM kernel modules
$ lsmod | grep kvm
kvm_intel             143630  3 
kvm                   456274  1 kvm_intel

# Are there any KVM related system messages
$ dmesg | grep kvm
[ 2030.719215] kvm: zapping shadow pages for mmio generation wraparound
[ 2032.454780] kvm [6817]: vcpu0 disabled perfctr wrmsr: 0xc1 data 0xabcd

# Can I use KVM?
$ kvm-ok
INFO: /dev/kvm exists
KVM acceleration can be used

# Can I find a KVM device
$ ls -l /dev/kvm
crw-rw---- 1 root kvm 10, 232 May 11 14:15 /dev/kvm

# Have I configured nested KVM 
$ cat /sys/module/kvm_intel/parameters/nested
Y

All of the above is the default output of a stock Ubuntu 14.04 install on my H/W, and with the correctly configured Bios (which requires a hard reboot to verify, and a camera to record the proof).

Some more analysis when changing the Bios.

$ sudo kvm-ok
INFO: /dev/kvm does not exist
HINT:   sudo modprobe kvm_intel
INFO: Your CPU supports KVM extensions
INFO: KVM (vmx) is disabled by your BIOS
HINT: Enter your BIOS setup and enable Virtualization Technology (VT),
      and then hard poweroff/poweron your system
KVM acceleration can NOT be used

When running a VirtualBox VM, the following is found.

$ sudo kvm-ok
INFO: Your CPU does not support KVM extensions
KVM acceleration can NOT be used

Now checking my OpenStack installation for related KVM needs.

# Have I configured Nova to use KVM virtualization
$ grep virt_type /etc/nova/nova.conf
virt_type = kvm

# Checking hypervisor type via API's
$ curl -s -H "X-Auth-Token: ${OS_TOKEN}" ${COMPUTE_API}/os-hypervisors/detail | $FORMAT_JSON | grep hypervisor_type
            "hypervisor_type": "QEMU",
            "hypervisor_type": "QEMU",

# Checking hypervisor type via OpenStack Client
$ openstack hypervisor show -f json 1 | grep hypervisor_type
  "hypervisor_type": "QEMU"

Devstack by default has configured libvirt to use kvm.

Spinning up an instance I ran the following additional checks.


# List running instances
$ virsh -c qemu:///system list
 Id    Name                           State
----------------------------------------------------
 2     instance-00000001              running

# Check processlist for KVM usage
$ ps -ef | grep -i qemu | grep accel=kvm
libvirt+ 19093     1 21 16:24 ?        00:00:03 qemu-system-x86_64 -enable-kvm -name instance-00000001 -S -machine pc-i440fx-trusty,accel=kvm,usb=off...

Information from the running VM in my environment.

$ ssh [email protected]

$ egrep -c ' lm ' /proc/cpuinfo
1

$ egrep -c '^flags.*(vmx|svm)' /proc/cpuinfo
1

$ uname -m
x86_64


$ cat /proc/cpuinfo
processor	: 0
vendor_id	: GenuineIntel
cpu family	: 6
model		: 6
model name	: QEMU Virtual CPU version 2.0.0
...

So, while the topic of the ML thread does indeed cover the confusion over OpenStack reporting the hypervisor type as QEMU when infact it does seem so but is enabling KVM via my analysis. I find the original question as a valid problem to operators.

And finally, this exercise while a lesson in understanding a little more about hypervisor and commands available, the original data was simply an operator error where sudo was needed (and not for other commands).

$ sudo  virt-host-validate
  QEMU: Checking for hardware virtualization                                 : PASS
  QEMU: Checking for device /dev/kvm                                         : PASS
  QEMU: Checking for device /dev/vhost-net                                   : PASS
  QEMU: Checking for device /dev/net/tun                                     : PASS
   LXC: Checking for Linux >= 2.6.26                                         : PASS

References

Using your devstack cloud

You have setup and installed devstack. Now what!

The Horizon UI will allow you to administer your running cloud from a web interface. We are not going to discuss the web UI in this post.

Using the command line will provide you access to the following initial developer/operator capabilities.

  • Duplicating the features of the UI with the client tools
  • Observing the running services
  • Understanding the logging of OpenStack services
  • Understanding the configuration of OpenStack services
  • Understanding the source code of OpenStack services

This is not an exhaustive list or explanation of each point but an intro into navigating around the running OpenStack services.

Duplicating UI features

OpenStack has a number of individual command line clients for many services, and a common client openstack.

To get started:

$ openstack user list
Missing parameter(s): 
Set a username with --os-username, OS_USERNAME, or auth.username
Set an authentication URL, with --os-auth-url, OS_AUTH_URL or auth.auth_url
Set a scope, such as a project or domain, set a project scope with --os-project-name, OS_PROJECT_NAME or auth.project_name, set a domain scope with --os-domain-name, OS_DOMAIN_NAME or auth.domain_name

By default you will need to provide applicable authentication details via arguments or environment variables.
Using the output of the devstack setup, we can obtain applicable details needed for most parameters.

$ ./stack.sh
...
...
...
This is your host IP address: 192.168.56.101
This is your host IPv6 address: ::1
Horizon is now available at http://192.168.56.101/dashboard
Keystone is serving at http://192.168.56.101:5000/
The default users are: admin and demo
The password: passwd

We can now retrieve a summary list of users defined in your project with:

$ openstack --os-username=admin --os-password=passwd --os-auth-url=http://192.168.56.101:5000/ --os-project-name=demo user list
+----------------------------------+----------+
| ID                               | Name     |
+----------------------------------+----------+
| a531ea1011af43bb8277f3e5edfea34b | admin    |
| d6ce303e83b64a2998228c55ebd274c3 | demo     |
| fe7301aa4d2b44b482cd6ba19c24f6b8 | alt_demo |
| e18ae48148df4593b4067785c5e72820 | nova     |
| 9a49deabb7b64454abf411de87c2862c | glance   |
| 1315257f265740f8a32988b014c9e693 | cinder   |
+----------------------------------+----------+

One parameter that is required but no information was available in the devstack installation output was project. There are a number of projects defined in the installation which you can obtain with:

$ openstack --os-username=admin --os-password=passwd --os-auth-url=http://192.168.56.101:5000/ --os-project-name=admin project list
+----------------------------------+--------------------+
| ID                               | Name               |
+----------------------------------+--------------------+
| 3b9f48af38ac40a495ca7b22d4d5c036 | demo               |
| 42c574962a114974bfe35e4a3467df60 | service            |
| 7af69c571e764d5f99688ed2e59930d5 | alt_demo           |
| 893b8954952c4319abd6596b587bba5f | admin              |
| da71fdc9c88f4eddac38937dfef542a2 | invisible_to_admin |
+----------------------------------+--------------------+

By defining authentication with environment variables you can easily simply CLI command usage. For example:

$ export OS_USERNAME=admin
$ export OS_PASSWORD=passwd
$ export OS_AUTH_URL=http://192.168.56.101:5000/
$ export OS_PROJECT_NAME=demo
$ openstack user list
...

devstack pre-packages a few source files that enable you to avoid specifying these arguments or environment variables manually. For example to duplicate this example:

$ source accrc/admin/demo
$ openstack user list

The openstack command provides a --help option to list the available options. You can also inquire as to commands with the command list option.

$ openstack --help
$ openstack command list

With the openstack command line interface you can perform all the operations needed to configure, administer and run your cloud services.

Observing the running services

OpenStack is made up of a number of services, those key services in devstack start with nova, keystone, glance, cinder and horizon. devstack conveniently packages the individual running services into separate screen processes, leveraging a cursors based view of services via the output of log files.

You can view the running screen sessions by reattaching with.

$ screen -r

If you get the following error when attempting to reattach “Cannot open your terminal ‘/dev/pts/0′ – please check.”, you have likely tried reconnecting in a different shell session. You can address this with:

$ script /dev/null
$ screen -r

Commands in screen are driven by a key combination starting with ^a (ctrl-A). ^a d will detach from your screen session you just reattached to. This is what gets you out of screen. See the later section for the full list screen help commands.

On the command line you can run the following command to list the available images via the glance service.

$ openstack image list
+--------------------------------------+---------------------------------+--------+
| ID                                   | Name                            | Status |
+--------------------------------------+---------------------------------+--------+
| 864bad45-d0de-4031-aea6-80b6af72cf2a | cirros-0.3.4-x86_64-uec         | active |
| 75e8b1ef-ae84-41aa-b0a0-7ea785771f14 | cirros-0.3.4-x86_64-uec-ramdisk | active |
| f694bdb1-4bb0-4f18-a7c9-290ad26b1fc8 | cirros-0.3.4-x86_64-uec-kernel  | active |
+--------------------------------------+---------------------------------+--------+

Within screen you can look at the glance api screen log (^a 5) and can observe the logging that occurs in relation to this command. For example we can see an INFO message to get the images (GET /v2/images), and we can see several DEBUG messages. We will use these DEBUG messages in a later post to describe handling logging output.

The INFO message will look like:

2016-04-04 16:24:00.139 INFO eventlet.wsgi.server [req-acf98429-60de-4d18-a69c-36a7d80bed7c a531ea1011af43bb8277f3e5edfea34b 3b9f48af38ac40a495ca7b22d4d5c036] 192.168.1.60 - - [04/Apr/2016 16:24:00] "GET /v2/images HTTP/1.1" 200 2202 0.116774

While we will discuss logging formats in another post, the standard format (in devstack) includes:

  • Date/Time
  • Logging Level
  • Package
  • Request context. this is made up of
    • req-acf98429-60de-4d18-a69c-36a7d80bed7c a request-id, useful for grouping logging records
    • a531ea1011af43bb8277f3e5edfea34b refers to the user id (as seen in user list above, i.e. admin)
    • 3b9f48af38ac40a495ca7b22d4d5c036 refers to the project id (as seen in the project list above, i.e. demo)
  • The actual log message
In order to page back in screen output, you enter copy mode “^a [” and then you can use ^b (page back) and ^f (page forward) keys.

Understanding the logging of OpenStack services

What is actually observed in the screen output is what is being logged for the Glance API service. We can verify this with the log file logged in /opt/stack/logs.

$ tail -f /opt/stack/logs/g-api.log

NOTE: You may see that there are colors within both the screen and log output. This is an optional configuration setup used by devstack (not an OpenStack default for logging). We will use this later to show a change in the logging of the service.

We can verify the details of the command used within the screen session (^a 5) by killing the running process with ^c.

Using the bash history, you can up arrow to observe the last running command, and restart this.

/usr/local/bin/glance-api --config-file=/etc/glance/glance-api.conf & echo $! >/opt/stack/status/stack/g-api.pid; fg || echo "g-api failed to start" | tee "/opt/stack/status/stack/g-api.failure"

The actual log file is produced by the screen configuration defined in devstack/stack-screenrc.

screen -t g-api bash
"tuff "/usr/local/bin/glance-api --config-file=/etc/glance/glance-api.conf
logfile /opt/stack/logs/g-api.log.2016-04-04-110956
log on

In a running OpenStack environment you would configure logging output to file as per the log_file option.

Understanding the configuration of OpenStack services

This command indicated a configuration file /etc/glance/glance-api.conf. Glance like other services may contain several configuration files. These are by default defined in the individual projects namespace under /etc.

$ ls -l /etc/glance/
total 152
-rw-r--r-- 1 stack stack 65106 Apr  4 11:12 glance-api.conf
-rw-r--r-- 1 stack stack  3266 Mar 11 12:22 glance-api-paste.ini
-rw-r--r-- 1 stack stack 13665 Apr  4 11:12 glance-cache.conf
-rw-r--r-- 1 stack stack 51098 Apr  4 11:12 glance-registry.conf
-rw-r--r-- 1 stack stack  1233 Mar 11 12:22 glance-registry-paste.ini
drwxr-xr-x 2 stack root   4096 Apr  4 11:12 metadefs
-rw-r--r-- 1 stack stack  1351 Mar 11 12:22 policy.json
-rw-r--r-- 1 stack stack  1380 Mar 11 12:22 schema-image.json

This is an appropriate time to point to several documentation sources including the Glance Developer Documentation – Configuration Options and the Configuration Guide Image Service options which describe in more detail these listed configuration files and the possible options available. You can find similar documentation for other services.

To demonstrate just how the configuration and logging work with a running service the following will modify the logging of the Glance API service by commenting out the logging configuration lines, and then reverting to the oslo.log configuration defaults.

$ sudo vi /etc/glance/glance-api.conf

Comment out the four logging_ options in the [DEFAULT] section.

[DEFAULT]
#logging_exception_prefix = %(color)s%(asctime)s.%(msecs)03d TRACE %(name)s ^[[01;35m%(instance)s^[[00m
#logging_debug_format_suffix = ^[[00;33mfrom (pid=%(process)d) %(funcName)s %(pathname)s:%(lineno)d^[[00m
#logging_default_format_string = %(asctime)s.%(msecs)03d %(color)s%(levelname)s %(name)s [^[[00;36m-%(color)s] ^[[01;35m%(instance)s%(color)s%(message)s^[[00m
#logging_context_format_string = %(asctime)s.%(msecs)03d %(color)s%(levelname)s %(name)s [^[[01;36m%(request_id)s ^[[00;36m%(user)s %(tenant)s%(color)s] ^[[01;35m%(instance)s%(color)s%(message)s^[[00m

Now, repeating the earlier steps within the g-api screen window, kill and restart the service.
The first thing you will observe is that the logging no longer contains color (this helps greatly for log file analysis). Repeat the CLI option to list the images, and you will notice a slightly modified logging message occur.

2016-04-05 11:38:57.312 17696 INFO eventlet.wsgi.server [req-1e66b7e5-3429-452e-a9b7-e28ee498f772 a531ea1011af43bb8277f3e5edfea34b 3b9f48af38ac40a495ca7b22d4d5c036 - - -] 192.168.1.60 - - [05/Apr/2016 11:38:57] "GET /v2/images HTTP/1.1" 200 2202 11.551233

The request context now is a modified format (containing additional - - - values) as a result of using the default value of logging_context_format_string. We will discuss the specifics of logging options in a later post.

There are a reasonable number of log files for a minimal devstack installation, some services have multiple log files.

$ cd /opt/stack/logs; ls -l *.log
lrwxrwxrwx 1 stack stack       27 Apr  5 12:49 c-api.log -> c-api.log.2016-04-05-124004
lrwxrwxrwx 1 stack stack       27 Apr  5 12:49 c-sch.log -> c-sch.log.2016-04-05-124004
lrwxrwxrwx 1 stack stack       27 Apr  5 12:49 c-vol.log -> c-vol.log.2016-04-05-124004
-rw-r--r-- 1 stack stack 16672591 Apr  5 14:01 dstat-csv.log
lrwxrwxrwx 1 stack stack       27 Apr  5 12:42 dstat.log -> dstat.log.2016-04-05-124004
lrwxrwxrwx 1 stack stack       27 Apr  5 12:48 g-api.log -> g-api.log.2016-04-05-124004
lrwxrwxrwx 1 stack stack       27 Apr  5 12:48 g-reg.log -> g-reg.log.2016-04-05-124004
lrwxrwxrwx 1 stack stack       29 Apr  5 12:50 horizon.log -> horizon.log.2016-04-05-124004
lrwxrwxrwx 1 stack stack       32 Apr  5 12:42 key-access.log -> key-access.log.2016-04-05-124004
lrwxrwxrwx 1 stack stack       25 Apr  5 12:42 key.log -> key.log.2016-04-05-124004
lrwxrwxrwx 1 stack stack       27 Apr  5 12:48 n-api.log -> n-api.log.2016-04-05-124004
lrwxrwxrwx 1 stack stack       29 Apr  5 12:49 n-cauth.log -> n-cauth.log.2016-04-05-124004
lrwxrwxrwx 1 stack stack       28 Apr  5 12:48 n-cond.log -> n-cond.log.2016-04-05-124004
lrwxrwxrwx 1 stack stack       27 Apr  5 12:49 n-cpu.log -> n-cpu.log.2016-04-05-124004
lrwxrwxrwx 1 stack stack       27 Apr  5 12:48 n-crt.log -> n-crt.log.2016-04-05-124004
lrwxrwxrwx 1 stack stack       28 Apr  5 12:42 n-dhcp.log -> n-dhcp.log.2016-04-05-124004
lrwxrwxrwx 1 stack stack       27 Apr  5 12:48 n-net.log -> n-net.log.2016-04-05-124004
lrwxrwxrwx 1 stack stack       29 Apr  5 12:49 n-novnc.log -> n-novnc.log.2016-04-05-124004
lrwxrwxrwx 1 stack stack       27 Apr  5 12:49 n-sch.log -> n-sch.log.2016-04-05-124004
lrwxrwxrwx 1 stack stack       46 Apr  5 12:40 stack.sh.log -> /opt/stack/logs/stack.sh.log.2016-04-05-124004

To turn off color in logging across service, you can configure this in the devstack local.conf file before starting the stack.

# local.conf
LOG_COLOR=False

Understanding the source code of OpenStack services

devstack installs the OpenStack code in two ways, via packaging and via source.

Generally all libraries are installed via packaging. You can discern these via looking at the python packages via pip with:

$ pip freeze
...
oslo.cache==1.5.0
oslo.concurrency==3.6.0
oslo.config==3.9.0
oslo.context==2.2.0
oslo.db==4.6.0
oslo.i18n==3.4.0
oslo.log==3.2.0
oslo.messaging==4.5.0
oslo.middleware==3.7.0
oslo.policy==1.5.0
oslo.reports==1.6.0
oslo.rootwrap==4.1.0
oslo.serialization==2.4.0
oslo.service==1.7.0
oslo.utils==3.7.0
oslo.versionedobjects==1.7.0
oslo.vmware==2.5.0
...
python-barbicanclient==4.0.0
python-ceilometerclient==2.3.0
python-cinderclient==1.6.0
python-designateclient==2.0.0
python-glanceclient==2.0.0
python-heatclient==1.0.0
python-ironicclient==1.2.0
python-keystoneclient==2.3.1
python-magnumclient==1.1.0
python-manilaclient==1.8.0
python-memcached==1.57
python-mimeparse==1.5.1
python-mistralclient==2.0.0
python-neutronclient==4.1.1
python-novaclient==3.3.0
python-openstackclient==2.2.0
python-saharaclient==0.13.0
python-senlinclient==0.4.0
python-subunit==1.2.0
python-swiftclient==3.0.0
python-troveclient==2.1.1
python-zaqarclient==1.0.0
...

This is a list of all Python packages so it’s not possible to determine which are OpenStack specific, and which are dependencies. These installed packages are actually Python source that you can view and even modify.

$ ls -l /usr/local/lib/python2.7/dist-packages/

You can approximate the installed OpenStack packages via source by looking at the base source directory:

$ ls -l /opt/stack
total 92
drwxr-xr-x 10 stack stack 4096 Mar 11 12:23 cinder
drwxr-xr-x  6 stack root  4096 Apr  5 12:42 data
-rw-r--r--  1 stack stack  440 Apr  5 12:52 devstack.subunit
drwxr-xr-x  4 stack stack 4096 Mar 11 12:27 dib-utils
drwxr-xr-x 10 stack stack 4096 Mar 11 12:22 glance
drwxr-xr-x 15 stack stack 4096 Mar 11 12:26 heat
drwxr-xr-x  7 stack stack 4096 Mar 11 12:27 heat-cfntools
drwxr-xr-x 10 stack stack 4096 Mar 11 12:27 heat-templates
drwxr-xr-x 11 stack stack 4096 Mar 11 14:13 horizon
drwxr-xr-x 13 stack stack 4096 Mar 11 11:57 keystone
drwxr-xr-x  2 stack stack 4096 Apr  5 12:50 logs
drwxr-xr-x 12 stack stack 4096 Mar 11 15:45 neutron
drwxr-xr-x 13 stack stack 4096 Mar 11 12:25 nova
drwxr-xr-x  8 stack stack 4096 Mar 11 12:24 noVNC
drwxr-xr-x  4 stack stack 4096 Mar 11 12:27 os-apply-config
drwxr-xr-x  4 stack stack 4096 Mar 11 12:27 os-collect-config
drwxr-xr-x  5 stack stack 4096 Mar 11 12:27 os-refresh-config
drwxr-xr-x  7 stack stack 4096 Apr  5 12:51 requirements
drwxr-xr-x 13 stack stack 4096 Mar 11 15:47 solum
drwxr-xr-x  3 stack stack 4096 Apr  4 11:13 status
drwxr-xr-x 10 stack stack 4096 Mar 11 12:22 swift

devstack enables you to configure which packages you want to install via source. Checkout plugins for more information. For example, the following added to the local.conf would install solum.

# local.conf
...
enable_plugin solum git://git.openstack.org/openstack/solum

You have complete flexibility of which branch and version of each package using devstack. This enables you to use devstack as a testing tool for code changes.

At this time to understand more about how software is installed check out devstack documentation and review the stack.sh script.

What’s next

This is only a cursory introduction into what devstack sets up during the installation process. Subsequent posts will talk more on topics including the configuration options, the different logging capabilities and how to test code changes.

screen help

^a ? will provide the following help output.

                                                                                     Screen key bindings, page 1 of 2.

                                                                                     Command key:  ^A   Literal ^A:  a

  break       ^B b         dumptermcap .            info        i            meta        a            pow_detach  D            reset       Z            title       A            xoff        ^S s      
  clear       C            fit         F            kill        K k          monitor     M            prev        ^H ^P p ^?   screen      ^C c         vbell       ^G           xon         ^Q q      
  colon       :            flow        ^F f         lastmsg     ^M m         next        ^@ ^N sp n   quit        \            select      '            version     v         
  copy        ^[ [         focus       ^I           license     ,            number      N            readbuf     <            silence     _            width       W         
  detach      ^D d         hardcopy    h            lockscreen  ^X x         only        Q            redisplay   ^L l         split       S            windows     ^W w      
  digraph     ^V           help        ?            log         H            other       ^A           remove      X            suspend     ^Z z         wrap        ^R r      
  displays    *            history     { }          login       L            pow_break   B            removebuf   =            time        ^T t         writebuf    >         

^]   paste .
"    windowlist -b
-    select -
0    select 0
1    select 1
2    select 2
3    select 3
4    select 4
5    select 5
6    select 6
7    select 7
8    select 8
9    select 9
I    login on
O    login off
]    paste .
|    split -v
:kB: focus prev

Running a devstack virtual machine with limited memory

If you have a system with only 4GB of RAM, you need to assign at least 2.5GB (2560M) to a virtual machine to install devstack. Even with this limited RAM there are times the devstack installation will fail.

One way to give the installation process an opportunity to complete is to configure your virtual machine to have swap space. The amount of swap space you can configure may be limited to the size of your initial disk partition configuration (which is 8GB). The following steps add a 2GB swap file to your virtual machine.

sudo swapon -s
free -m
sudo fallocate -l 2G /swapfile
ls -lh /swapfile
sudo chmod 600 /swapfile
sudo mkswap /swapfile
sudo swapon /swapfile
sudo swapon -s
free -m
echo "/swapfile   none    swap    sw    0   0" | sudo tee -a /etc/fstab
cat /etc/fstab
The use of swap space by your virtual machine instead of available RAM will cause a significant slowdown of any software. For the purposes of a minimal installation this option provides a means to observe a running minimal OpenStack cloud.

Downloading and installing devstack

The following instructions assume you have a running Linux virtual machine that can support the installation of devstack to demonstrate a simple working OpenStack cloud.

For more information about the preparation needed for this step, see these pre-requisite instructions:

Pre-requisites

You will need to login to your Linux virtual machine as a normal user (e.g. stack if you followed these instructions).

To verify the IP address of your machine you can run:

$ ifconfig eth1

NOTE: This assumes you configured a second network adapter as detailed.

You need to determine the IP address assigned. If this is your first-time using VirtualBox and this was configured with default settings, the value will be 192.168.56.101

eth1      Link encap:Ethernet  HWaddr 08:00:27:db:42:6e  
          inet addr:192.168.56.101  Bcast:192.168.56.255  Mask:255.255.255.0
          inet6 addr: fe80::a00:27ff:fedb:426e/64 Scope:Link
          UP BROADCAST RUNNING MULTICAST  MTU:1500  Metric:1
          RX packets:398500 errors:0 dropped:0 overruns:0 frame:0
          TX packets:282829 errors:0 dropped:0 overruns:0 carrier:0
          collisions:0 txqueuelen:1000 
          RX bytes:35975184 (35.9 MB)  TX bytes:59304714 (59.3 MB)

Verify that you have applicable sudo privileges.

$ sudo id

If you are prompted for a password, then your privileges are not configured correctly. See here.

Download devstack

After connecting to the virtual machine the following commands will download the devstack source code:

$ sudo apt-get install -y git-core
# NOTE: You will not be prompted for a password
#       This is important for the following installation steps
$ git clone https://git.openstack.org/openstack-dev/devstack

Configure devstack

The following will create an example configuration file suitable for a default devstack installation.

$ cd devstack
# Use the sample default configuration file
$ cp samples/local.conf .
$ HOST_IP="192.168.56.101"
$ echo "HOST_IP=${HOST_IP}" >> local.conf

NOTE: If your machine has different IP address you should specify this alternative value.

Install devstack

$ ./stack.sh

Depending on your physical hardware and network connection, this takes approximately 20 minutes.

When completed you will see the following:

...
This is your host IP address: 192.168.56.101
This is your host IPv6 address: ::1
Horizon is now available at http://192.168.56.101/dashboard
Keystone is serving at http://192.168.56.101:5000/
The default users are: admin and demo
The password: nomoresecrete
While the installation of devstack is happening, you should read Configuration section, and look at the devstack/samples/local.conf sample configuration file being used.

Accessing devstack

You now have a running OpenStack cloud. There are two easy ways to access the running services to verify.

  • Connect the Horizon dashboard in your browser with the URL (e.g. http://192.168.56.101/), and use the user and password described (e.g. admin and nomoresecrete).
  • Use the OpenStack client that is installed with devstack, for example:
$ source accrc/admin/admin
$ openstack image list

See Using your devstack cloud for more information about analyzing your running cloud, restarting services, configuration files and how to demonstrate a code change.

Other devstack commands

There are some useful commands to know about with your devstack setup.

If you restart your virtual machine, you reconnect to devstack by re-running the installation (there is no longer a rejoin-stack.sh):

$ ./stack.sh

To shutdown a running devstack.

$ ./unstack.sh

To cleanup your VM of devstack installed software.

$ ./clean.sh

Setting up Ubuntu using vagrant

As discussed in Setting up an Ubuntu virtual machine using VirtualBox there are several other alternatives to defining an Ubuntu virtual machine. One of these alternatives is using Vagrant.

Pre-requisites

Vagrant requires the installation of VirtualBox.

Install Vagrant

See Vagrant Downloads for the correct file for your platform.

For Ubuntu, the following commands will download a recent copy and install on your computer.

$ wget https://releases.hashicorp.com/vagrant/1.8.1/vagrant_1.8.1_x86_64.deb
$ sudo dpkg -i vagrant_1.8.1_x86_64.deb

Launching an Ubuntu image

The following commands will initialize an start an Ubuntu 14.04 vagrant instance.

$ vagrant init ubuntu/trusty64
$ vagrant up --provider virtualbox
$ vagrant ssh

You should now be connected to the new virtual machine.

Vagrant creates a port forwarding configuration from your local machine automatically. You can connect via ssh directly with:

ssh vagrant@localhost -p 2222 -i .vagrant/machines/default/virtualbox/private_key

NOTE: Port 2222 may be different if this is already in use. You can verify this via the output of the vagrant up command, for example:

...
==> default: Forwarding ports...
    default: 22 (guest) => 2222 (host) (adapter 1)
...

Post configuration

In order to access your vagrant instance with a specific IP address and leverage the recommended devstack instructions you need to add the config.vm.network line to the Vagrantfile in the directory used on your host computer. You also need to set the virtual machine memory to at least 2.5GB to get a minimal devstack operational.

Vagrant.configure(2) do |config|
  config.vm.box = "ubuntu/trusty64"
  config.vm.network "private_network", type: "dhcp"
 
  config.vm.provider "virtualbox" do |v|
    v.memory = 2560
  end
end

You will then need to restart the vagrant image in order to have a host-only IP assigned to the virtual machine and applicable memory.

$ vagrant reload
$ vagrant ssh
$ ifconfig eth1
$ free -m

This has created a suitable virtual machine ready for Downloading and installing devstack.

Setting up CentOS on VirtualBox for RDO

Create a CentOS Virtual Machine (VM)

NOTE: There are several different ways in creating a base VM CentOS image. These steps are the more manual approach, however they are provided for completeness in understanding varying options.

To create a virtual machine in VirtualBox select the New icon. This will prompt you for some initial configuration. Use these recommendations:

  • Name and operating System
    • Name: RDO
    • Type: Linux
    • Version: Red Hat (64-bit)
  • Memory Size
    • Use at minimum 4GB.
  • Hard Disk
    • Use the default settings including 8.0GB, VDI type, dynamically allocated, File location and size.

By default your virtual machine is ready to install however by making the following network recommendation it will be easier to access your running virtual machine via SSH and the RDO web interface and APIs from your host computer.

  • Click Settings
  • Select Network
  • Enable Adapter 2 and attach to a Host-only Adapter and select vboxnet0
  • Ok

Install CentOS Operating System

You are now ready to install the Operating System on the virtual machine with the following instructions.

  • Click Start
  • Open the CentOS .iso file you just downloaded.
  • You will be prompted for a number of options, select the default provided and use the following values when prompted.
  • Install CentOS 7
  • Select English and English (United States) (or your choice of language)
  • Select System to configure your installation destination
    • Click Done to use the default VM disk and automatically configure partitioning
  • Select Network & hostname
    • Enable both of the listed Ethernet connections
    • Enter rdo for the Host Name
    • Click Done
  • Click Begin Installation
  • Click Root Password
    • Enter password of your choosing
  • Click User Creation
    • Enter rdo for user name (or any value of your choice)
    • Enter Openstack for password (or any password of your choice)
    • Click Done

When the installation is complete, click Reboot.

You will now be able to login with username: rdo and password: Openstack (or the values you chose).

Post Installation

While the second ethernet adapter for your VM is configured it is not enabled.

$ su -
# Enter root password
$ sed -ie "s/ONBOOT=no/ONBOOT=yes/" /etc/sysconfig/network-scripts/ifcfg-enp0s8
$ ifup enp0s8
$ ip addr
# RDO does not operate with NetworkManager
$ sudo systemctl stop NetworkManager.service
$ sudo systemctl disable NetworkManager.service

The ip output will verify the IP address that was assigned. If you configured the VirtualBox host-only adapter with defaults, the address will be 192.168.56.1XX.

To verify access to your virtual machine from your host computer, you should SSH with:

$ ssh [email protected]

Setting up Ubuntu on VirtualBox for devstack

As discussed, devstack enables a software developer to run a standalone minimal OpenStack cloud on a virtual machine (VM). In this tutorial we are going to step through the installation of an Ubuntu VM using VirtualBox manually. This is a pre-requisite to installing devstack.

NOTE: There are several different ways in creating a base Ubuntu VM image. These steps are the more manual approach, however they are provided for completeness in understanding varying options.

Pre-requisites

  1. You will need a computer running a 64 bit operating system on Mac OSX, Windows, Linux or Solaris with at least 4GB of RAM and 10GB of available disk drive space.
  2. You will need to have a working VirtualBox on your computer. See Setting up VirtualBox to run virtual machines as a pre-requisite for these steps.
  3. You will need an Ubuntu server .iso image. Download the Ubuntu Server 14.04 (Trusty) server image (e.g. ubuntu-14.04.X-server-amd64.iso) to your computer. This will be the base operating system of your virtual machine that will run devstack.

If using Mac OS X or Linux you can obtain a recent .iso release with the command:

$ wget http://releases.ubuntu.com/14.04/ubuntu-14.04.4-server-amd64.iso
NOTE: devstack can be installed on different operating systems. As a first time user, Ubuntu 14.04 is used as this is a more common platform (and used by OpenStack infrastructure). Other operating systems include Ubuntu (14.10, 15.04, 15.01), Fedora (22, 23) and CentOS/RHEL 7.

Create an Ubuntu Virtual Machine

To create a virtual machine in VirtualBox select the New icon. This will prompt you for some initial configuration. Use these recommendations:

  • Name and operating System
    • Name: devstack
    • Type: Linux
    • Version: Ubuntu (64-bit)
  • Memory Size
    • If you have 8+GB use 4GB.
    • If you have only 4GB use 2.5GB. (Note. Testing during the creation of this guide found that 2048M was insufficient, and that a minimum of 2560M was needed)
  • Hard Disk
    • Use the default settings including 8.0GB, VDI type, dynamically allocated, File location and size.

By default your virtual machine is ready to install however by making the following network recommendation it will be easier to access your running virtual machine and devstack from your host computer.

  • Click Settings
  • Select Network
  • Enable Adapter 2 and attach to a Host-only Adapter and select vboxnet0
  • Ok

You are now ready to install the Operating System on the virtual machine with the following instructions.

  • Click Start
  • Open the Ubuntu .iso file you just downloaded.
  • You will be prompted for a number of options, select the default provided and use the following values when prompted.
  • Install Ubuntu Server
  • English (or your choice)
  • United States (or your location)
  • No for configure the keyboard
  • English (US) for keyboard (or your preference)
  • English (US) for keyboard layout (or your preference)
  • Select eth0 as your primary network interface
  • Select default ubuntu for hostname
  • Enter stack for full username/username
  • Enter Openstack for password (or your own preference)
  • Select No to encrypt home directory
  • Select Yes for time zone selected
  • Select Guided – use entire disk for partition method
  • Select highlighted partition
  • Select Yes to partition disks
  • Select Continue for package manager proxy
  • Select No automatic updates
  • Select OpenSSH Server in software to install
  • Select Yes to install GRUB boot loader
  • Select Continue when installation complete

The new virtual machine will now restart and you will be able to login with the username and password specified (i.e. stack and Openstack).

Post Installation

After successfully logging in run the following commands to complete the Ubuntu installation setup needed as pre-requisites to install devstack.

$ sudo su -
# Enter your stack user password
$ umask 266 & echo "stack ALL=(ALL) NOPASSWD: ALL" > /etc/sudoers.d/stack
$ apt-get update && apt-get upgrade -y
$ echo "auto eth1
iface eth1 inet dhcp" >> /etc/network/interfaces
$ ifup eth1

You are now ready to download and install devstack.

You can also setup an Ubuntu virtual machine via vagrant which simplifies these instructions.

More information

This blog is a series for the software developer with no experience in OpenStack to experience just the tip of functionality and features to become more interested in the project.

VirtualBox networking for beginners

When using VirtualBox for my OpenStack development I always configure two network adapters for ease of development. The first is a NAT adapter that enables the guest VM connectivity to the Internet via the host. The second network adapter is a host-only Adapter that enables my host computer (aka my terminal windows) to SSH directly to the guest VM, or to access a web interface for example. This enables the use of tools like ssh, scp, rsync etc easily with multiple VMs without thinking of different ports.

Having the two adapters is very convenient, however when you install products such as devstack or RDO these require additional steps to manage the interface and configure the installation. These steps are relatively straightforward but they make the most simple instructions more complex.

There are alternatives to using the NAT only adapter and enable port forwarding. For example you can configure port forwarding of port 2222 to the guest 22 with (when VM is not running):

$ VBoxManage modifyvm "vm-name" --natpf1 "guestssh,tcp,,2222,,22"
$ VBoxManage startvm "vm-name"

You can now connect to the guest VM via port forwarding on your host, in this case connecting to port 2222.

$ ssh user@localhost -p 2222

Personally I find this a disadvantage. You need to provide port forwarding for all ports you want to communicate on e.g. ssh (22), http (80) and keystone (5000). You need to do it in advance of using your VM, and you also need to do this for each VM.

However, depending on your needs and experience this is a valid alternative.

Ubuntu two adapter configuration

On Ubuntu, the following configuration file defines two DHCP network adapters.

$ cat /etc/network/interfaces
# This file describes the network interfaces available on your system
# and how to activate them. For more information, see interfaces(5).

# The loopback network interface
auto lo
iface lo inet loopback

# The primary network interface
auto eth0
iface eth0 inet dhcp

auto eth1
iface eth1 inet dhcp

You can verify adapter information (e.g. IP address) using ifconfig.

$ ifconfig
eth0      Link encap:Ethernet  HWaddr 08:00:27:7f:a0:e2  
          inet addr:10.0.2.15  Bcast:10.0.2.255  Mask:255.255.255.0
          inet6 addr: fe80::a00:27ff:fe7f:a0e2/64 Scope:Link
          UP BROADCAST RUNNING MULTICAST  MTU:1500  Metric:1
          RX packets:585 errors:0 dropped:0 overruns:0 frame:0
          TX packets:455 errors:0 dropped:0 overruns:0 carrier:0
          collisions:0 txqueuelen:1000 
          RX bytes:129820 (129.8 KB)  TX bytes:64215 (64.2 KB)

eth1      Link encap:Ethernet  HWaddr 08:00:27:66:8d:cb  
          inet addr:192.168.56.102  Bcast:192.168.56.255  Mask:255.255.255.0
          inet6 addr: fe80::a00:27ff:fe66:8dcb/64 Scope:Link
          UP BROADCAST RUNNING MULTICAST  MTU:1500  Metric:1
          RX packets:221 errors:0 dropped:0 overruns:0 frame:0
          TX packets:152 errors:0 dropped:0 overruns:0 carrier:0
          collisions:0 txqueuelen:1000 
          RX bytes:28289 (28.2 KB)  TX bytes:19443 (19.4 KB)

lo        Link encap:Local Loopback  
          inet addr:127.0.0.1  Mask:255.0.0.0
          inet6 addr: ::1/128 Scope:Host
          UP LOOPBACK RUNNING  MTU:65536  Metric:1
          RX packets:371 errors:0 dropped:0 overruns:0 frame:0
          TX packets:371 errors:0 dropped:0 overruns:0 carrier:0
          collisions:0 txqueuelen:0 
          RX bytes:90509 (90.5 KB)  TX bytes:90509 (90.5 KB)

The ip command is also available.

To configure an IP with a fixed address on the host-only adapter network which is useful for many machines, you would use:

auto eth1
iface eth1 inet static
address 192.168.56.50
netmask 255.255.255.0
gateway 192.168.56.1

CentOS two adapter configuration

CentOS keeps a configuration file per interface. We start be determining the interface names.

$ ls -l /etc/sysconfig/network-scripts/ifcfg-*
-rw-r--r--. 1 root root 310 Mar 30 16:53 /etc/sysconfig/network-scripts/ifcfg-enp0s3
-rw-r--r--. 1 root root 278 Mar 30 17:00 /etc/sysconfig/network-scripts/ifcfg-enp0s8
-rw-r--r--. 1 root root 277 Mar 30 16:53 /etc/sysconfig/network-scripts/ifcfg-enp0s8e
-rw-r--r--. 1 root root 254 Sep 16  2015 /etc/sysconfig/network-scripts/ifcfg-lo

And then can review the per interface configuration with:

$ cat /etc/sysconfig/network-scripts/ifcfg-enp0s3
TYPE="Ethernet"
BOOTPROTO="dhcp"
DEFROUTE="yes"
PEERDNS="yes"
PEERROUTES="yes"
IPV4_FAILURE_FATAL="no"
IPV6INIT="yes"
IPV6_AUTOCONF="yes"
IPV6_DEFROUTE="yes"
IPV6_PEERDNS="yes"
IPV6_PEERROUTES="yes"
IPV6_FAILURE_FATAL="no"
NAME="enp0s3"
UUID="2c0bdd66-badc-449c-8db8-b2c85a716dab"
DEVICE="enp0s3"
ONBOOT="yes"

$ cat /etc/sysconfig/network-scripts/ifcfg-enp0s8
TYPE=Ethernet
BOOTPROTO=dhcp
DEFROUTE=yes
PEERDNS=yes
PEERROUTES=yes
IPV4_FAILURE_FATAL=no
IPV6INIT=yes
IPV6_AUTOCONF=yes
IPV6_DEFROUTE=yes
IPV6_PEERDNS=yes
IPV6_PEERROUTES=yes
IPV6_FAILURE_FATAL=no
NAME=enp0s8
UUID=4127685d-a7b9-4b8d-a399-6dcacdb3396d
DEVICE=enp0s8
ONBOOT=yes

You can verify the network configuration using the ip command.

$ ip addr
1: lo:  mtu 65536 qdisc noqueue state UNKNOWN 
    link/loopback 00:00:00:00:00:00 brd 00:00:00:00:00:00
    inet 127.0.0.1/8 scope host lo
       valid_lft forever preferred_lft forever
    inet6 ::1/128 scope host 
       valid_lft forever preferred_lft forever
2: enp0s3:  mtu 1500 qdisc pfifo_fast state UP qlen 1000
    link/ether 08:00:27:32:c0:4c brd ff:ff:ff:ff:ff:ff
    inet 10.0.2.15/24 brd 10.0.2.255 scope global dynamic enp0s3
       valid_lft 15876sec preferred_lft 15876sec
    inet6 fe80::a00:27ff:fe32:c04c/64 scope link 
       valid_lft forever preferred_lft forever
3: enp0s8:  mtu 1500 qdisc pfifo_fast state UP qlen 1000
    link/ether 08:00:27:43:22:85 brd ff:ff:ff:ff:ff:ff
    inet 192.168.56.103/24 brd 192.168.56.255 scope global dynamic enp0s8
       valid_lft 1056sec preferred_lft 1056sec
    inet6 fe80::a00:27ff:fe43:2285/64 scope link 
       valid_lft forever preferred_lft forever

CentOS does not provide ifconfig by default, it’s included in the net-tools package (RDO for example installs this).

$ sudo yum install -y net-tools
$ ifconfig
enp0s3: flags=4163  mtu 1500
        inet 10.0.2.15  netmask 255.255.255.0  broadcast 10.0.2.255
        inet6 fe80::a00:27ff:fe32:c04c  prefixlen 64  scopeid 0x20
        ether 08:00:27:32:c0:4c  txqueuelen 1000  (Ethernet)
        RX packets 437445  bytes 441847285 (421.3 MiB)
        RX errors 0  dropped 0  overruns 0  frame 0
        TX packets 142720  bytes 8897712 (8.4 MiB)
        TX errors 0  dropped 0 overruns 0  carrier 0  collisions 0

enp0s8: flags=4163  mtu 1500
        inet 192.168.56.103  netmask 255.255.255.0  broadcast 192.168.56.255
        inet6 fe80::a00:27ff:fe43:2285  prefixlen 64  scopeid 0x20
        ether 08:00:27:43:22:85  txqueuelen 1000  (Ethernet)
        RX packets 14250  bytes 1708162 (1.6 MiB)
        RX errors 0  dropped 0  overruns 0  frame 0
        TX packets 15367  bytes 13061787 (12.4 MiB)
        TX errors 0  dropped 0 overruns 0  carrier 0  collisions 0

lo: flags=73  mtu 65536
        inet 127.0.0.1  netmask 255.0.0.0
        inet6 ::1  prefixlen 128  scopeid 0x10
        loop  txqueuelen 0  (Local Loopback)
        RX packets 5706360  bytes 778262566 (742.2 MiB)
        RX errors 0  dropped 0  overruns 0  frame 0
        TX packets 5706360  bytes 778262566 (742.2 MiB)
        TX errors 0  dropped 0 overruns 0  carrier 0  collisions 0

References