Deploying Ubuntu OpenStack Kilo

My previous Ubuntu OpenStack setup has been using the Juno release. I received some installation problems for Kilo using the stable repo and so I switched to using the experimental repo. This comes with a number of surface changes.

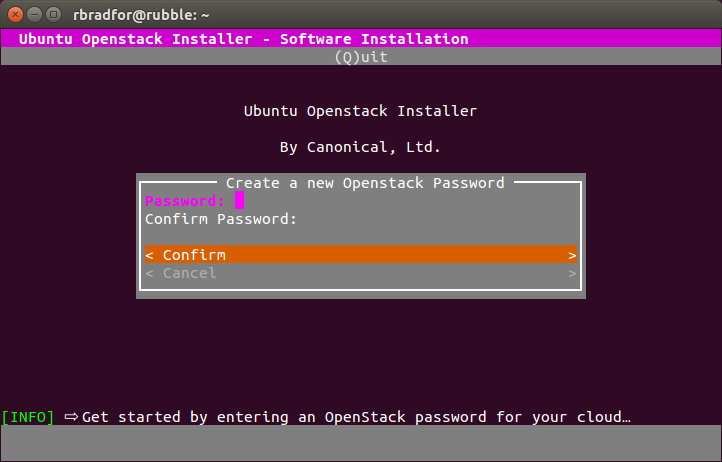
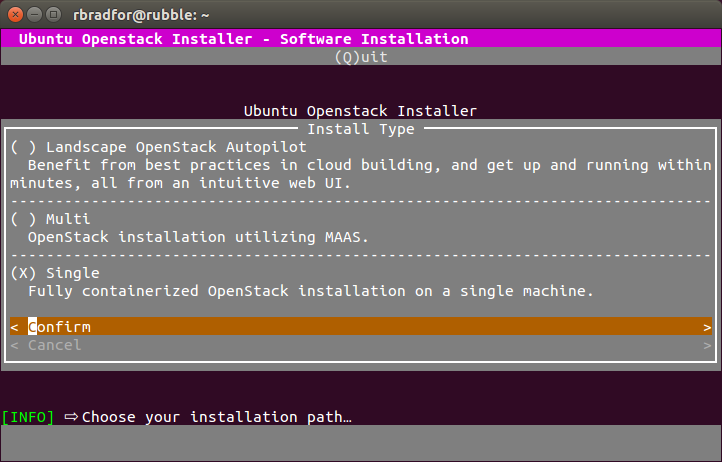
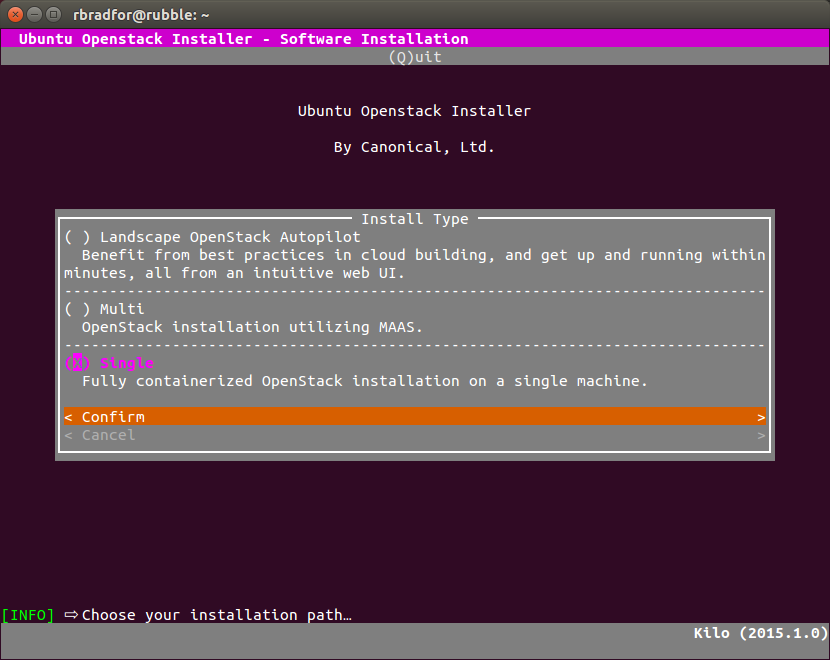
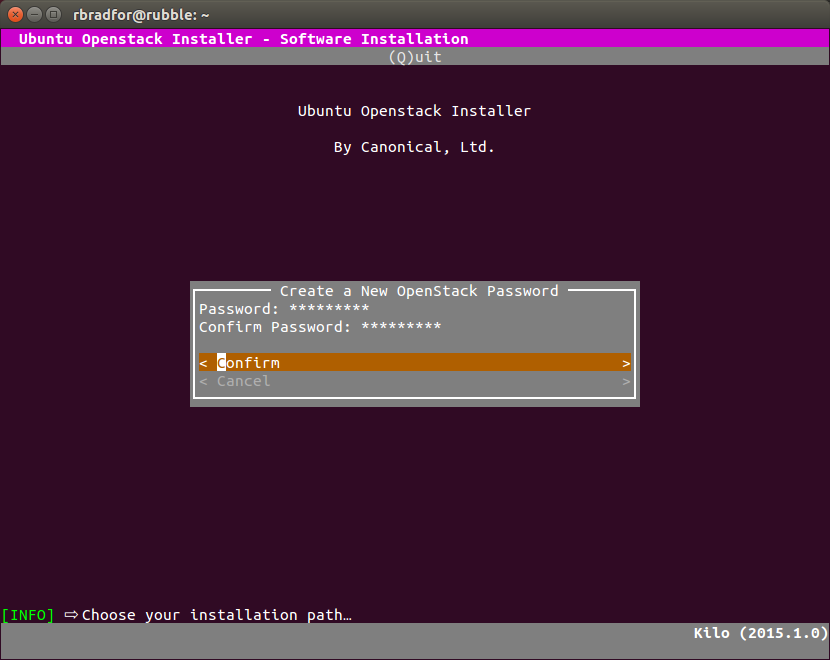
  • The interactive installation asks for the installation type first, and password second.
  • The IP range of installed OpenStack services changes from 10.0.4.x to 10.0.7.x.
  • Juju GUI is no longer installed by default. You need to specifically add this as a service after initial installation.
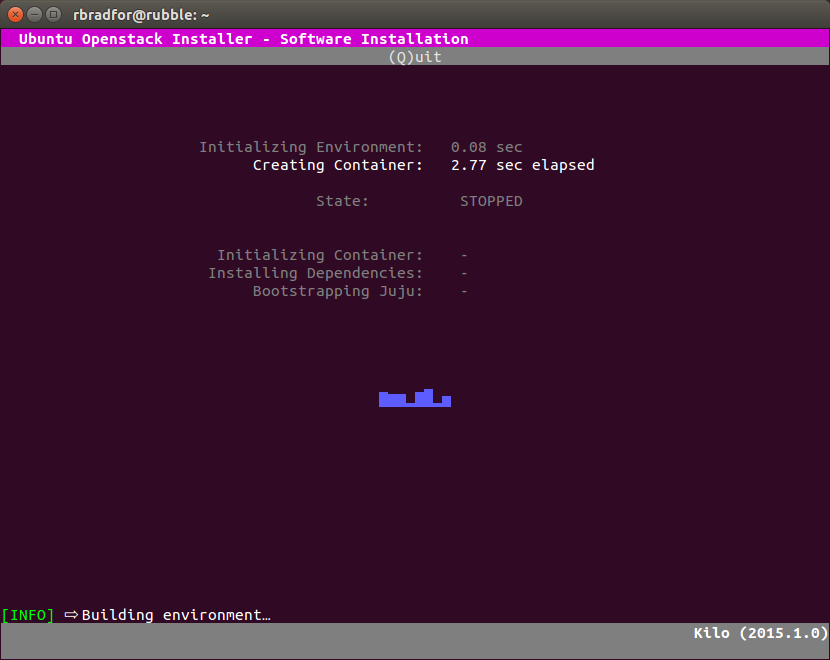
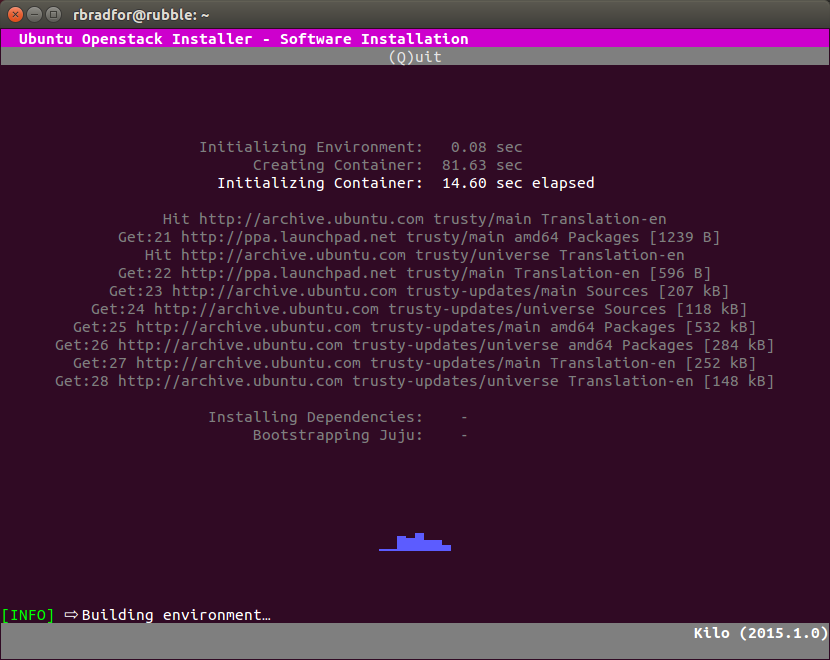
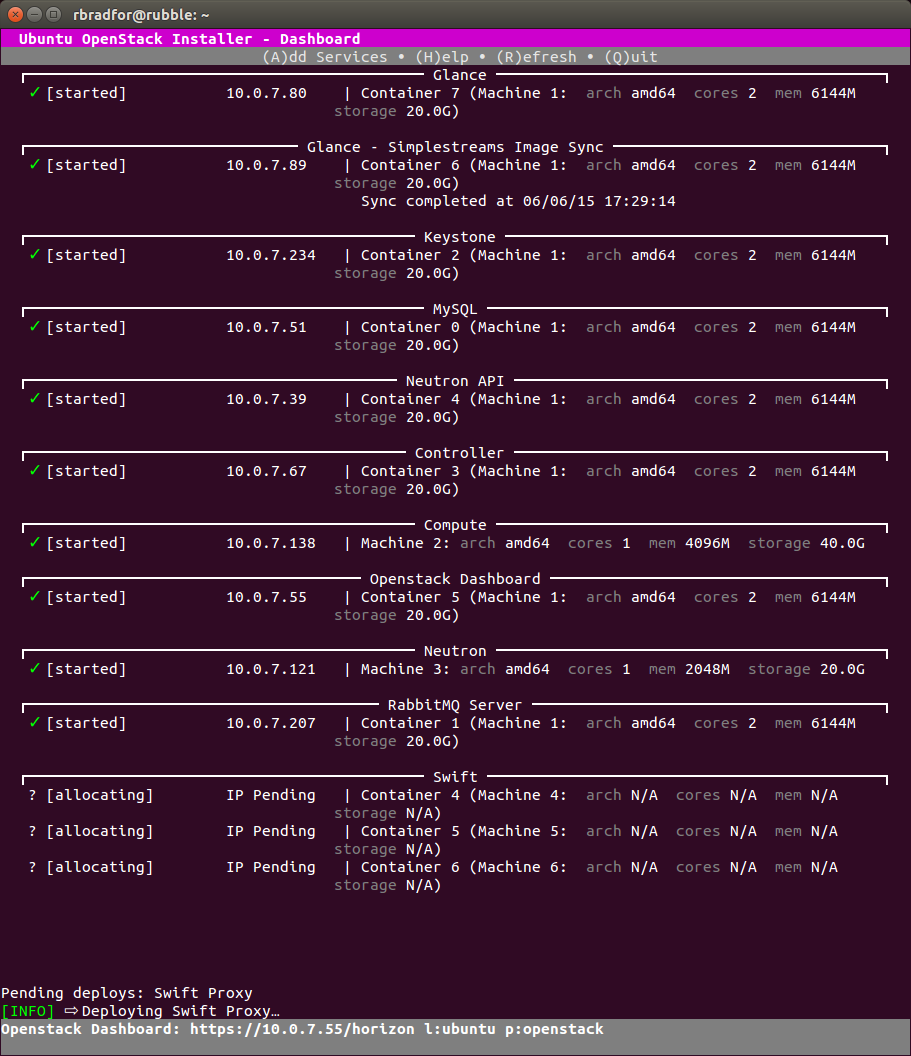
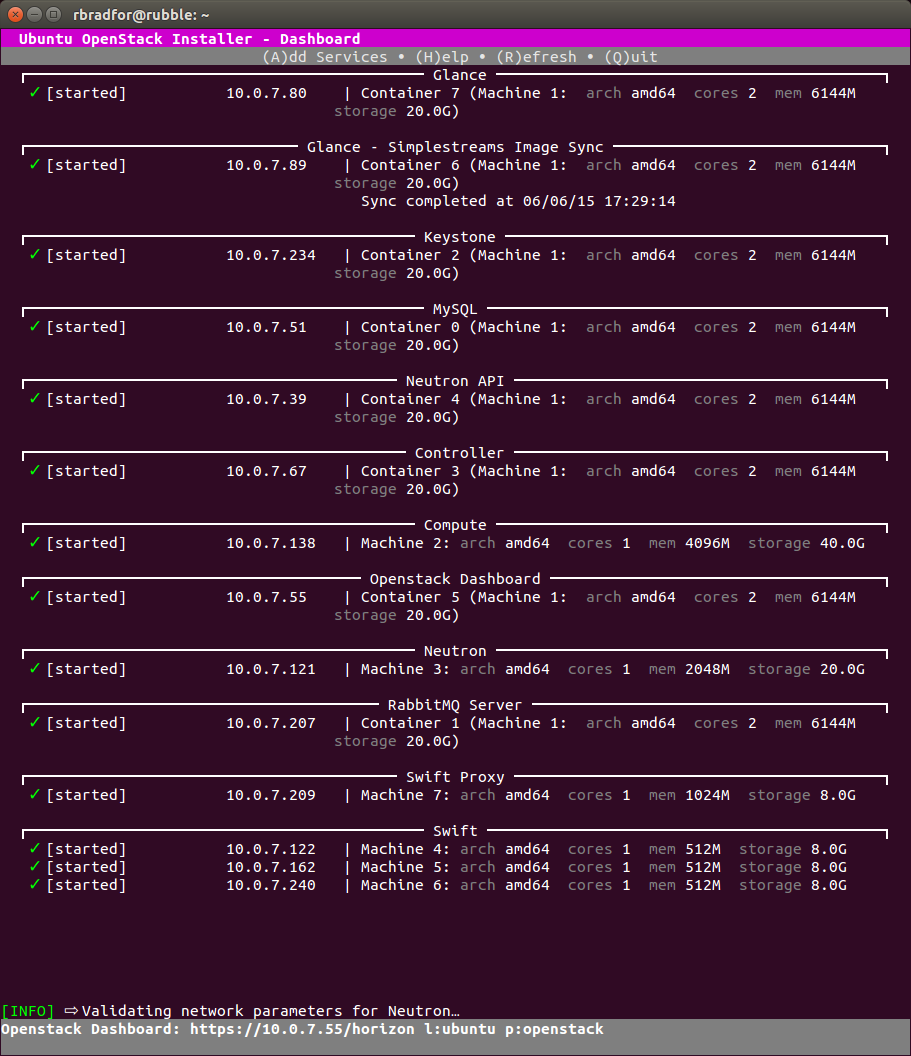
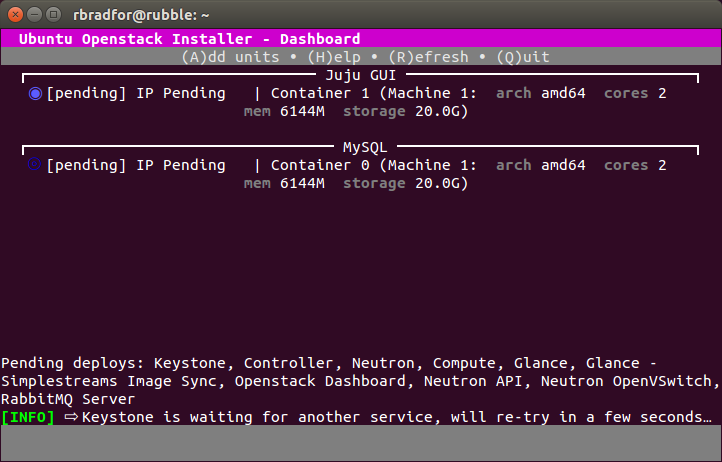
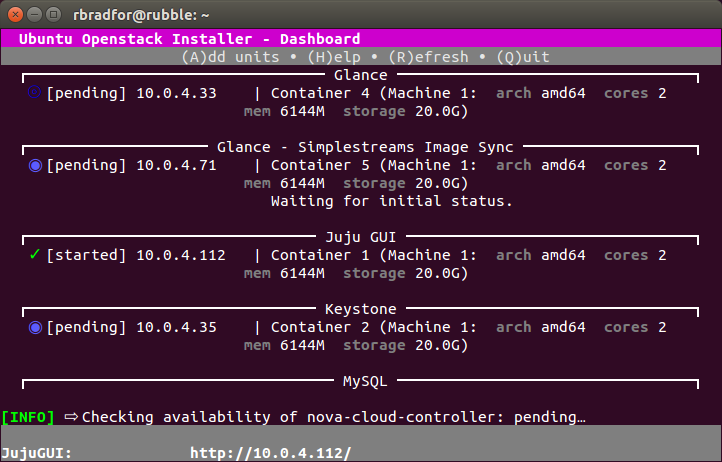
  • The GUI displays additional information during installation.
  • The LXC container name changes from uoi-bootstrap to openstack-single-<user>.

Uninstall any existing environment

Remove any existing installed OpenStack cloud.

sudo openstack-install -k
sudo openstack-install -u

NOTE: Be sure to remove your existing cloud before upgrading. Failing to do so will mean you need to manually cleanup some things with:

sudo lxc-stop --name uoi-bootstrap
sudo lxc-destroy --name uoi-bootstrap
rm -rf $HOME/.cloud_install

Update the OpenStack installer

Upgrade Ubuntu OpenStack with the following commands. In my environment this installed version 0.99.14.

sudo apt-add-repository ppa:cloud-installer/experimental
sudo apt-get update
sudo apt-get upgrade openstack

Install OpenStack Kilo

Installing an Ubuntu OpenStack environment still uses the openstack-install command with an additional argument.

sudo openstack-install --upstream-ppa

NOTE: Updated 6/18/15 When using the experimental repo with version 0.99.12 or earlier you must specify the --extra-ppa argument and value, i.e. sudo openstack-install –extra-ppa ppa:cloud-installer/experimental. Thanks stokachu for pointing this out.
Adding Services

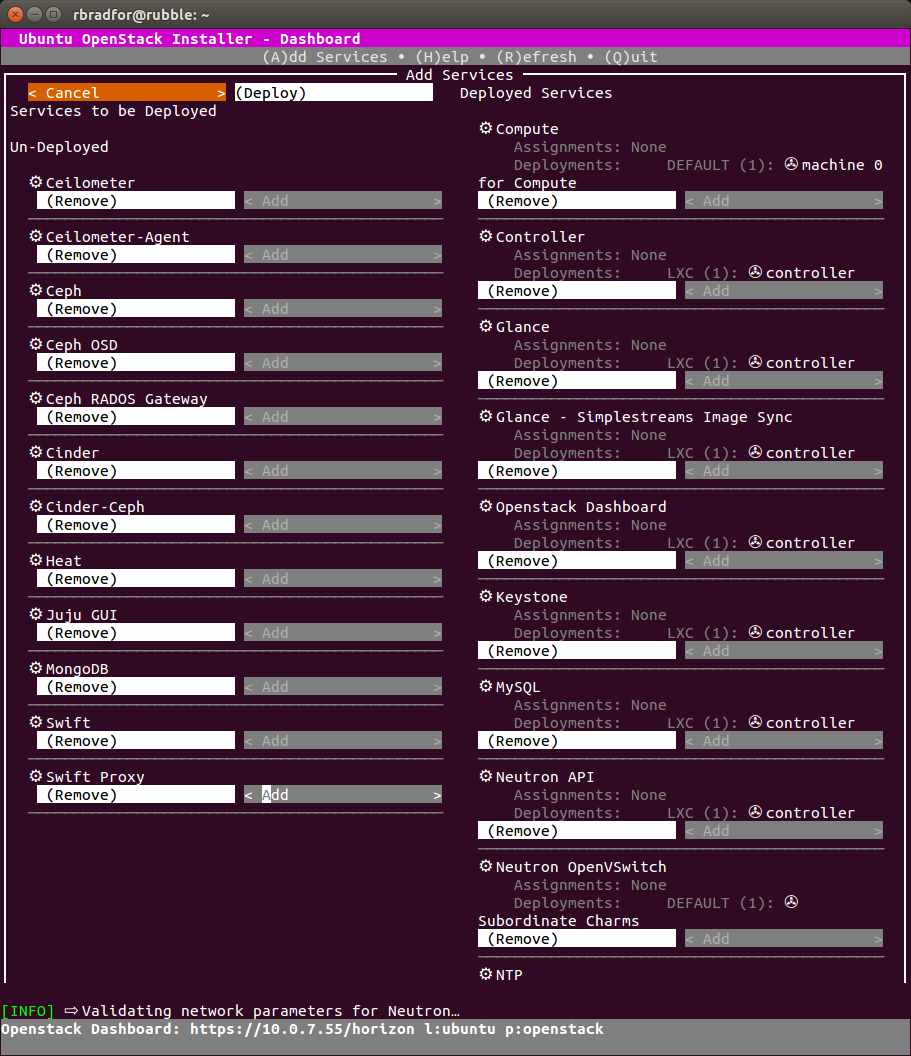
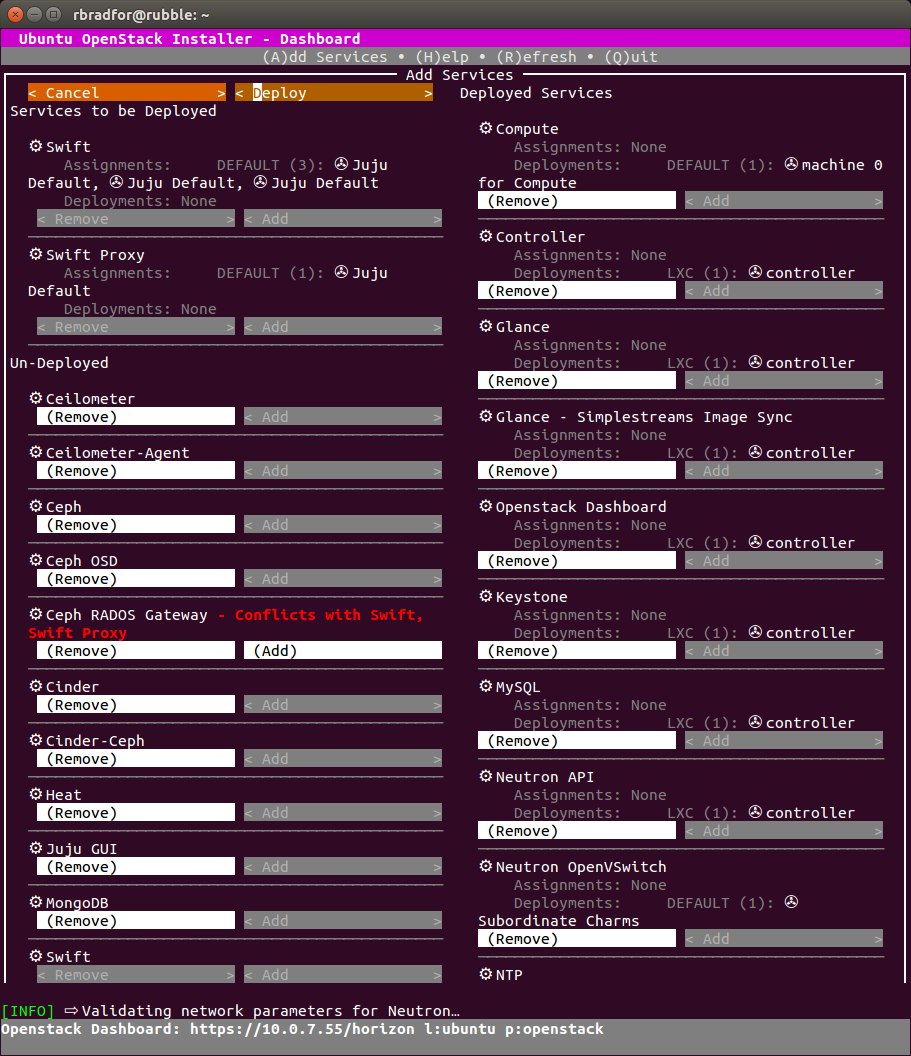
After setting up a Kilo cloud using Ubuntu OpenStack I was able to successfully add a Swift component. Something else that was not quite working as expected in stable.
References

Writing and testing unit tests in OpenStack

The following outlines an approach of identifying and improving unit tests in an OpenStack project.

Obtain the source code

You can obtain a copy of current source code for an OpenStack project at http://git.openstack.org. Active projects are categorized into openstack, openstack-dev, openstack-infra and stackforge.

NOTE: While you can find OpenStack projects on GitHub, these are just a mirror of the source repositories.

In this example I am going to use the Magnum project.

$ git clone git://git.openstack.org/openstack/magnum 
$ cd magnum

Run the current tests

The first step should be to run the current tests to verify the current code. This is to become familiar with the habit, especially if you may have made modifications and are returning to looking at your code. This will also create a virtual environment, which you will want to use later to test your changes.

$ tox -e py27

Should this fail, you may want to ensure all OpenStack developer dependencies are inplace on your OS.

Identify unit tests to work on

You can use the code coverage of unit tests to determine possible places to start adding to existing unit tests. The following command will produce a HTML report in the /cover directory of your project.

$ tox -e cover

This output will look similar to this example coverage output for Magnum. You can also produce a text based version with:

$ coverage report -m 

I will use this text version as a later verification.

Working on a specific unit test

Drilling down on any individual test file you will get an indication of code that does not have unit test coverage. For example in magnum/common/utils:

Once you have found a place to work with and you have identified the corresponding unit test file in the magnum/tests/unit sub-directory, in this example I am working on on magnum/tests/unit/common/test_utils.py, you will want to run this individual unit test in the virtual environment you previously created.

$ source .tox/py27/bin/activate
$ testr run test_utils -- -f

You can now start working on making your changes in whatever editor you wish. You may want to also work interactively in python initially to test and verify classes and methods especially if you are unfamiliar with how the code functions. For example, using the identical import found in test_utils.py for the test coverage I started with these simple checks.

(py27)$ python
Python 2.7.6 (default, Mar 22 2014, 22:59:56)
[GCC 4.8.2] on linux2
Type "help", "copyright", "credits" or "license" for more information.
>>> from magnum.common import utils
>>> utils.is_valid_ipv4('10.0.0.1') == True
True
>>> utils.is_valid_ipv4('') == False
True

I then created some appropriate unit tests for these two methods based on this interactive validation. These tests show that I not only test for valid values, I also test various boundary contains for invalid values including blank, character and out of range values of IP addresses.

    def test_valid_ipv4(self):
        self.assertTrue(utils.is_valid_ipv4('10.0.0.1'))
        self.assertTrue(utils.is_valid_ipv4('255.255.255.255'))

    def test_invalid_ipv4(self):
        self.assertFalse(utils.is_valid_ipv4(''))
        self.assertFalse(utils.is_valid_ipv4('x.x.x.x'))
        self.assertFalse(utils.is_valid_ipv4('256.256.256.256'))
        self.assertFalse(utils.is_valid_ipv4(
                         'AA42:0000:0000:0000:0202:B3FF:FE1E:8329'))

    def test_valid_ipv6(self):
        self.assertTrue(utils.is_valid_ipv6(
                        'AA42:0000:0000:0000:0202:B3FF:FE1E:8329'))
        self.assertTrue(utils.is_valid_ipv6(
                        'AA42::0202:B3FF:FE1E:8329'))

    def test_invalid_ipv6(self):
        self.assertFalse(utils.is_valid_ipv6(''))
        self.assertFalse(utils.is_valid_ipv6('10.0.0.1'))
        self.assertFalse(utils.is_valid_ipv6('AA42::0202:B3FF:FE1E:'))

After making these changes you want to run and verify your modified test works as previously demonstrated.

$ testr run test_utils -- -f
running=OS_STDOUT_CAPTURE=${OS_STDOUT_CAPTURE:-1} \
OS_STDERR_CAPTURE=${OS_STDERR_CAPTURE:-1} \
OS_TEST_TIMEOUT=${OS_TEST_TIMEOUT:-160} \
${PYTHON:-python} -m subunit.run discover -t ./ ${OS_TEST_PATH:-./magnum/tests/unit} --list  -f
running=OS_STDOUT_CAPTURE=${OS_STDOUT_CAPTURE:-1} \
OS_STDERR_CAPTURE=${OS_STDERR_CAPTURE:-1} \
OS_TEST_TIMEOUT=${OS_TEST_TIMEOUT:-160} \
${PYTHON:-python} -m subunit.run discover -t ./ ${OS_TEST_PATH:-./magnum/tests/unit}  --load-list /tmp/tmpDMP50r -f
Ran 59 (+1) tests in 0.824s (-0.016s)
PASSED (id=19)

If your tests fail you will see a FAILED message like. I find it useful to write a failing test intentionally just to validate the actual testing process is working.


${PYTHON:-python} -m subunit.run discover -t ./ ${OS_TEST_PATH:-./magnum/tests/unit}  --load-list /tmp/tmpsZlk3i -f
======================================================================
FAIL: magnum.tests.unit.common.test_utils.UtilsTestCase.test_invalid_ipv6
tags: worker-0
----------------------------------------------------------------------
Empty attachments:
  stderr
  stdout

Traceback (most recent call last):
  File "magnum/tests/unit/common/test_utils.py", line 98, in test_invalid_ipv6
    self.assertFalse(utils.is_valid_ipv6('AA42::0202:B3FF:FE1E:832'))
  File "/home/rbradfor/os/openstack/magnum/.tox/py27/local/lib/python2.7/site-packages/unittest2/case.py", line 672, in assertFalse
    raise self.failureException(msg)
AssertionError: True is not false
Ran 55 (-4) tests in 0.805s (-0.017s)
FAILED (id=20, failures=1 (+1))

Confirming your new unit tests

You can verify this has improved coverage percentage by re-running the coverage commands. I use the text based version as an easy way to see a decrease in the number of lines not covered.

Before

$ coverage report -m | grep "common/utils"
magnum/common/utils    273     94     76     38    62%   92-94, 105-134, 151-157, 208-211, 215-218, 241-259, 267-270, 275-279, 325, 349-384, 442, 449-453, 458-459, 467, 517-518, 530-531, 544
$ tox -e cover

After

$ coverage report -m | grep "common/utils"
magnum/common/utils    273     86     76     38    64%   92-94, 105-134, 151-157, 241-259, 267-270, 275-279, 325, 349-384, 442, 449-453, 458-459, 467, 517-518, 530-531, 544

I can see 8 lines of improvement which I can also verify if I look at the html version.

Before

After

Additional Testing

Make sure you run a full test before committing. This runs all tests in multiple Python versions and runs the PEP8 code style validation for your modified unit tests.

$ tox -e py27

Here are some examples of PEP8 problems with my improvements to the unit tests.

pep8 runtests: commands[0] | flake8
./magnum/tests/unit/common/test_utils.py:88:80: E501 line too long (88 > 79 characters)
./magnum/tests/unit/common/test_utils.py:91:80: E501 line too long (87 > 79 characters)
...
./magnum/tests/unit/common/test_utils.py:112:32: E231 missing whitespace after ','
./magnum/tests/unit/common/test_utils.py:113:32: E231 missing whitespace after ','
./magnum/tests/unit/common/test_utils.py:121:30: E231 missing whitespace after ','
...

Submitting your work

In order for your time and effort to be included in the OpenStack project there are a number of key details you need to follow that I outlined in contributing to OpenStack. Specifically these documents are important.

You do not have to be familiar with the procedures in order to look at the code, and even look at improving the code. You will need to follow the steps as outlined in these links if you want to contribute your code. Remember if you are new, the best access to help is to jump onto the IRC channel of the project you are interested in.

This example along with additions for several other methods was submitted (See patch). It was reviewed and ultimately approved.

References

Some additional information about the tools and processes can be found in these OpenStack documentation and wiki pages.

Contributing to OpenStack

Following my first OpenStack Summit in Vancouver 4/2015 it was time to become involved with contributing to OpenStack.

I have lurked around the mailing lists and several IRC channels for a few weeks and familiarized myself with OpenStack in varying forms including devstack, the free hosted Mirantis Express and the VM version, Ubuntu OpenStack, and even building my own 3 physical server cloud from second hand hardware purchased on eBay.

There are several resources available however I suggest you start with this concise presentation I attended at the summit by Adrian Otto on “7 Habits of Highly Effective Contributors” (slides, video).

You should also look at contributions from existing developers by looking at current code being submitted for review at https://review.openstack.org. I spent several weeks just looking at submissions, and I look at new submissions most days. While it does not always make sense (including a lot initially) its important to look at the full scope of all the projects. It is extremely valuable to look at how the review process works, how others comment on contributions, and look at the types of patches and code changes that are being contributed. There are a number of ways of not doing it right which can be discouraging when you first start contributing. The following links are vital to read, and re-read.

Individual projects also have various information, for example Magnum’s Ways to Contribute.

The benefit of observing for some time is you can be better prepared when you start to contribute. I was also new to how unit testing and automated testing worked in Python (about 7th on my list of known languages), and so learning about running OpenStack tests with tox and understanding the different OpenStack tox configs were valuable lessons, helped by feedback of OpenStack developers on the mailing list and IRC (If you have not looked at the 7 Habits presentation, now is a great time).

I took the time to find areas of interest and value which become more apparent after attending my first Design Summit. I even committed to assist in a design priority in the Magnum project as a result of my learning about how unit testing worked.

And if you write about your experiences another thing you can do is Add your blog to Planet OpenStack. I have received great feedback from the OpenStack community when writing about my first experiences.

Tracking the Ubuntu OpenStack installation process

Following on from Installing Ubuntu OpenStack the following steps help you navigate around the single server installation, monitoring and debugging the installation process.

Configuration

The initial execution of the installer will create a default config.yaml file that defines the container and OpenStack services. After a successful installation this looks like:

$ more $HOME/.cloud-install/config.yaml
container_ip: 10.0.3.149
current_state: 2
deploy_complete: true
install_type: Single
openstack_password: openstack
openstack_release: juno
placements:
  controller:
    assignments:
      LXC:
      - nova-cloud-controller
      - glance
      - glance-simplestreams-sync
      - openstack-dashboard
      - juju-gui
      - keystone
      - mysql
      - neutron-api
      - neutron-openvswitch
      - rabbitmq-server
    constraints:
      cpu-cores: 2
      mem: 6144
      root-disk: 20480
  nova-compute-machine-0:
    assignments:
      BareMetal:
      - nova-compute
    constraints:
      mem: 4096
      root-disk: 40960
  quantum-gateway-machine-0:
    assignments:
      BareMetal:
      - quantum-gateway
    constraints:
      mem: 2048
      root-disk: 20480

This file changes during the installation process which I described later.

The LXC Container

The single server installation is managed within a single LXC container. You can obtain details of and connect to the container with the following.

$ sudo lxc-ls --fancy
----------------------------------------------------------------------------
uoi-bootstrap  RUNNING  10.0.3.149, 10.0.4.1, 192.168.122.1  -     YES      

$ sudo lxc-info --name uoi-bootstrap
Name:           uoi-bootstrap
State:          RUNNING
PID:            19623
IP:             10.0.3.149
IP:             10.0.4.1
IP:             192.168.122.1
CPU use:        27692.85 seconds
BlkIO use:      63.94 GiB
Memory use:     24.29 GiB
KMem use:       0 bytes
Link:           vethC0E9US
 TX bytes:      507.43 MiB
 RX bytes:      1.43 GiB
 Total bytes:   1.93 GiB

$ sudo lxc-attach --name uoi-bootstrap

You can also connect to the server directly. As I prefer to NEVER configure or connect to a server as root this is how I access the LXC container.

$ ssh [email protected]

Juju Status

When connected to the LXC container you can then look at the status of the Juju orchestration with.

$ export JUJU_HOME=~/.cloud-install/juju

$ juju status
environment: local
machines:
  "0":
    agent-state: started
    agent-version: 1.20.11.1
    dns-name: localhost
    instance-id: localhost
    series: trusty
    state-server-member-status: has-vote
  "1":
    agent-state: started
    agent-version: 1.20.11.1
    dns-name: 10.0.4.62
    instance-id: ubuntu-local-machine-1
    series: trusty
    hardware: arch=amd64 cpu-cores=1 mem=4096M root-disk=40960M
  "2":
    agent-state: started
    agent-version: 1.20.11.1
    dns-name: 10.0.4.77
    instance-id: ubuntu-local-machine-2
    series: trusty
    containers:
      2/lxc/0:
        agent-state: started
        agent-version: 1.20.11.1
        dns-name: 10.0.4.147
        instance-id: ubuntu-local-machine-2-lxc-0
        series: trusty
        hardware: arch=amd64
      2/lxc/1:
        agent-state: started
        agent-version: 1.20.11.1
        dns-name: 10.0.4.15
        instance-id: ubuntu-local-machine-2-lxc-1
        series: trusty
        hardware: arch=amd64
      2/lxc/2:
        agent-state: started
        agent-version: 1.20.11.1
        dns-name: 10.0.4.135
        instance-id: ubuntu-local-machine-2-lxc-2
        series: trusty
        hardware: arch=amd64
      2/lxc/3:
        agent-state: started
        agent-version: 1.20.11.1
        dns-name: 10.0.4.133
        instance-id: ubuntu-local-machine-2-lxc-3
        series: trusty
        hardware: arch=amd64
      2/lxc/4:
        agent-state: started
        agent-version: 1.20.11.1
        dns-name: 10.0.4.119
        instance-id: ubuntu-local-machine-2-lxc-4
        series: trusty
        hardware: arch=amd64
      2/lxc/5:
        agent-state: started
        agent-version: 1.20.11.1
        dns-name: 10.0.4.88
        instance-id: ubuntu-local-machine-2-lxc-5
        series: trusty
        hardware: arch=amd64
      2/lxc/6:
        agent-state: started
        agent-version: 1.20.11.1
        dns-name: 10.0.4.155
        instance-id: ubuntu-local-machine-2-lxc-6
        series: trusty
        hardware: arch=amd64
      2/lxc/7:
        agent-state: started
        agent-version: 1.20.11.1
        dns-name: 10.0.4.36
        instance-id: ubuntu-local-machine-2-lxc-7
        series: trusty
        hardware: arch=amd64
      2/lxc/8:
        agent-state: started
        agent-version: 1.20.11.1
        dns-name: 10.0.4.11
        instance-id: ubuntu-local-machine-2-lxc-8
        series: trusty
        hardware: arch=amd64
    hardware: arch=amd64 cpu-cores=2 mem=6144M root-disk=20480M
  "3":
    agent-state: started
    agent-version: 1.20.11.1
    dns-name: 10.0.4.10
    instance-id: ubuntu-local-machine-3
    series: trusty
    hardware: arch=amd64 cpu-cores=1 mem=2048M root-disk=20480M
  "4":
    agent-state: started
    agent-version: 1.20.11.1
    dns-name: 10.0.4.96
    instance-id: ubuntu-local-machine-4
    series: trusty
    hardware: arch=amd64 cpu-cores=1 mem=512M root-disk=8192M
  "5":
    agent-state: started
    agent-version: 1.20.11.1
    dns-name: 10.0.4.140
    instance-id: ubuntu-local-machine-5
    series: trusty
    hardware: arch=amd64 cpu-cores=1 mem=512M root-disk=8192M
  "6":
    agent-state: started
    agent-version: 1.20.11.1
    dns-name: 10.0.4.197
    instance-id: ubuntu-local-machine-6
    series: trusty
    hardware: arch=amd64 cpu-cores=1 mem=512M root-disk=8192M
services:
  glance:
    charm: cs:trusty/glance-11
    exposed: false
    relations:
      amqp:
      - rabbitmq-server
      cluster:
      - glance
      identity-service:
      - keystone
      image-service:
      - nova-cloud-controller
      - nova-compute
      object-store:
      - swift-proxy
      shared-db:
      - mysql
    units:
      glance/0:
        agent-state: started
        agent-version: 1.20.11.1
        machine: 2/lxc/4
        open-ports:
        - 9292/tcp
        public-address: 10.0.4.119
  glance-simplestreams-sync:
    charm: local:trusty/glance-simplestreams-sync-0
    exposed: false
    relations:
      amqp:
      - rabbitmq-server
      identity-service:
      - keystone
    units:
      glance-simplestreams-sync/0:
        agent-state: started
        agent-version: 1.20.11.1
        machine: 2/lxc/5
        public-address: 10.0.4.88
  juju-gui:
    charm: cs:trusty/juju-gui-16
    exposed: false
    units:
      juju-gui/0:
        agent-state: started
        agent-version: 1.20.11.1
        machine: 2/lxc/1
        open-ports:
        - 80/tcp
        - 443/tcp
        public-address: 10.0.4.15
  keystone:
    charm: cs:trusty/keystone-12
    exposed: false
    relations:
      cluster:
      - keystone
      identity-service:
      - glance
      - glance-simplestreams-sync
      - neutron-api
      - nova-cloud-controller
      - openstack-dashboard
      - swift-proxy
      shared-db:
      - mysql
    units:
      keystone/0:
        agent-state: started
        agent-version: 1.20.11.1
        machine: 2/lxc/2
        public-address: 10.0.4.135
  mysql:
    charm: cs:trusty/mysql-12
    exposed: false
    relations:
      cluster:
      - mysql
      shared-db:
      - glance
      - keystone
      - neutron-api
      - nova-cloud-controller
      - nova-compute
      - quantum-gateway
    units:
      mysql/0:
        agent-state: started
        agent-version: 1.20.11.1
        machine: 2/lxc/0
        public-address: 10.0.4.147
  neutron-api:
    charm: cs:trusty/neutron-api-6
    exposed: false
    relations:
      amqp:
      - rabbitmq-server
      cluster:
      - neutron-api
      identity-service:
      - keystone
      neutron-api:
      - nova-cloud-controller
      neutron-plugin-api:
      - neutron-openvswitch
      shared-db:
      - mysql
    units:
      neutron-api/0:
        agent-state: started
        agent-version: 1.20.11.1
        machine: 2/lxc/7
        open-ports:
        - 9696/tcp
        public-address: 10.0.4.36
  neutron-openvswitch:
    charm: cs:trusty/neutron-openvswitch-2
    exposed: false
    relations:
      amqp:
      - rabbitmq-server
      neutron-plugin:
      - nova-compute
      neutron-plugin-api:
      - neutron-api
    subordinate-to:
    - nova-compute
  nova-cloud-controller:
    charm: cs:trusty/nova-cloud-controller-51
    exposed: false
    relations:
      amqp:
      - rabbitmq-server
      cloud-compute:
      - nova-compute
      cluster:
      - nova-cloud-controller
      identity-service:
      - keystone
      image-service:
      - glance
      neutron-api:
      - neutron-api
      quantum-network-service:
      - quantum-gateway
      shared-db:
      - mysql
    units:
      nova-cloud-controller/0:
        agent-state: started
        agent-version: 1.20.11.1
        machine: 2/lxc/3
        open-ports:
        - 3333/tcp
        - 8773/tcp
        - 8774/tcp
        - 9696/tcp
        public-address: 10.0.4.133
  nova-compute:
    charm: cs:trusty/nova-compute-14
    exposed: false
    relations:
      amqp:
      - rabbitmq-server
      cloud-compute:
      - nova-cloud-controller
      compute-peer:
      - nova-compute
      image-service:
      - glance
      neutron-plugin:
      - neutron-openvswitch
      shared-db:
      - mysql
    units:
      nova-compute/0:
        agent-state: started
        agent-version: 1.20.11.1
        machine: "1"
        public-address: 10.0.4.62
        subordinates:
          neutron-openvswitch/0:
            upgrading-from: cs:trusty/neutron-openvswitch-2
            agent-state: started
            agent-version: 1.20.11.1
            public-address: 10.0.4.62
  openstack-dashboard:
    charm: cs:trusty/openstack-dashboard-9
    exposed: false
    relations:
      cluster:
      - openstack-dashboard
      identity-service:
      - keystone
    units:
      openstack-dashboard/0:
        agent-state: started
        agent-version: 1.20.11.1
        machine: 2/lxc/6
        open-ports:
        - 80/tcp
        - 443/tcp
        public-address: 10.0.4.155
  quantum-gateway:
    charm: cs:trusty/quantum-gateway-10
    exposed: false
    relations:
      amqp:
      - rabbitmq-server
      cluster:
      - quantum-gateway
      quantum-network-service:
      - nova-cloud-controller
      shared-db:
      - mysql
    units:
      quantum-gateway/0:
        agent-state: started
        agent-version: 1.20.11.1
        machine: "3"
        public-address: 10.0.4.10
  rabbitmq-server:
    charm: cs:trusty/rabbitmq-server-26
    exposed: false
    relations:
      amqp:
      - glance
      - glance-simplestreams-sync
      - neutron-api
      - neutron-openvswitch
      - nova-cloud-controller
      - nova-compute
      - quantum-gateway
      cluster:
      - rabbitmq-server
    units:
      rabbitmq-server/0:
        agent-state: started
        agent-version: 1.20.11.1
        machine: 2/lxc/8
        open-ports:
        - 5672/tcp
        public-address: 10.0.4.11

You can also look at a subset of the status for a particular service, for example keystone with:

$ juju status keystone
environment: local
machines:
  "1":
    agent-state: started
    agent-version: 1.20.11.1
    dns-name: 10.0.4.128
    instance-id: ubuntu-local-machine-1
    series: trusty
    containers:
      1/lxc/2:
        agent-state: started
        agent-version: 1.20.11.1
        dns-name: 10.0.4.142
        instance-id: ubuntu-local-machine-1-lxc-2
        series: trusty
        hardware: arch=amd64
    hardware: arch=amd64 cpu-cores=2 mem=6144M root-disk=20480M
services:
  keystone:
    charm: cs:trusty/keystone-12
    exposed: false
    relations:
      cluster:
      - keystone
      identity-service:
      - glance
      - glance-simplestreams-sync
      - neutron-api
      - nova-cloud-controller
      - openstack-dashboard
      shared-db:
      - mysql
    units:
      keystone/0:
        agent-state: started
        agent-version: 1.20.11.1
        machine: 1/lxc/2
        public-address: 10.0.4.142

Monitoring the Installation

When performing an installation you can monitor the executed commands with:

$ tail -f $HOME/.cloud-install/commands.log

...

This provides a lot of debugging output. A streamlined logging is actually possible with automated installation described later.

Uninstalling

As the single server instance is in a LXC container, as the documentation states uninstalling the environment is a rather trivial process that takes only a few seconds.

This will teardown the cloud but leaving userdata available for a subsequent deployment.

$ sudo openstack-install -k
Warning:

This will destroy the host Container housing the OpenStack private cloud. This is a permanent operation.
Proceed? [y/N] Y
Removing static route
Removing host container...
Container is removed.

You can also do a more permanent uninstall of the cloud and packages.

$ sudo openstack-install -u
Warning:

This will uninstall OpenStack and make a best effort to return the system back to its original state.
Proceed? [y/N] Y
Restoring system to last known state.
Ubuntu Openstack Installer Uninstalling ...Single install path.

This does not however seem to cleanup $HOME/.cloud-install. You can safely remove this or move it sideways when re-deploying without any issues.

Installation automation

As described in my original post, the openstack-install script is a cursors-based interactive view. You can automate the installation by defining the needed setup inputs in a separate configuration file and running in headless mode.

$ echo "install_type: Single
openstack_password: openstack" > install.yaml

$ sudo openstack-install --headless --config install.yaml

This has the added benefit providing a more meaningful log of the state of the installation with less verbose information then in the commands.log file.

[INFO  • 06-02 12:02:42 • cloudinstall.install] Running in headless mode.
[INFO  • 06-02 12:02:42 • cloudinstall.install] Performing a Single Install
[INFO  • 06-02 12:02:42 • cloudinstall.task] [TASKLIST] ['Initializing Environment', 'Creating container', 'Bootstrapping Juju']
[INFO  • 06-02 12:02:42 • cloudinstall.task] [TASK] Initializing Environment
[INFO  • 06-02 12:02:42 • cloudinstall.consoleui] Building environment
[INFO  • 06-02 12:02:42 • cloudinstall.single_install] Prepared userdata: {'extra_sshkeys': ['ssh-rsa ...\n'], 'seed_command': ['env', 'pollinate', '-q']}
[INFO  • 06-02 12:02:42 • cloudinstall.single_install] Setting permissions for user rbradfor
[INFO  • 06-02 12:02:43 • cloudinstall.task] [TASK] Creating container
[INFO  • 06-02 12:04:20 • cloudinstall.single_install] Setting DHCP properties for host container.
[INFO  • 06-02 12:04:20 • cloudinstall.single_install] Adding static route for 10.0.4.0/24 via 10.0.3.160
...
[INFO  • 06-02 12:22:50 • cloudinstall.consoleui] Checking availability of nova-cloud-controller: pending
[INFO  • 06-02 12:23:31 • cloudinstall.consoleui] Checking availability of nova-cloud-controller: installed
[INFO  • 06-02 12:23:52 • cloudinstall.consoleui] Checking availability of nova-cloud-controller: started
[INFO  • 06-02 12:24:34 • cloudinstall.consoleui] Checking availability of keystone: started
[INFO  • 06-02 12:24:44 • cloudinstall.consoleui] Checking availability of keystone: started
[INFO  • 06-02 12:24:44 • cloudinstall.consoleui] Checking availability of nova-cloud-controller: started
[INFO  • 06-02 12:27:38 • cloudinstall.consoleui] Checking availability of quantum-gateway: started
[INFO  • 06-02 12:27:38 • cloudinstall.consoleui] Checking availability of nova-cloud-controller: started
[INFO  • 06-02 12:27:38 • cloudinstall.consoleui] Validating network parameters for Neutron
[INFO  • 06-02 12:27:53 • cloudinstall.consoleui] All systems go!=

And 25 minutes later you have an available cloud.

If you attempt to look at the GUI status page with openstack-status you will be given a text based version of messages like.

$ sudo openstack-status
[INFO  • 06-02 12:06:21 • cloudinstall.core] Running openstack-status in headless mode.
[INFO  • 06-02 12:06:21 • cloudinstall.consoleui] Loaded placements from file.
[INFO  • 06-02 12:06:21 • cloudinstall.consoleui] Waiting for machines to start: 3 unknown
[INFO  • 06-02 12:08:20 • cloudinstall.consoleui] Waiting for machines to start: 1 pending, 2 unknown
[INFO  • 06-02 12:08:48 • cloudinstall.consoleui] Waiting for machines to start: 2 pending, 1 unknown
[INFO  • 06-02 12:09:04 • cloudinstall.consoleui] Waiting for machines to start: 1 down (started), 1 pending, 1 unknown
[INFO  • 06-02 12:09:13 • cloudinstall.consoleui] Waiting for machines to start: 1 down (started), 2 pending
[INFO  • 06-02 12:09:20 • cloudinstall.consoleui] Waiting for machines to start: 2 down (started), 1 pending
[INFO  • 06-02 12:09:26 • cloudinstall.consoleui] Waiting for machines to start: 1 pending, 2 started
[INFO  • 06-02 12:09:51 • cloudinstall.consoleui] Waiting for machines to start: 1 down (started), 2 started
[INFO  • 06-02 12:10:44 • cloudinstall.consoleui] Verifying service deployments
[INFO  • 06-02 12:10:44 • cloudinstall.consoleui] Missing ConsoleUI() attribute: set_pending_deploys
[INFO  • 06-02 12:10:44 • cloudinstall.consoleui] Checking if MySQL is deployed
[INFO  • 06-02 12:10:44 • cloudinstall.consoleui] Deploying MySQL to machine lxc:1
[INFO  • 06-02 12:10:49 • cloudinstall.consoleui] Deployed MySQL.
[INFO  • 06-02 12:10:49 • cloudinstall.consoleui] Checking if Juju GUI is deployed
[INFO  • 06-02 12:10:49 • cloudinstall.consoleui] Deploying Juju GUI to machine lxc:1
[INFO  • 06-02 12:11:00 • cloudinstall.consoleui] Deployed Juju GUI.
[INFO  • 06-02 12:11:00 • cloudinstall.consoleui] Checking if Keystone is deployed
[INFO  • 06-02 12:11:00 • cloudinstall.consoleui] Deploying Keystone to machine lxc:1
...

It seems you can trick it into providing both a GUI and text version with the following in another shell session.

$ sed -ie "/headless/d" $HOME/.cloud-install/config.yaml
$ sudo openstack-status

NOTE: You will not get any output until the initial container is completed. This also leaves a .pid file that must be manually cleaned up if you run to soon. The next invocation provides the following message.

$ sudo openstack-status
Another instance of openstack-status is running. If you're sure there are no other instances, please remove ~/.cloud-install/openstack.pid
$ rm $HOME/.cloud-install/openstack.pid

Monitoring the installation progress

The running config.yaml file changes over the duration of the installation.
It’s most basic configuration (when starting with the GUI) is:

$ more $HOME/.cloud-install/config.yaml
current_state: 0
openstack_release: juno

The release is also defined in the $HOME/.cloud-install/openstack_release file.

When starting by passing the configuration as previously mentioned it’s initial state is:

$ more $HOME/.cloud-install/config.yaml
config_file: install.yaml
current_state: 0
headless: true
install_type: Single
openstack_password: openstack
openstack_release: juno

This is updated when the LXC container is installed.

$ more $HOME/.cloud-install/config.yaml
config_file: install.yaml
container_ip: 10.0.3.77
current_state: 0
headless: true
install_type: Single
openstack_password: openstack
openstack_release: juno

And also updated during installation, such as.

$ more $HOME/.cloud-install/config.yaml
config_file: install.yaml
container_ip: 10.0.3.77
current_state: 0
headless: true
install_type: Single
openstack_password: openstack
openstack_release: juno
placements:
  controller:
    assignments:
      LXC:
      - nova-cloud-controller
      - glance
      - glance-simplestreams-sync
      - openstack-dashboard
      - juju-gui
      - keystone
      - mysql
      - neutron-api
      - neutron-openvswitch
      - rabbitmq-server
    constraints:
      cpu-cores: 2
      mem: 6144
      root-disk: 20480
  nova-compute-machine-0:
    assignments:
      BareMetal:
      - nova-compute
    constraints:
      mem: 4096
      root-disk: 40960
  quantum-gateway-machine-0:
    assignments:
      BareMetal:
      - quantum-gateway
    constraints:
      mem: 2048
      root-disk: 20480

When completed the configuration has the following settings.

config_file: install.yaml
container_ip: 10.0.3.77
current_state: 2
deploy_complete: true
install_type: Single
openstack_password: openstack
openstack_release: juno
placements:
...

Problems

When using the GUI installer the first time you quit (using Q), it seems to leave the terminal state wrong. The following will reset this to normal use.

$ stty sane  ^j    # (i.e. Ctrl-J together).

Subsequent uses of openstack-status do not have the same problem.

References

In my next post I am going to talk about the analysis taken to debug errors in the installation, starting with Keystone – hook failed: “config-changed” message I got attempting to install kilo, and hence this more detailed analysis of the installation process components.

Installing Ubuntu OpenStack

The The Canonical Distribution of Ubuntu OpenStack provides a simple installer to run an OpenStack cloud. You can deploy a simple single machine setup with fully containerized services (11 in total), or a multi server installation leveraging MAAS – Metal as a Service and Landscape Autopilot.

Installation

This post describes my experiences with the single machine setup on a 4 core machine with 32GB of RAM with a clean Ubuntu 14.04 LTS OS. The installation requires the following commands to configure the repo, install and configure your OpenStack cloud. In this example, the installed version is 0.22.3.

sudo apt-add-repository -y ppa:cloud-installer/stable
sudo apt-get update
sudo apt-get install -y openstack
sudo openstack-install --version
sudo openstack-install

The final step uses a cusors-based interface and only requires two steps before the installation.

  • Specify a password
  • Specify the install type


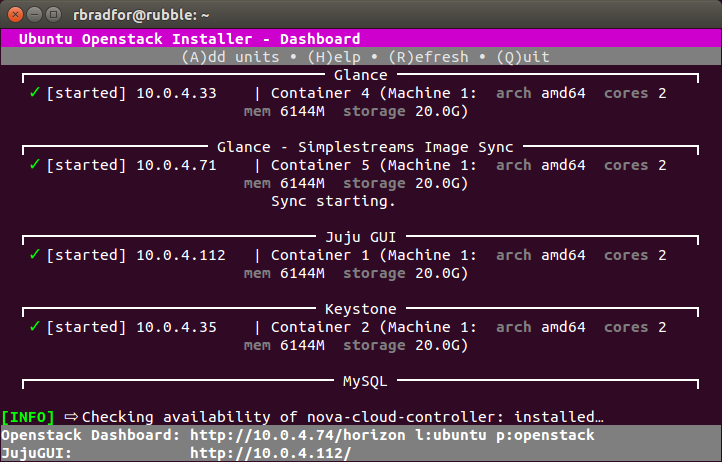
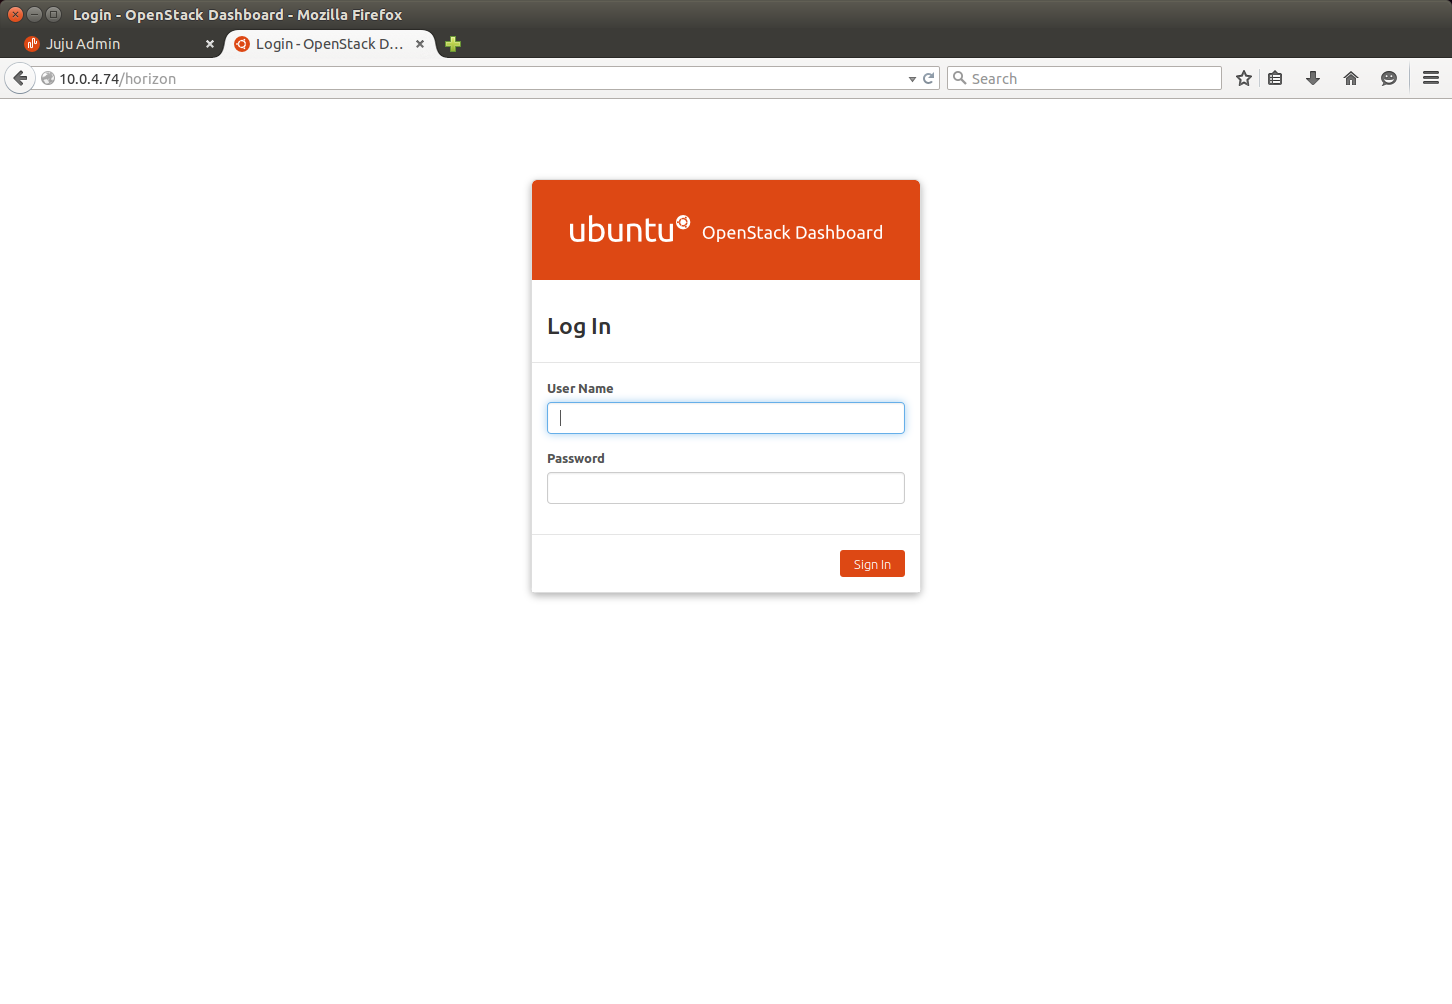
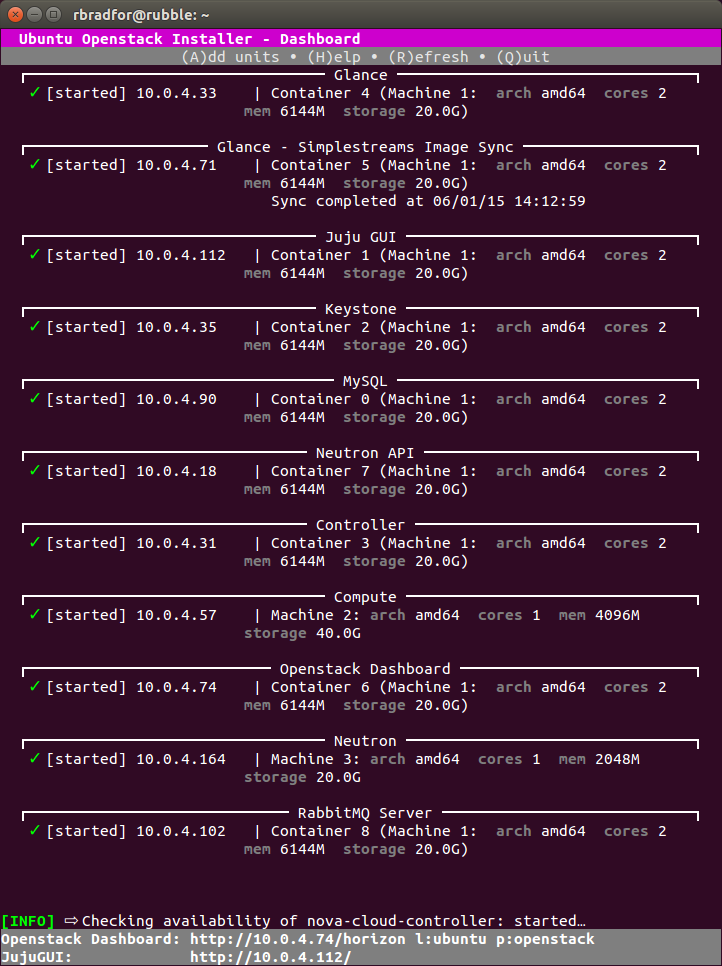
The UI provides a progress status of the installation. Initially new containers will start with a Pending status. Following the starting of the Juju GUI container the footer bar shows the URL for the JujuGUI, in my case http://10.0.4.112. Following the starting of the Openstack Dashboard you will then get a Horizon URL also detailed in the footer such as http://10.0.4.74/horizon.


Horizon

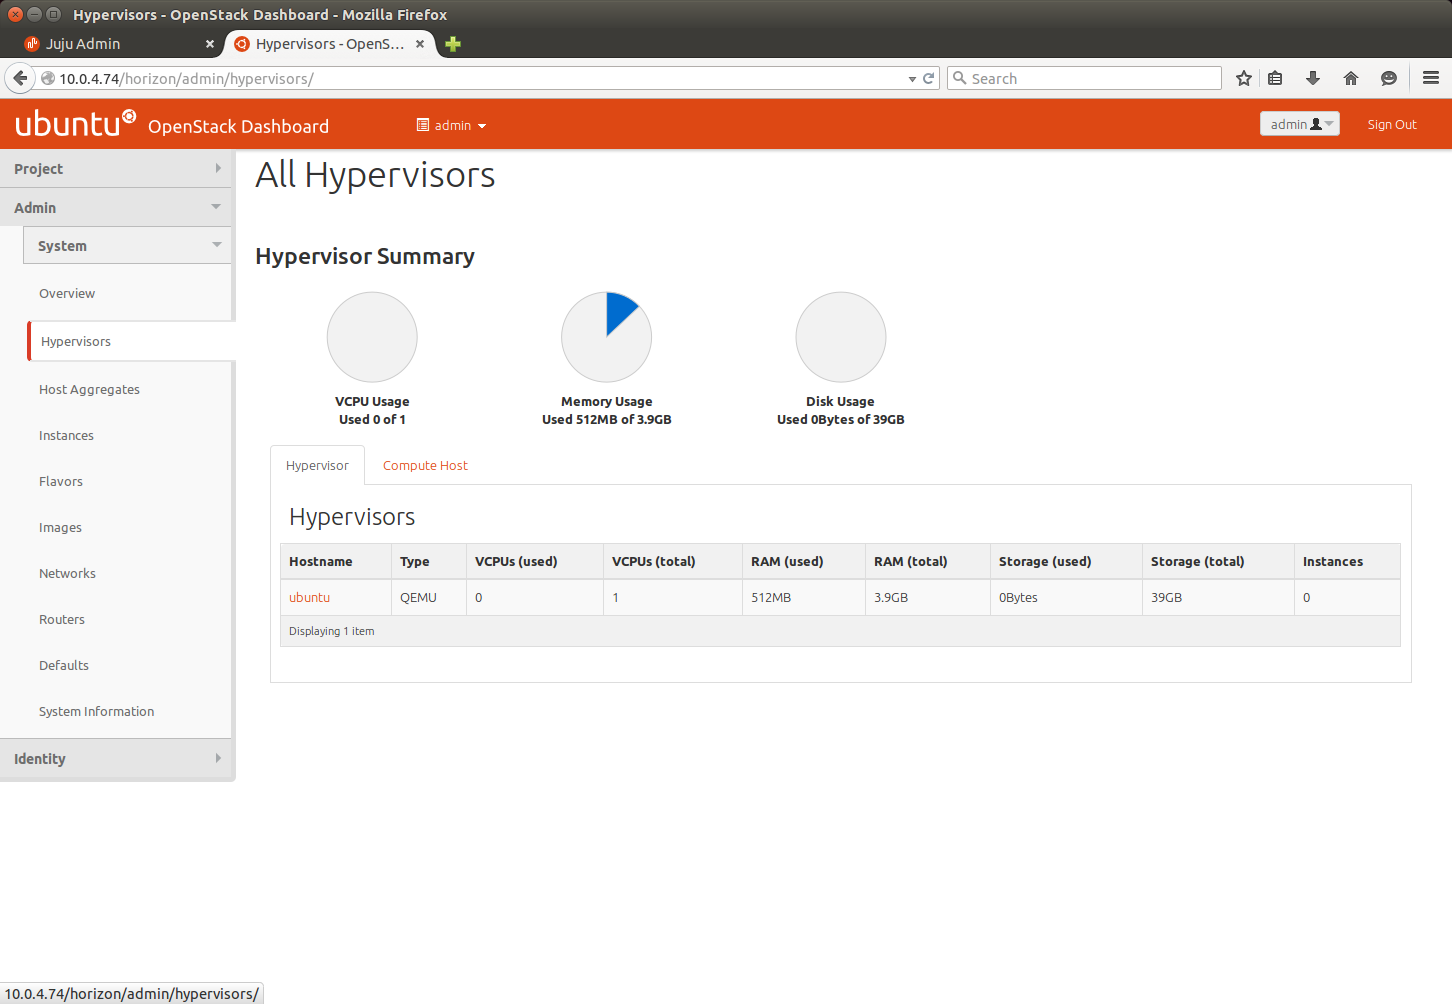
The Horizon display is what you generally expect.


JujuGUI

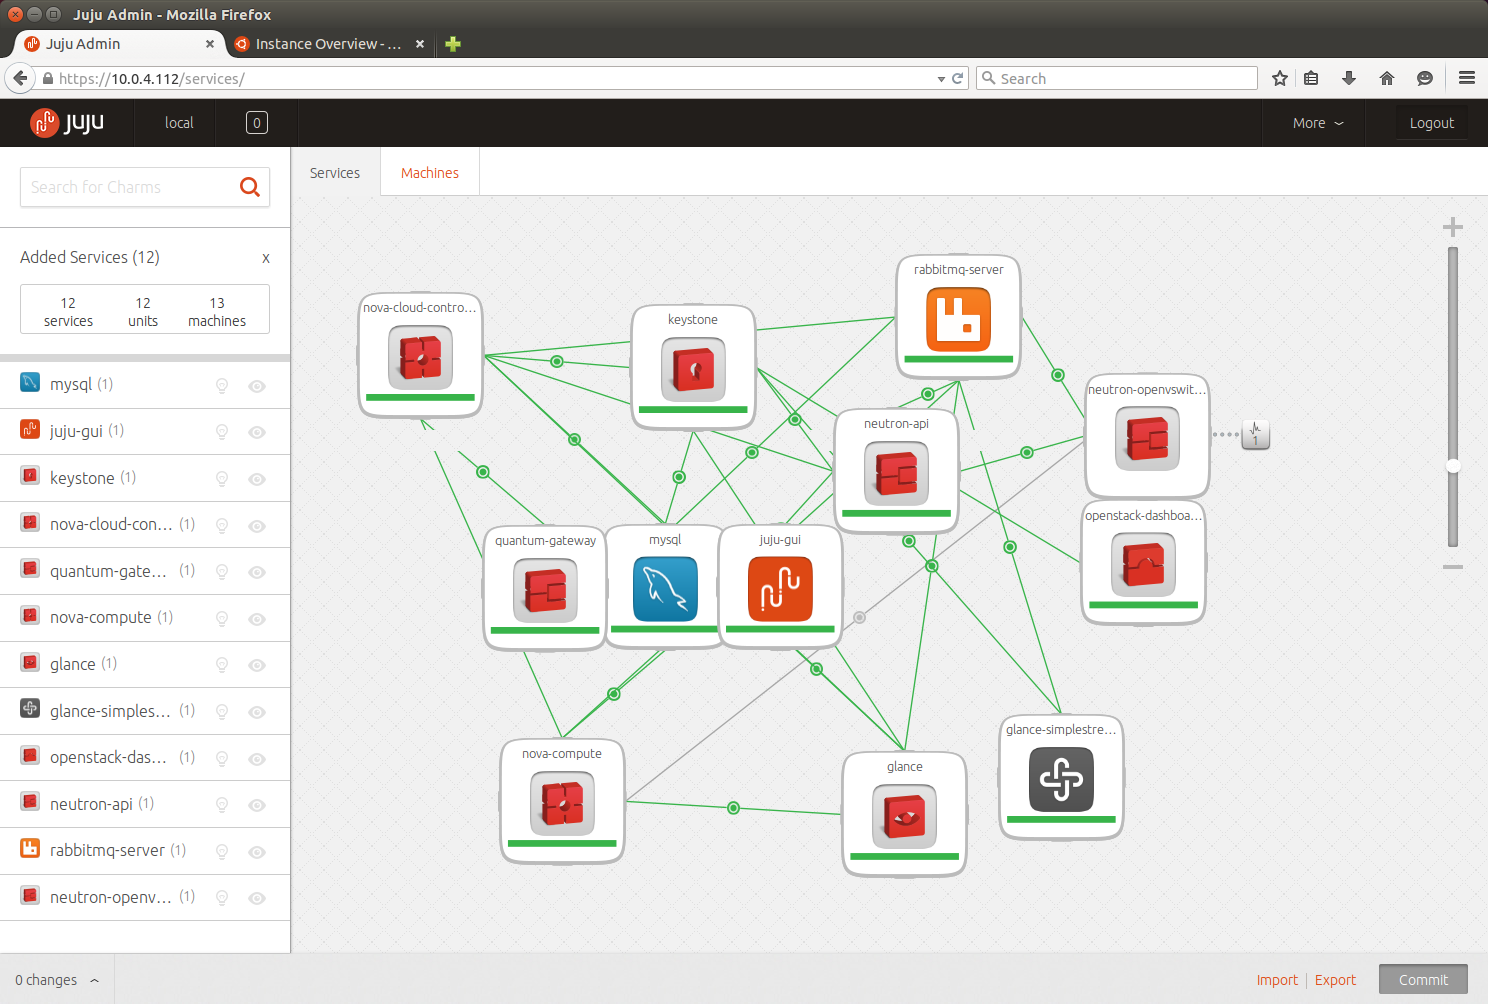
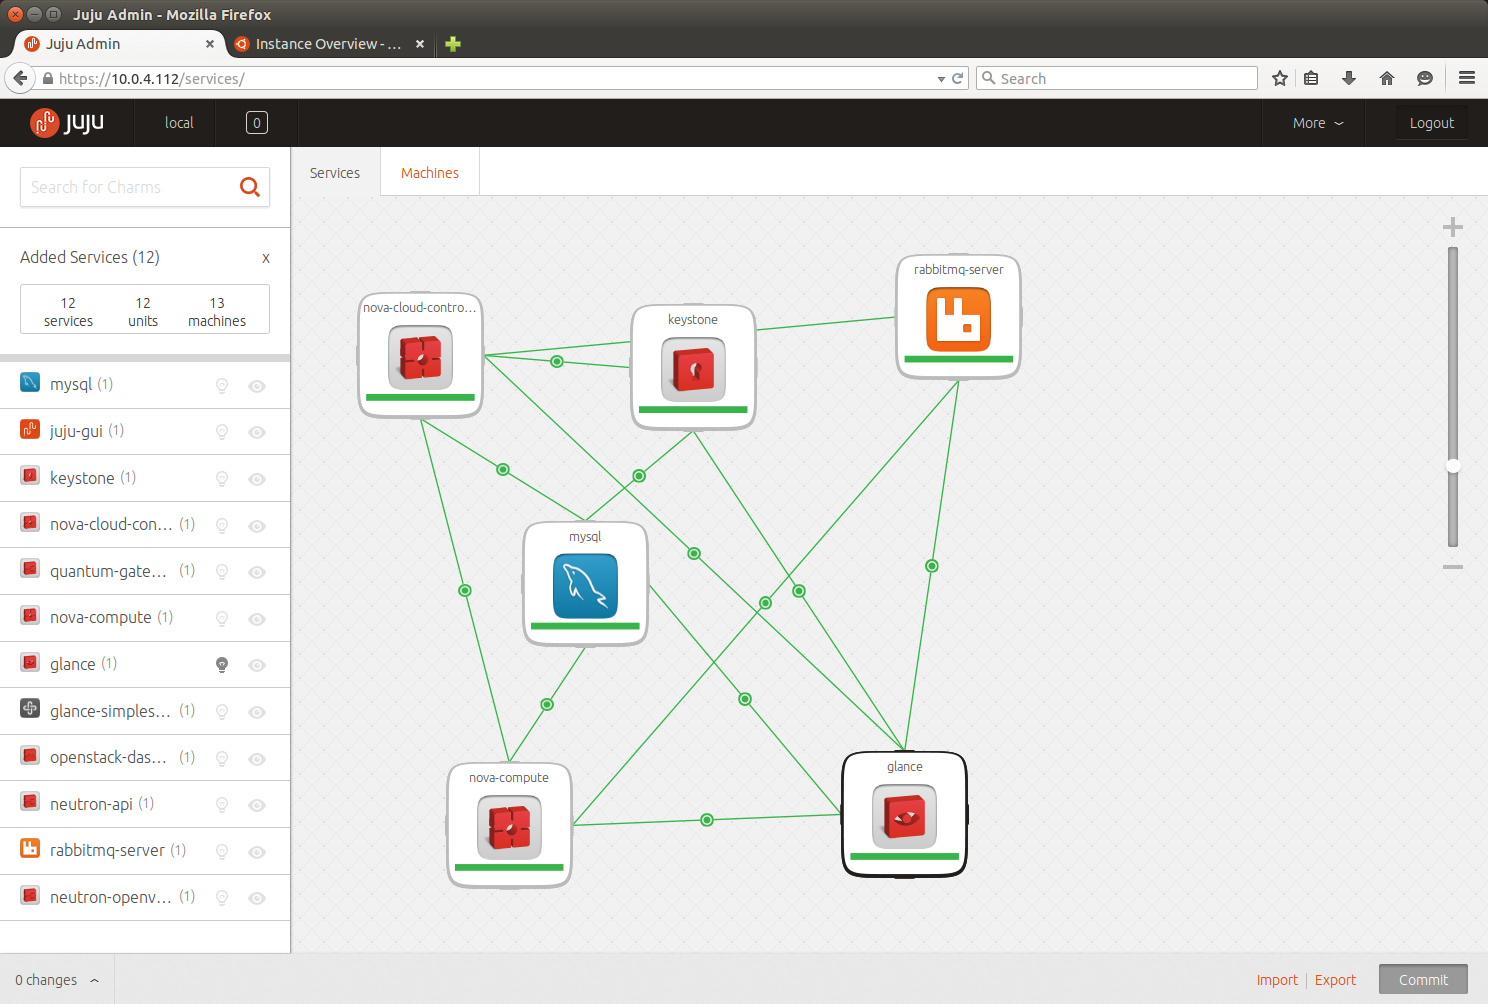
The JujuGUI provides a display of the deployment orchestration via charms. You can also drill down to specific services. An example is for the glance service using the charm cs:trusty/glance-11. This describes the relationships and configuration which are also seen in the GUI. You can also view online the full source code used to create this deployed service.


OpenStack Status

You can view the state of your containerized cloud with openstack-status which is a cursors-based display of the running installation, the same used during the installation. This displays the units deployed, status messages and a footer URL bar that indicates the URL’s of Horizon and JujuGUI. Each time you invoke this it will also check services, as indicated by the [INFO] messages.


Connecting to Containers

The installer will automatically create a SSH key for the user that you use to run the openstack-install command. This enables you to SSH to any of the containers, for example to connect to the MySQL container.

ssh [email protected]
$ mysql -uroot -p`sudo cat /var/lib/mysql/mysql.passwd` -e "SHOW SCHEMAS"
+--------------------+
| Database           |
+--------------------+
| information_schema |
| glance             |
| keystone           |
| mysql              |
| neutron            |
| nova               |
| performance_schema |
+--------------------+

You can use the various OpenStack clients to access OpenStack services. These are not installed by default.

sudo apt-get install -y python-glanceclient python-openstackclient python-novaclient python-keystoneclient
$ source $HOME/.cloud-install/openstack-admin-rc
$ glance image-list
+--------------------------------------+---------------------------------------------------------------+-------------+------------------+-----------+--------+
| ID                                   | Name                                                          | Disk Format | Container Format | Size      | Status |
+--------------------------------------+---------------------------------------------------------------+-------------+------------------+-----------+--------+
| f3cd4ec6-8ce6-4a44-85ec-2f8f066f351b | auto-sync/ubuntu-trusty-14.04-amd64-server-20150528-disk1.img | qcow2       | bare             | 257294848 | active |
+--------------------------------------+---------------------------------------------------------------+-------------+------------------+-----------+--------+

More Information

Read Tracking the Ubuntu OpenStack installation process for more detailed information on monitoring the installation process.

Thanks to the New York OpenStack Group and a presentation by Mark Baker of Canonical who demonstrated MAAS and Landscape AutoPilot installation of OpenStack. Slides of Automating hard things slides.