UltimateLAMP Passwords

For those passwords I have not clearly mentioned within the included wiki documents, here is a summary.

  • UltimateLAMP is built on the VMWare Browser Appliance application, so all Linux passwords match the supplied default.
    • vmware/vwmare
    • root/vmware To use, you do $ sudo su –
  • For all UltimateLAMP passwords, I have used dolphin. Within MySQL, the username will match the database name of the application.
  • For all UltimateLAMP Applications, I have used a username that matches the product name (where possible), and have used the password dolphin. Some applications for example, have a default user (for example WordPress uses admin).
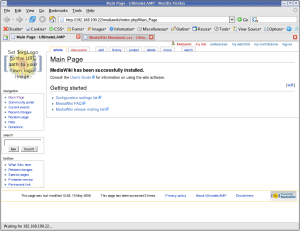
Restyling a Mediwiki Installation – Lesson 1

Following my implementation of UltimateLAMP, read heaps more at this thread, I undertook to provide customizations of a MediaWiki Installation. Here is the first lesson that you can undertake if you wish to beautify the default MediaWiki Installation.

For the purposes of this demonstration, I am going to help out Jay & Colin and propose a restyle the MySQL forge to fit in with the default Home Page. Hopefully you will see it there soon!

Lesson 1 – Updating the default Monobook.css

There are several different ways to make style changes, the simplest is to customize the system wide Monobook.css, and this Lesson will focus on this.

By accessing the link [http://my.wiki.site/]index.php/MediaWiki:Monobook.css you will be able to make the following changes.

The best way to approach this, like any good programming style, make small changes, testing and confirmation and continue.

Note: For all screen prints, click for a larger image

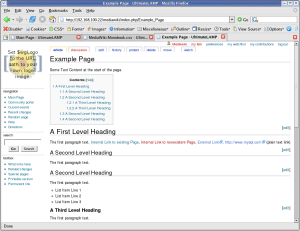
1. Cleanup Backgrounds

body        { background-image: none; background-color: #FFFFFF;}
.portlet    { background-color: #FFFFFF; }

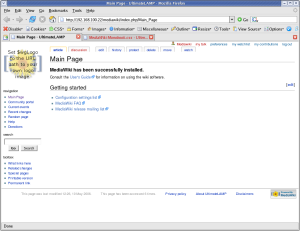
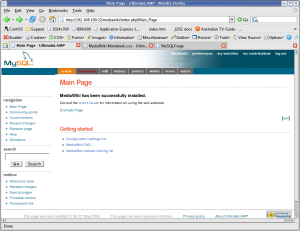
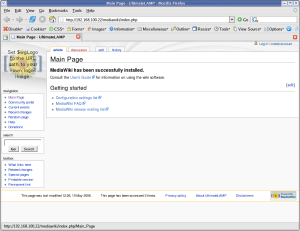
The MediaWiki Page is made up of three sections, these are the represented by styles .portlet, #content, and #footer. For the purposes of our first example, the content section and the footer section are already white.

==>

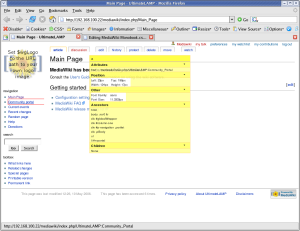
At this point I should recommend that you use FireFox for future work. You should then install the Web Developer Add-on. What results from this plugin is invaluable information about the internals of a web page. The two options most useful for this exercise is:

  • Information | Display Id and Class Details.
  • Information | Display Element Information (move the cursor around to get information)
==>

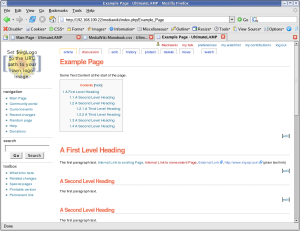
2. Cleanup Borders

I don’t feel that borders around things are warranted. I’m more a clean look kinda guy. Remove all borders, say one to separate the footer from the page.

#content    { border-width: 0px; }
.portlet .pBody
            { border-width: 0px; }
#footer     { border-top: 1px solid #888888; border-bottom-width: 0px; }
==>

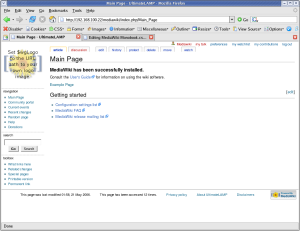
Maybe, that’s a little too clean. Add some separators on left side options.

#p-navigation,
#p-search,
#p-tb       { border-top: 1px dotted #888888; }
==>

3. Links

Using the Forge Styles http://forge.mysql.com/css/shared.css we can adjust the links accordingly.

a:link      { color: #10688E; text-decoration: none; }
a:hover     { color: #003366; text-decoration: underline; }
a:visited   { color: #106887; text-decoration: none; }

a.new:link  { color: #AA0000; text-decoration: none; }
a.new:hover { color: #AA0000; text-decoration: underline; }

==>

4. Content

Ok, we have played around a little, now to move into some more serious changes. Looking at the general page look and feel that you see in most page content.


html,body,p,td,a,li
            { font: 12px/19px Verdana, "Lucida Grande", "Lucida Sans Unicode", Tahoma, Arial, sans-serif; }

h1          { font: bold 24px Helvetica, Arial, sans-serif; color: #EB694A; letter-spacing: -1px;
              margin: 1.5em 0 0.25em 0;
              border-bottom: 1px dotted #888888; line-height: 1.1em; padding-bottom: 0.2em; }

h2          { font: bold 18px Helvetica, Arial, sans-serif;  color: #EB694A; letter-spacing: -1px;
              margin: 2em 0 0 0;
              border-bottom: 1px dotted  #888888; line-height: 1.1em; padding-bottom: 0.2em; }

h3          { font-size: 12px; color: #6F90B5; }

h4          { font-size: 12px; color: #6F90B5; }

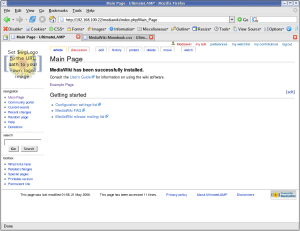
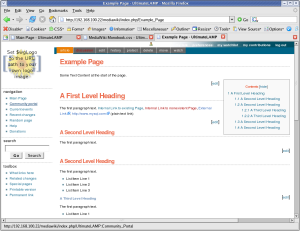
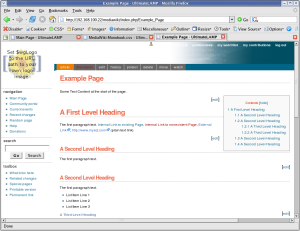
At this time, I’ve created an Example Page to better demonstration of the look and feel, as the default MediaWiki Main page has limited content.

Some Text Content at the start of the page.

= A First Level Heading =
The first paragraph text.
[[Main Page | Internal Link to existing Page]],
[[Nonexistent Page | Internal Link to nonexistent Page]],
[http://forge.mysql.com  External Link],
http://www.mysql.com  (plain text link)

== A Second Level Heading ==
The first paragraph text.

== A Second Level Heading ==
The first paragraph text.
* List Item Line 1
* List Item Line 2
* List Item Line 3
=== A Third Level Heading ===
The first paragraph text.
* List Item Line 1
** Sub Item 1
** Sub Item 1
** Sub Item 1
*** Sub Item 1
*** Sub Item 2
*** Sub Item 3
* List Item Line 2
* List Item Line 3
=== A Third Level Heading ===
The first paragraph text.
# List Item Line 1
## Sub Item 1
## Sub Item 1
## Sub Item 1
### Sub Item 1
### Sub Item 2
### Sub Item 3
# List Item Line 2
# List Item Line 3
== A Second Level Heading ==
The first paragraph text.

== A Second Level Heading ==
The first paragraph text.

==>

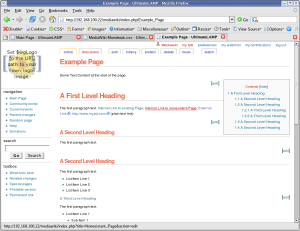
5. Table of Contents

By default, the Table of Contents shows at the top of a page when a given amount of sections or content is present (not sure what the trigger is). The issue is, for larger pages, it means you need to scroll down before you can see any page content. You can disable this with the __NOTOC__ option, but a better solution is to position the Table of Contents so as to not interfere with initial content.

#toc        { float: right; margin: 0 0 1em 1em; border: solid 1px #888888; text-color: #EFEFEF; color: #333333; }
#toc td     { padding: 0.5em; }
#toc .tocindent
            { margin-left: 1em; }
#toc .tocline
            { margin-bottom: 0px; }
#toc p      { margin: 0; }
#toc .editsection
            { margin-top: 0.7em;}
==>

Ok, we are about half way there.

6. Menu Options

In order to get a look and feel like the Forge Home Page., we now have to work on the rest of the navigation options at the top of the page above the content. Let’s start with Second Line of Menu Options (I’ll explain more later why).

#p-cactions { padding-right: 0px; margin-right: 0px; background-color: #006486; width: 100%; top: 77px; }
#p-cactions ul
            { margin: 0; padding: 0; list-style: none;  font-size: 85%; margin-left: 10px; }
#p-cactions li
            { float:left; margin:0; padding:0; text-indent:0; border-width: 0px; }
#p-cactions li a
            { display:block;  color:#F7F7F7;  font-weight: bold;
              background-color: #666666;  border:solid 1px #DDDDDD;
              border-width: 0px;  border-left-width:1px;  text-decoration:none; white-space:nowrap;}
#p-cactions li a:hover
            { background-color: #FFBC2F; color: #666666; }
#p-cactions li.selected a
            { background: #EA7F07;  border:none;}
#p-cactions li.selected  a:hover
            { color: #000000; }
==>

7. Top Menu Options

#p-personal .pBody
            { background: #FFFFFF url(http://forge.mysql.com/img/bggradient.jpg) no-repeat top right; }

#p-personal li a,
#p-personal li a.new
            { color: #FFFFFF; text-decoration: none; font-weight: bold; }
#p-personal li a:hover
            { color: #E97B00; background-color: transparent; text-decoration: underline; }
==>

The down side is it should be the same height at the Forge Page. This required a little more work, and other sections had to be adjusted accordingly, hence why I left this to last. (The size is based on the later mention logo height + margins)

#p-personal { height: 62px; }
#p-personal .pBody
            { height: 62px; }
#p-cactions { top: 62px; }
#content    { margin-top: 84px; }

==>

8. Some Miscellaneous Things

  • Deemphasis the text in the footer a little
  • Remove the annoying arrow that occurs after external links
  • Remove the logo from the login link
  • Hide the My Talk link
#footer     { color: #888888; }
#bodyContent a[href ^="http://"]
            { background:inherit !important; padding-right:inherit !important}
li#pt-userpage
            { background: none; }
li#pt-mytalk
            { display: none; }

==>

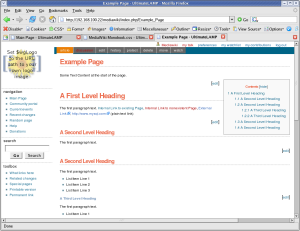
The Badging

Let us not forget the final step, the logo badging.

This requires a change to a MediaWiki filesystem file

LocalSettings.php.

$wgLogo             = "http://forge.mysql.com/img/mysqllogo.gif";

And the following Style changes.

#p-logo, #p-logo a, #p-logo a:hover
            { width:100px; height: 52px; }
#p-logo     { margin-left: 10px; margin-top: 5px; margin-bottom: 5px; }

#p-cactions { left: 0px; }
#p-cactions ul
            { margin-left: 180px; }

In order to overcome the top options bleeding to white text on white background, I’ve increased the right side fill of the default bggradient image, replacing the appropriate ULR with the following.

#p-personal .pBody
            { background: #FFFFFF url(/images/bggradient.png) no-repeat top right; }
==>

Conclusion

It’s not quite perfect yet, but this shows how it can be done. Some minor things are left, but I’ve run out of time for the few hours I allocated to this.
The end result of monobook.css for this lesson is:

/* edit this file to customize the monobook skin for the entire site */

/* Background Display */

body        { background-image: none; background-color: #FFFFFF;}
.portlet    { background-color: #FFFFFF; }

/* Borders */

#content    { border-width: 0px; }
.portlet .pBody
            { border-width: 0px; }
#footer     { border-top: 1px solid #888888; border-bottom-width: 0px; }

#p-navigation,
#p-search,
#p-tb       { border-top: 1px dotted #888888; }

/* Links */
a:link      { color: #10688E; text-decoration: none; }
a:hover     { color: #003366; text-decoration: underline; }
a:visited   { color: #106887; text-decoration: none; }

a.new:link  { color: #AA0000; text-decoration: none; }
a.new:hover { color: #AA0000; text-decoration: underline; }

a.external:link {color: #000000; text-decoration: none; }
a.external:hover { color: #AA0000; text-decoration: underline; }


/* Page Look & Feel */
html,body,p,td,a,li
            { font: 12px/19px Verdana, "Lucida Grande", "Lucida Sans Unicode", Tahoma, Arial, sans-serif; }

h1          { font: bold 24px Helvetica, Arial, sans-serif; color: #EB694A; letter-spacing: -1px;
              margin: 1.5em 0 0.25em 0;
              border-bottom: 1px dotted #888888; line-height: 1.1em; padding-bottom: 0.2em; }

h2          { font: bold 18px Helvetica, Arial, sans-serif;  color: #EB694A; letter-spacing: -1px;
              margin: 2em 0 0 0;
              border-bottom: 1px dotted  #888888; line-height: 1.1em; padding-bottom: 0.2em; }

h3          { font-size: 12px; color: #6F90B5; }

h4          { font-size: 12px; color: #6F90B5; }

/* Table of Contents */
#toc        { float: right; margin: 0 0 1em 1em; border: solid 1px #888888; #EFEFEF; color: #333333; }
#toc td     { padding: 0.5em; }
#toc .tocindent
            { margin-left: 1em; }
#toc .tocline
            { margin-bottom: 0px; }
#toc p      { margin: 0; }
#toc .editsection
            { margin-top: 0.7em;}


/* Second Line Top Menu Options */

#p-cactions { padding-right: 0px; margin-right: 0px; background-color: #006486; width: 100%; }

#p-cactions ul
            { margin: 0; padding: 0; list-style: none;  font-size: 85%; margin-left: 10px; }

#p-cactions li
            { float:left; margin:0; padding:0; text-indent:0; border-width: 0px; }

#p-cactions li a
            { display:block;  color:#F7F7F7;  font-weight: bold;
              background-color: #666666;  border:solid 1px #DDDDDD;
              border-width: 0px;  border-left-width:1px;  text-decoration:none; white-space:nowrap;}

#p-cactions li a:hover
            { background-color: #FFBC2F; color: #66666; }

#p-cactions li.selected a
            { background: #EA7F07;  border:none;}

#p-cactions li.selected  a:hover
            { color: #000000; }

/* Top Menu Options */
#p-personal .pBody
            { background: #FFFFFF url(/images/bggradient.png) no-repeat top right; }

#p-personal li a,
#p-personal li a.new
            { color: #FFFFFF; text-decoration: none; font-weight: bold; }
#p-personal li a:hover
            { color: #E97B00; background-color: transparent; text-decoration: underline; }

/* Top Menu Height Adjustments */
#p-personal { height: 62px; }
#p-personal .pBody
            { height: 62px; }
#p-cactions { top: 62px; }
#content    { margin-top: 84px; }

/* Minor Things */
#footer     { color: #888888; }
#bodyContent a[href ^="http://"]
            { background:inherit !important; padding-right:inherit !important}
li#pt-userpage
            { background: none; }
li#pt-mytalk
            { display: none; }

/* Badging */
#p-logo, #p-logo a, #p-logo a:hover
            { width:100px; height: 52px; }
#p-logo     { margin-left: 10px; margin-top: 5px; margin-bottom: 5px; }

#p-cactions { left: 0px; }
#p-cactions ul
            { margin-left: 180px; }

References

User Styles Alternative
Gallery of user styles
Skins
LocalSettings.php Style Information
Navigation Bar
User Rights
Wikipedia Monobook
MediaWiki Skin HowTo

UltimateLAMP

This product is no longer available. This was created over 6 years ago and software is too out of date.


As I discussed earlier in A picture can tell a thousand words, I outlined briefly what the intention of UltimateLAMP was for. Let me spill the beans so to speak.

What is UltimateLAMP?

UltimateLAMP is a fully functional environment allowing you to easily try and evaluate a number of LAMP stack software products without requiring any specific setup or configuration of these products. UltimateLAMP runs as a Virtual Machine with VMware Player (FREE). This demonstration package also enables the recording of all user entered information for later reference, indeed you will find a wealth of information already available within a number of the Product Recommendations starting with the supplied Documentation.

My executive punch line with the “right” buzz words is:


You have heard of all the hype in Open Source with lowering Total Cost of
Ownership (TCO) or Total Economic Impact (TEI)? Evaluate Open Source now
in your organistion at no cost or risk with this software package.

What are the uses for UltimateLAMP?


Well, in a nutshell UltimateLAMP allows for instant exposure of Open Source products that use MySQL. You have to remember my goal here is to promote MySQL. Unfortunately, as with any database the features alone will not get the new sale, it’s the applicability to an organisation, and with Open Source the wealth of existing and developing applications that exist can. I don’t necessarily like this approach. Indeed many open source products are poorly designed and can be poor choices in a large scale enterprise solution, but the flip side is, where else can you start.

The benefits of selling a MediaWiki for example due to the success and scalability with Wikipedia is great. So it’s important that the product list includes proven products and currently developing products (rather then stale ones). This is something that the community can definitely provide valuable feedback on to help in this selection.

Other then becoming a CD used as a drink coaster, I feel the potential is here already to provide a copy to people, even install it on a managers computer. You can’t break the software, so why not install it for your non-computer user friends/family. The goal is to move up to executive management however I feel the exposure to the general community first will greatly help.

How it came about

There is some history to this idea. Here are some of the highlights.

  • Late 2005, several planning sessions with Jon and Morgan about a more practical Open Source Contribution user group lead to obviously LAMP stack products for simplicity and exposure. This lead to exposure of LAMP stack products to more of the general person and split from the original intended goal, but was a great idea.
  • Early 2006, futher discussions of how MySQL could get exposure and traction into organisations. For myself professional, how could I promote in industry sectors that I work in.
  • In April 2006, the MySQL Users Conference with discussions of this idea with others and the positive feedback
  • In May 2006, the VMware Appliance Challenge was the possible exposure and deadline needed for me to “Just Do It”. Originally the idea was intended as a Live CD, but in some ways a virtual machine is just as good.

Where to from now!

Well, supply and demand. I don’t know if anybody else has a particular use, or will even download to use it, or market it.

I could see the potential for MySQL User Groups to get behind my idea, and enable members to filter this into known organisations. I could see for targeted opportunities/events, CD’s or information could be distributed. With the support and backing of MySQL AB, I could see the opportunity for even a breakfast CEO/CTI/CIO introduction or other format of meeting the ultimate intended audience.

I could see the potential that an organisation or entity could provide free hosting (30 days) to an organisation that pointed a 3rd level domain to the provider (e.g. wiki.acme.com). It’s like the honeypot, if it takes off after 30 days, the company will either want to pay for hosting, or what to move it. And that’s also fine, organisation provides a MySQL dump, and links to documented installation instructions, or perhaps a sale of services for initial installation/customisation/training can be made.

What can I do?

There is always a list of things that can be done. For now the greatest thing I can ask for is feedback. The good, the bad and the ugly. It’s find to get the comments to say, “That’s great”, or “Good job” or “I can use this”, it’s just as important to get the comments that are proactive in what’s not good. I would value any feedback. Please feel free to Download UltimateLAMP

On my immediate ToDo List or even partially complete is:

  • Document VMPlayer installation instructions for Windows/Linux (partial).
  • Add more product sample content.
  • Add more mediawiki content about the product, like customisation options, references to specific documentation, or other online working examples.
  • Documenting the installation/creation instructions for individual products.
  • Figure out a better way for users to contribute content that get’s rolled back into the Virtual Machines. For the mediawiki, I could see a public online copy, but for other products it could become harder
  • Optimise VM image (removing unnecessary OS stuff), removing product language support (not ideal), but my goal is to provide a 2 CD pack. The first CD has VMplayer in Win/Linux/RPM formats and the default VMware BrowserAppliance (All software from VMWare). The second CD is UltimateLAMP. Combined in a DVD 2x case along with perhaps a small booklet of a few pages, would enable this product to potential move to a commercial state.
  • Investigating other products

Should anybody wishing to help, leave a comment, that way I can see somebody is reading this and so can others.

Related Post:

UltimateLAMP Passwords

A picture can tell a thousand words

I’m a keen advocate of MySQL. However, while I use it and promote it within my limited IT circles, I often wonder how MySQL can get better traction and exposure, especially within both the industry sectors and physical locations where I am presently.

This presents a dilemma, it’s almost like the term that has been used in Venture Capital, and in the well named book, Crossing the Chasm. I see and believe that MySQL already has good penetration within certain industry sectors, specifically Internet Based, Startup Based, or Small Based segments. However, I’m sure within other commercial sectors, MySQL has either a token exposure or little to no exposure at all, at least in the circles I mix with.

So how can MySQL the product and MySQL AB the company get both better exposure and penetration? Ultimately it’s great for the community, both in dollars driving product features, product support and from my interest, more jobs. I figure there are many different approaches, and they all target organisations, and the individuals making decisions within the organisations differently. You have the 24×7 support with MySQL Network and certified installations that can satisfy management, you have the speed, flexibility, performance and capability that can appeal to a DBA. But this I doubt is the ultimate hurdle.

How do you do the active sell in 60 seconds to a potential cold contact, or how do you as an MySQL Open Source advocate within an organisation do the active or passive sell to a CEO/CTO/CIO/IT Manager etc.

Well I have an idea, it’s called UltimateLAMP. It’s not the ideal solution, it’s not the great sell, but I figure it’s one approach that I can contribute to and promote.

Stay tuned, more to come very soon.

VMPlayer Installation under Linux

Install

rpm -ivh VMware-player-1.0.1-19317.i386.rpm

Configure

$ /usr/bin/vmware-config.pl
Making sure services for VMware Player are stopped.

Stopping VMware services:
   Virtual machine monitor                                 [  OK  ]

You must read and accept the End User License Agreement to continue.
Press enter to display it.


Do you accept? (yes/no) yes

Thank you.

Configuring fallback GTK+ 2.4 libraries.

In which directory do you want to install the mime type icons?
[/usr/share/icons]

What directory contains your desktop menu entry files? These files have a
.desktop file extension. [/usr/share/applications]

In which directory do you want to install the application's icon?
[/usr/share/pixmaps]

Trying to find a suitable vmmon module for your running kernel.

The module bld-2.6.9-5.EL-i686smp-RHEL4 loads perfectly in the running kernel.

Do you want networking for your virtual machines? (yes/no/help) [yes]

Configuring a bridged network for vmnet0.

Your computer has multiple ethernet network interfaces available: eth0, eth0:0,
wlan0. Which one do you want to bridge to vmnet0? [eth0]

The following bridged networks have been defined:

. vmnet0 is bridged to eth0

Do you wish to configure another bridged network? (yes/no) [no]

Do you want to be able to use NAT networking in your virtual machines? (yes/no)
[yes]

Configuring a NAT network for vmnet8.

Do you want this program to probe for an unused private subnet? (yes/no/help)
[yes]

Probing for an unused private subnet (this can take some time)...

The subnet 192.168.117.0/255.255.255.0 appears to be unused.

The following NAT networks have been defined:

. vmnet8 is a NAT network on private subnet 192.168.117.0.

Do you wish to configure another NAT network? (yes/no) [no]

Do you want to be able to use host-only networking in your virtual machines?
[yes]

Configuring a host-only network for vmnet1.

Do you want this program to probe for an unused private subnet? (yes/no/help)
[yes]

Probing for an unused private subnet (this can take some time)...

The subnet 192.168.47.0/255.255.255.0 appears to be unused.

The following host-only networks have been defined:

. vmnet1 is a host-only network on private subnet 192.168.47.0.

Do you wish to configure another host-only network? (yes/no) [no]

Trying to find a suitable vmnet module for your running kernel.

The module bld-2.6.9-5.EL-i686smp-RHEL4 loads perfectly in the running kernel.

Would you like to enable the Google searchbar? (yes/no) [no]

Starting VMware services:
   Virtual machine monitor                                 [  OK  ]
   Virtual ethernet                                        [  OK  ]
   Bridged networking on /dev/vmnet0                       [  OK  ]
   Host-only networking on /dev/vmnet1 (background)        [  OK  ]
   Host-only networking on /dev/vmnet8 (background)        [  OK  ]
   NAT service on /dev/vmnet8                              [  OK  ]

The configuration of VMware Player 1.0.1 build-19317 for Linux for this running
kernel completed successfully.

You can now run VMware Player by invoking the following command:
"/usr/bin/vmplayer".

Enjoy,

--the VMware team


I don’t know why that can’t just provide an “accept all defaults option” for simplicity.