The Linux Foundation came across my reading path two separate times this week. As I continue to re-establish my larger footprint solely in the open-source ecosystem Setting an Open Source Strategy is a detailed report for any business to identify the potential return on investment (ROI) of participating in the open-source ecosystem. Every company uses open source. Even if you consume open source in your organization and do not plan to contribute to open source it is a good read to determine what is the inflection point where you (or your employees) may want to invest.
This week I spent some more time looking at the various Open Source Foundations after reading White House joins OpenSSF and the Linux Foundation in securing open-source software. The Open Source Security Foundation (OpenSSF) is a project of the The Linux Foundation. OpenSSF has created the “The Open Source Software Security Mobilization Plan”. This plan lists 10 streams of investment for open source security and I feel it’s important to reiterate these.
- Security Education – Deliver baseline secure software development education and certification to all.
- Risk Assessment – Establish a public, vendor-neutral, objective, metrics-based risk assessment dashboard for the top 10,000 (or more) OSS components.
- Digital Signatures – Accelerate the adoption of digital signatures on software releases.
- Memory Safety – Eliminate root causes of many vulnerabilities through replacement of non-memory-safe languages.
- Incident Response – Establish an OpenSSF Incident Response Team of security experts to assist open source projects accelerate their responses to newly discovered vulnerabilities.
- Better Scanning – Accelerate discovery of new vulnerabilities by maintainers and experts through advanced security tools and expert guidance.
- Code Audits – Conduct third-party code reviews (and any necessary remediation work) of up to 200 of the most-critical OSS components once per year.
- Data Sharing – Coordinate industry-wide data sharing to improve the research that helps determine the most critical OSS components.
- SBOMs Everywhere – Improve SBOM tooling and training to drive adoption.
- Improved Software Supply Chains – Enhance the 10 most critical OSS build systems, package managers, and distribution systems with better supply chain security tools and best practices.
While I have not read this, CNCF released the Cloud Native Security Whitepaper v2 this week.
In open source conference land we saw in-person events including Percona Live 2022 and KubeCon + CloudNativeCon Europe 2022. Which I was there!
In unrelated tech news, I have cut the cord following ongoing poor customer service with a legacy provider. Welcome to YouTube TV. I am automatically impressed with more features and 1/3 of the price.
Also, Derek Muller has a new video out. Check out my favorite YouTube channel Veritasium.
I’ll leave this blog with a few images reflecting the week.
- Very cool hand-drawn like math equations in a jupyter notebook with handcalcs
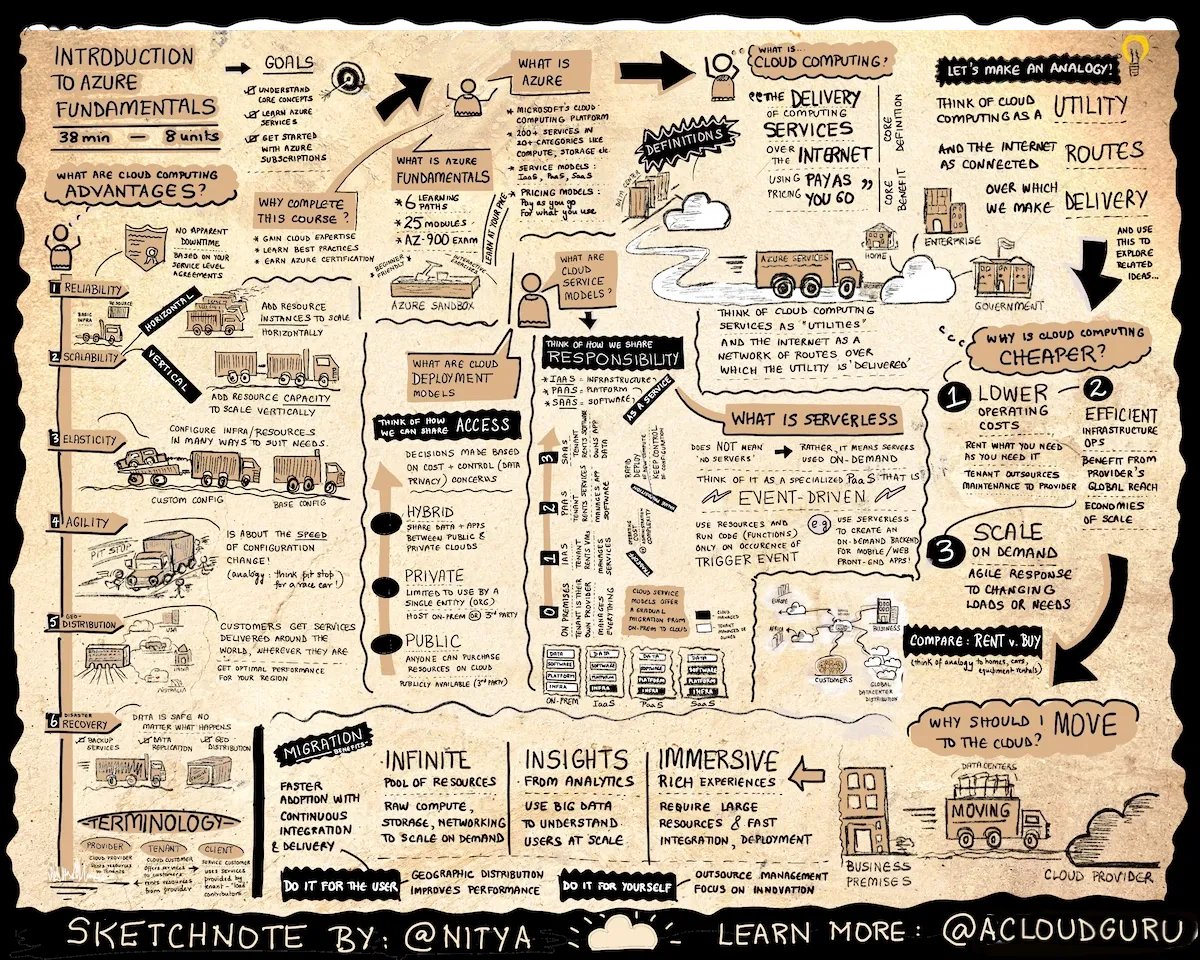
- A quite detailed infographics introducing Azure cloud (or any other public cloud)
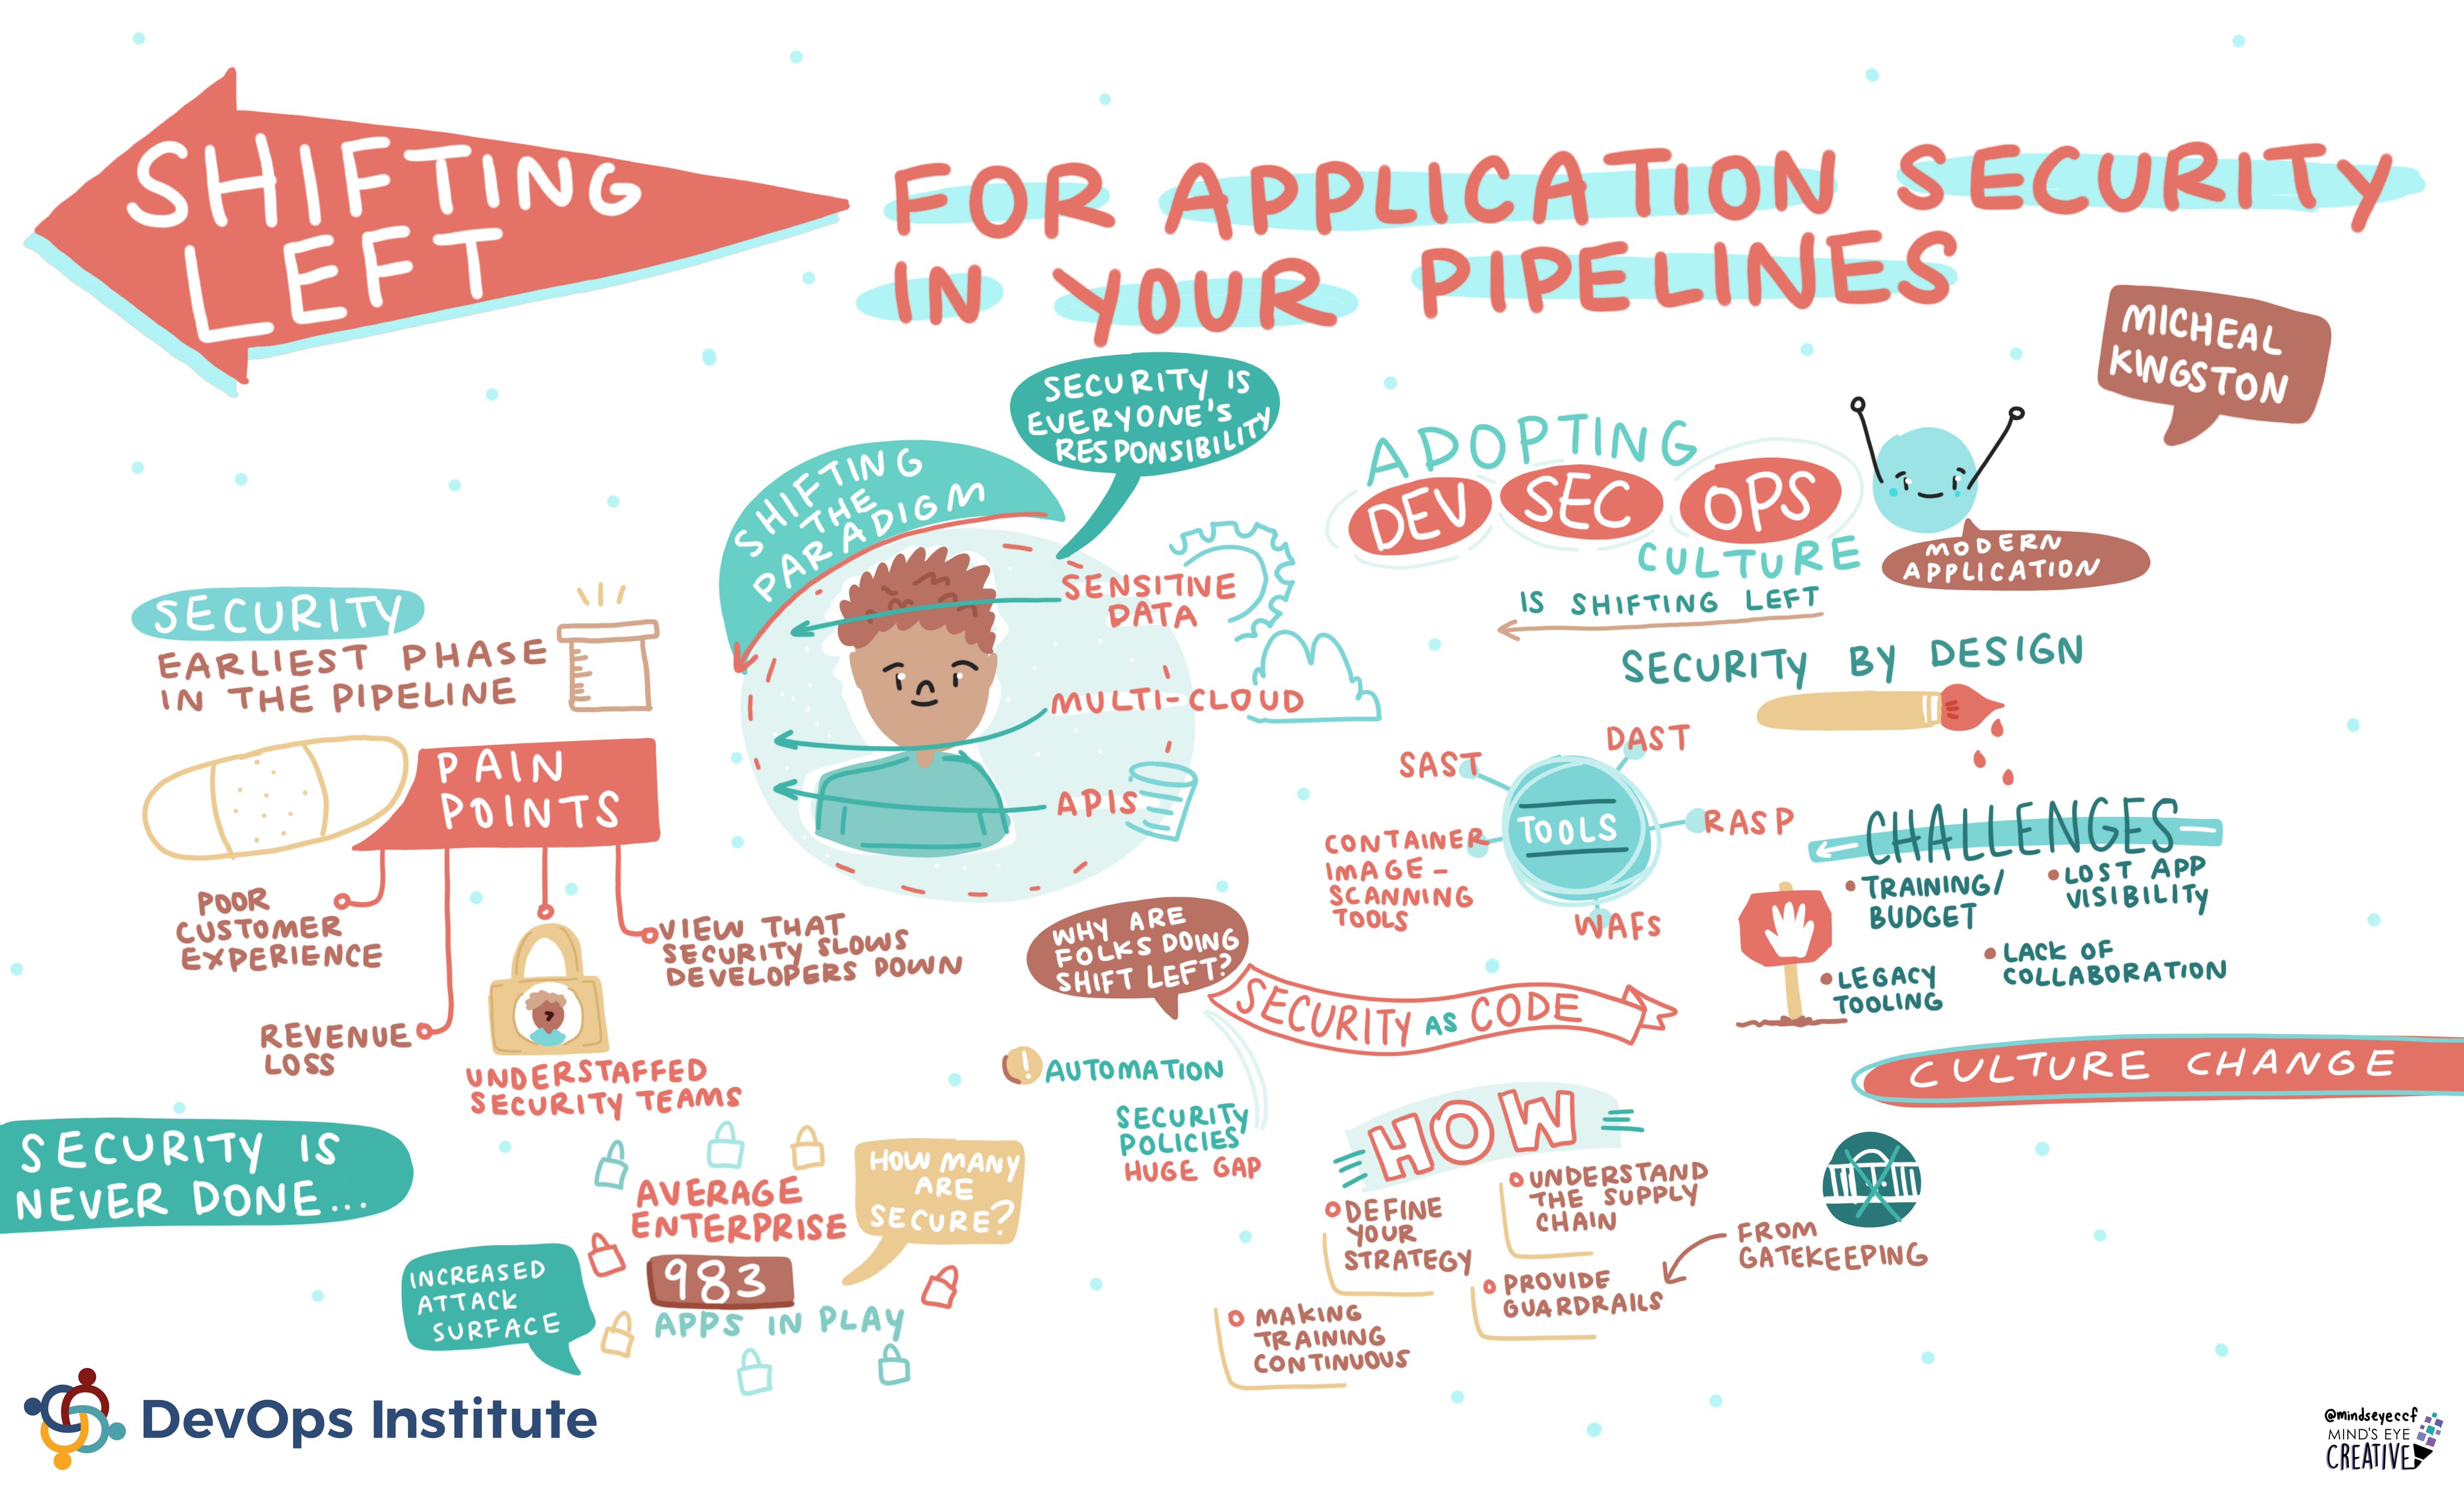
- For Application Security in your Pipelines
- Tracking White Sharks if you have nothing more interesting to do, or you want a GPS dataset.
![]()

 Today at the