The GWT!


New to the AJAX vertical space is the Google Web Toolkit (GWT) released the the Sun Java One Conference last week.

AJAX (“Asynchronous Javascript and XML”) isn’t new, infact the underlying requirements within AJAX, the DHTML, DOM manipulation and XMLHttpRequest were available in 1997. In fact, I implemented functionality to perform what AJAX does back in the late 90’s, probably starting 1999, using solely Javascript, and some of that is still in use today on at least one of my sites. Of course Google made this functionality popular with it’s use in Google Suggest a few years ago.

So what is GWT? An extract from the Google Web Toolkit Web Page.

Google Web Toolkit (GWT) is a Java software development framework that makes writing AJAX applications like Google Maps and Gmail easy for developers who don’t speak browser quirks as a second language. Writing dynamic web applications today is a tedious and error-prone process; you spend 90% of your time working around subtle incompatibilities between web browsers and platforms, and JavaScript’s lack of modularity makes sharing, testing, and reusing AJAX components difficult and fragile.

GWT lets you avoid many of these headaches while offering your users the same dynamic, standards-compliant experience. You write your front end in the Java programming language, and the GWT compiler converts your Java classes to browser-compliant JavaScript and HTML.
Migrating an MyISAM schema to use Referential Integrity

Here are some steps involved. Using the current MySQL defacto engine InnoDB. Of course, Falcon, PBXT and others will enable alternative engines to be used.

Convert Table Storage Engine Types

$ mysql -u[user] -p[password] [database] -e "SHOW TABLES" | grep -v "Tables_in" | sed -e "s/^/ALTER TABLE /" | sed -e "s/$/ ENGINE=InnoDB;/" > upgrade.sql
$ mysql -u[user] -p[password] [database] < upgrade.sql

NOTE: This may not work for all tables, for example those with FULLTEXT indexes will fail.

For the introduction of Referential Integrity we need to ensure the following.

  • Each Foreign Key column should have an index. Prior to 4.1 I think this was a requirement, however it's a good general practice regardless for SQL performance.
  • The datatype must match between Primary Key and Foreign Keys. The most obvious oversight is normally UNSIGNED, however you also for example have INT and INT, and not INT and BIGINT as datatypes.
  • Optional Foreign Keys must contain NULL values and not the normal practice of having a default of 0.

A Sample Foreign Key Syntax.

mysql> ALTER TABLE wp_usermeta ADD FOREIGN KEY usermeta_user_fk (user_id) REFERENCES wp_user(id);
ERROR 1005 (HY000): Can't create table './wordpress/#sql-cd9_10.frm' (errno: 150)

A closer investigation of what this error really is:

$ perror 150
MySQL error code 150: Foreign key constraint is incorrectly formed

A confirmation of table definitions.

mysql> desc wp_usermeta;
+------------+---------------------+------+-----+---------+----------------+
| Field      | Type                | Null | Key | Default | Extra          |
+------------+---------------------+------+-----+---------+----------------+
| umeta_id   | bigint(20)          |      | PRI | NULL    | auto_increment |
| user_id    | bigint(20) unsigned |      | MUL | 0       |                |
| meta_key   | varchar(255)        | YES  | MUL | NULL    |                |
| meta_value | longtext            | YES  |     | NULL    |                |
+------------+---------------------+------+-----+---------+----------------+
4 rows in set (0.00 sec)

 mysql> desc wp_users;
+---------------------+---------------------+------+-----+---------------------+----------------+
| Field               | Type                | Null | Key | Default             | Extra          |
+---------------------+---------------------+------+-----+---------------------+----------------+
| id                  | bigint(20) unsigned |      | PRI | NULL                | auto_increment |
| user_login          | varchar(60)         |      | UNI |                     |                |
| user_pass           | varchar(64)         |      |     |                     |                |
| user_nicename       | varchar(50)         |      |     |                     |                |
| user_email          | varchar(100)        |      |     |                     |                |
| user_url            | varchar(100)        |      |     |                     |                |
| user_registered     | datetime            |      |     | 0000-00-00 00:00:00 |                |
| user_activation_key | varchar(60)         |      |     |                     |                |
| user_status         | int(11)             |      |     | 0                   |                |
| display_name        | varchar(250)        |      |     |                     |                |
+---------------------+---------------------+------+-----+---------------------+----------------+
10 rows in set (0.00 sec)

A second pair of eyes (thanks Jon), showed that I actually spelt a table name wrong. Did you spot it. Of course it would have been nice if the error message actually told me this. This rather bland message Can’t create table could actually mean.

  • missing index (pre 4.1)
  • incompatible columns data types
  • Invalid Table.

I’m sure if I tried to break it I’d find more examples, but just a trap for unsuspecting people.

Now migrating an existing schema to using Referential Integrity provides some initial benefits (row level locking, misplaced key updates/deletes) but it does not provide true integrity unless your application has been written to support transactions. Chances are it hasn’t, but this is at least the first step.

Restyling a Mediwiki Installation – Lesson 1

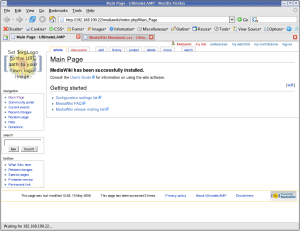
Following my implementation of UltimateLAMP, read heaps more at this thread, I undertook to provide customizations of a MediaWiki Installation. Here is the first lesson that you can undertake if you wish to beautify the default MediaWiki Installation.

For the purposes of this demonstration, I am going to help out Jay & Colin and propose a restyle the MySQL forge to fit in with the default Home Page. Hopefully you will see it there soon!

Lesson 1 – Updating the default Monobook.css

There are several different ways to make style changes, the simplest is to customize the system wide Monobook.css, and this Lesson will focus on this.

By accessing the link [http://my.wiki.site/]index.php/MediaWiki:Monobook.css you will be able to make the following changes.

The best way to approach this, like any good programming style, make small changes, testing and confirmation and continue.

Note: For all screen prints, click for a larger image

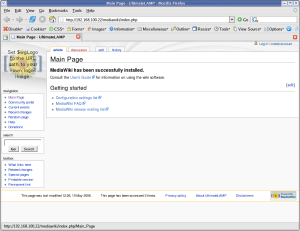
1. Cleanup Backgrounds

body        { background-image: none; background-color: #FFFFFF;}
.portlet    { background-color: #FFFFFF; }

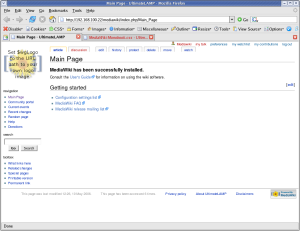
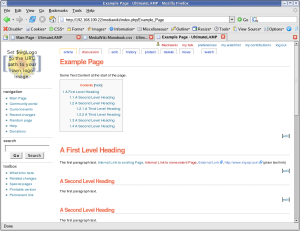
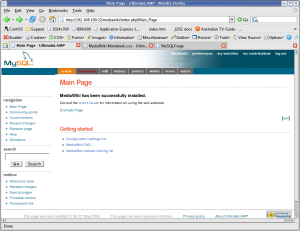
The MediaWiki Page is made up of three sections, these are the represented by styles .portlet, #content, and #footer. For the purposes of our first example, the content section and the footer section are already white.

==>

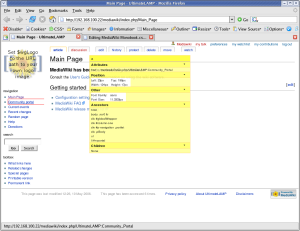
At this point I should recommend that you use FireFox for future work. You should then install the Web Developer Add-on. What results from this plugin is invaluable information about the internals of a web page. The two options most useful for this exercise is:

  • Information | Display Id and Class Details.
  • Information | Display Element Information (move the cursor around to get information)
==>

2. Cleanup Borders

I don’t feel that borders around things are warranted. I’m more a clean look kinda guy. Remove all borders, say one to separate the footer from the page.

#content    { border-width: 0px; }
.portlet .pBody
            { border-width: 0px; }
#footer     { border-top: 1px solid #888888; border-bottom-width: 0px; }
==>

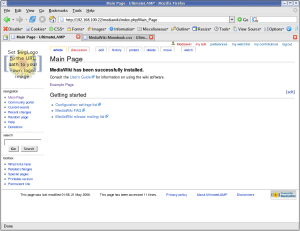
Maybe, that’s a little too clean. Add some separators on left side options.

#p-navigation,
#p-search,
#p-tb       { border-top: 1px dotted #888888; }
==>

3. Links

Using the Forge Styles http://forge.mysql.com/css/shared.css we can adjust the links accordingly.

a:link      { color: #10688E; text-decoration: none; }
a:hover     { color: #003366; text-decoration: underline; }
a:visited   { color: #106887; text-decoration: none; }

a.new:link  { color: #AA0000; text-decoration: none; }
a.new:hover { color: #AA0000; text-decoration: underline; }

==>

4. Content

Ok, we have played around a little, now to move into some more serious changes. Looking at the general page look and feel that you see in most page content.


html,body,p,td,a,li
            { font: 12px/19px Verdana, "Lucida Grande", "Lucida Sans Unicode", Tahoma, Arial, sans-serif; }

h1          { font: bold 24px Helvetica, Arial, sans-serif; color: #EB694A; letter-spacing: -1px;
              margin: 1.5em 0 0.25em 0;
              border-bottom: 1px dotted #888888; line-height: 1.1em; padding-bottom: 0.2em; }

h2          { font: bold 18px Helvetica, Arial, sans-serif;  color: #EB694A; letter-spacing: -1px;
              margin: 2em 0 0 0;
              border-bottom: 1px dotted  #888888; line-height: 1.1em; padding-bottom: 0.2em; }

h3          { font-size: 12px; color: #6F90B5; }

h4          { font-size: 12px; color: #6F90B5; }

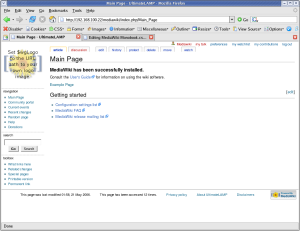
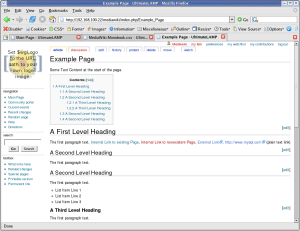
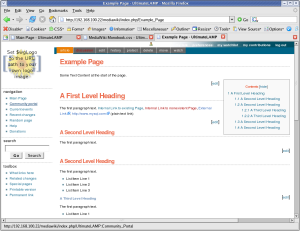
At this time, I’ve created an Example Page to better demonstration of the look and feel, as the default MediaWiki Main page has limited content.

Some Text Content at the start of the page.

= A First Level Heading =
The first paragraph text.
[[Main Page | Internal Link to existing Page]],
[[Nonexistent Page | Internal Link to nonexistent Page]],
[http://forge.mysql.com  External Link],
http://www.mysql.com  (plain text link)

== A Second Level Heading ==
The first paragraph text.

== A Second Level Heading ==
The first paragraph text.
* List Item Line 1
* List Item Line 2
* List Item Line 3
=== A Third Level Heading ===
The first paragraph text.
* List Item Line 1
** Sub Item 1
** Sub Item 1
** Sub Item 1
*** Sub Item 1
*** Sub Item 2
*** Sub Item 3
* List Item Line 2
* List Item Line 3
=== A Third Level Heading ===
The first paragraph text.
# List Item Line 1
## Sub Item 1
## Sub Item 1
## Sub Item 1
### Sub Item 1
### Sub Item 2
### Sub Item 3
# List Item Line 2
# List Item Line 3
== A Second Level Heading ==
The first paragraph text.

== A Second Level Heading ==
The first paragraph text.

==>

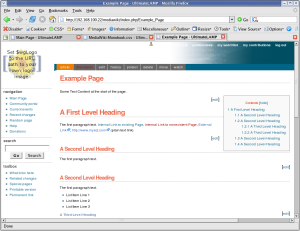
5. Table of Contents

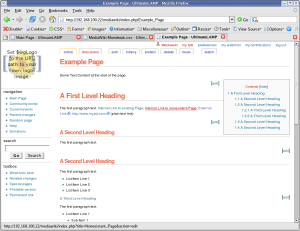
By default, the Table of Contents shows at the top of a page when a given amount of sections or content is present (not sure what the trigger is). The issue is, for larger pages, it means you need to scroll down before you can see any page content. You can disable this with the __NOTOC__ option, but a better solution is to position the Table of Contents so as to not interfere with initial content.

#toc        { float: right; margin: 0 0 1em 1em; border: solid 1px #888888; text-color: #EFEFEF; color: #333333; }
#toc td     { padding: 0.5em; }
#toc .tocindent
            { margin-left: 1em; }
#toc .tocline
            { margin-bottom: 0px; }
#toc p      { margin: 0; }
#toc .editsection
            { margin-top: 0.7em;}
==>

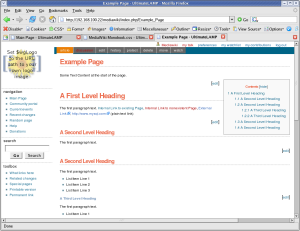
Ok, we are about half way there.

6. Menu Options

In order to get a look and feel like the Forge Home Page., we now have to work on the rest of the navigation options at the top of the page above the content. Let’s start with Second Line of Menu Options (I’ll explain more later why).

#p-cactions { padding-right: 0px; margin-right: 0px; background-color: #006486; width: 100%; top: 77px; }
#p-cactions ul
            { margin: 0; padding: 0; list-style: none;  font-size: 85%; margin-left: 10px; }
#p-cactions li
            { float:left; margin:0; padding:0; text-indent:0; border-width: 0px; }
#p-cactions li a
            { display:block;  color:#F7F7F7;  font-weight: bold;
              background-color: #666666;  border:solid 1px #DDDDDD;
              border-width: 0px;  border-left-width:1px;  text-decoration:none; white-space:nowrap;}
#p-cactions li a:hover
            { background-color: #FFBC2F; color: #666666; }
#p-cactions li.selected a
            { background: #EA7F07;  border:none;}
#p-cactions li.selected  a:hover
            { color: #000000; }
==>

7. Top Menu Options

#p-personal .pBody
            { background: #FFFFFF url(http://forge.mysql.com/img/bggradient.jpg) no-repeat top right; }

#p-personal li a,
#p-personal li a.new
            { color: #FFFFFF; text-decoration: none; font-weight: bold; }
#p-personal li a:hover
            { color: #E97B00; background-color: transparent; text-decoration: underline; }
==>

The down side is it should be the same height at the Forge Page. This required a little more work, and other sections had to be adjusted accordingly, hence why I left this to last. (The size is based on the later mention logo height + margins)

#p-personal { height: 62px; }
#p-personal .pBody
            { height: 62px; }
#p-cactions { top: 62px; }
#content    { margin-top: 84px; }

==>

8. Some Miscellaneous Things

  • Deemphasis the text in the footer a little
  • Remove the annoying arrow that occurs after external links
  • Remove the logo from the login link
  • Hide the My Talk link
#footer     { color: #888888; }
#bodyContent a[href ^="http://"]
            { background:inherit !important; padding-right:inherit !important}
li#pt-userpage
            { background: none; }
li#pt-mytalk
            { display: none; }

==>

The Badging

Let us not forget the final step, the logo badging.

This requires a change to a MediaWiki filesystem file

LocalSettings.php.

$wgLogo             = "http://forge.mysql.com/img/mysqllogo.gif";

And the following Style changes.

#p-logo, #p-logo a, #p-logo a:hover
            { width:100px; height: 52px; }
#p-logo     { margin-left: 10px; margin-top: 5px; margin-bottom: 5px; }

#p-cactions { left: 0px; }
#p-cactions ul
            { margin-left: 180px; }

In order to overcome the top options bleeding to white text on white background, I’ve increased the right side fill of the default bggradient image, replacing the appropriate ULR with the following.

#p-personal .pBody
            { background: #FFFFFF url(/images/bggradient.png) no-repeat top right; }
==>

Conclusion

It’s not quite perfect yet, but this shows how it can be done. Some minor things are left, but I’ve run out of time for the few hours I allocated to this.
The end result of monobook.css for this lesson is:

/* edit this file to customize the monobook skin for the entire site */

/* Background Display */

body        { background-image: none; background-color: #FFFFFF;}
.portlet    { background-color: #FFFFFF; }

/* Borders */

#content    { border-width: 0px; }
.portlet .pBody
            { border-width: 0px; }
#footer     { border-top: 1px solid #888888; border-bottom-width: 0px; }

#p-navigation,
#p-search,
#p-tb       { border-top: 1px dotted #888888; }

/* Links */
a:link      { color: #10688E; text-decoration: none; }
a:hover     { color: #003366; text-decoration: underline; }
a:visited   { color: #106887; text-decoration: none; }

a.new:link  { color: #AA0000; text-decoration: none; }
a.new:hover { color: #AA0000; text-decoration: underline; }

a.external:link {color: #000000; text-decoration: none; }
a.external:hover { color: #AA0000; text-decoration: underline; }


/* Page Look & Feel */
html,body,p,td,a,li
            { font: 12px/19px Verdana, "Lucida Grande", "Lucida Sans Unicode", Tahoma, Arial, sans-serif; }

h1          { font: bold 24px Helvetica, Arial, sans-serif; color: #EB694A; letter-spacing: -1px;
              margin: 1.5em 0 0.25em 0;
              border-bottom: 1px dotted #888888; line-height: 1.1em; padding-bottom: 0.2em; }

h2          { font: bold 18px Helvetica, Arial, sans-serif;  color: #EB694A; letter-spacing: -1px;
              margin: 2em 0 0 0;
              border-bottom: 1px dotted  #888888; line-height: 1.1em; padding-bottom: 0.2em; }

h3          { font-size: 12px; color: #6F90B5; }

h4          { font-size: 12px; color: #6F90B5; }

/* Table of Contents */
#toc        { float: right; margin: 0 0 1em 1em; border: solid 1px #888888; #EFEFEF; color: #333333; }
#toc td     { padding: 0.5em; }
#toc .tocindent
            { margin-left: 1em; }
#toc .tocline
            { margin-bottom: 0px; }
#toc p      { margin: 0; }
#toc .editsection
            { margin-top: 0.7em;}


/* Second Line Top Menu Options */

#p-cactions { padding-right: 0px; margin-right: 0px; background-color: #006486; width: 100%; }

#p-cactions ul
            { margin: 0; padding: 0; list-style: none;  font-size: 85%; margin-left: 10px; }

#p-cactions li
            { float:left; margin:0; padding:0; text-indent:0; border-width: 0px; }

#p-cactions li a
            { display:block;  color:#F7F7F7;  font-weight: bold;
              background-color: #666666;  border:solid 1px #DDDDDD;
              border-width: 0px;  border-left-width:1px;  text-decoration:none; white-space:nowrap;}

#p-cactions li a:hover
            { background-color: #FFBC2F; color: #66666; }

#p-cactions li.selected a
            { background: #EA7F07;  border:none;}

#p-cactions li.selected  a:hover
            { color: #000000; }

/* Top Menu Options */
#p-personal .pBody
            { background: #FFFFFF url(/images/bggradient.png) no-repeat top right; }

#p-personal li a,
#p-personal li a.new
            { color: #FFFFFF; text-decoration: none; font-weight: bold; }
#p-personal li a:hover
            { color: #E97B00; background-color: transparent; text-decoration: underline; }

/* Top Menu Height Adjustments */
#p-personal { height: 62px; }
#p-personal .pBody
            { height: 62px; }
#p-cactions { top: 62px; }
#content    { margin-top: 84px; }

/* Minor Things */
#footer     { color: #888888; }
#bodyContent a[href ^="http://"]
            { background:inherit !important; padding-right:inherit !important}
li#pt-userpage
            { background: none; }
li#pt-mytalk
            { display: none; }

/* Badging */
#p-logo, #p-logo a, #p-logo a:hover
            { width:100px; height: 52px; }
#p-logo     { margin-left: 10px; margin-top: 5px; margin-bottom: 5px; }

#p-cactions { left: 0px; }
#p-cactions ul
            { margin-left: 180px; }

References

User Styles Alternative
Gallery of user styles
Skins
LocalSettings.php Style Information
Navigation Bar
User Rights
Wikipedia Monobook
MediaWiki Skin HowTo

GoogleWack

This fad started many years ago, and once I achieved it. Well today, I got the google 1 of 1 result. Here are the rules

GoogleWack “Your goal: find that elusive query (two words – no quote marks) with a single, solitary result!”

And my two words were:

ensureClassInitialized xmlbeans

Of course the problem is, by the time you read this, it may no longer be a 1 of 1 result, as my Blog may get referenced. So, I’ve attached a screen print for proof. (yes, it’s an undoctored screen print)

My GoogleWack Blog Entry.